How to Use Cursor for Coding - Even If You're Not an Engineer
Or - how Cursor AI Rick Rolled me...


Table of Contents
How to Download and Set Up Cursor AI
Step 1: Download Cursor
Step 2: Launch Cursor
Step 3: Open or Create a Project
Step 4: Activate AI Assistant
Setting Up a React App with Cursor
Step 1: Open a New Project Folder
Step 2: Use the AI to Set Up React
Step 3: Start the Dev Server
Step 4: Modify Your App
How to Deploy Your React App to Production Using Vercel
Step 1: Install the Vercel CLI
Step 2: Log In to Vercel
Step 3: Deploy Your Project
Step 4: Configure Your Project
Prompting Like a Pro
Troubleshooting Errors
Backend and Databases
Subscriptions and Licensing
1. Introduction: Why Cursor AI for Vibe Coding?
If you've ever wanted to build something with code but found traditional development environments too overwhelming, you're not alone. That's where Cursor AI comes in—a modern, AI-native code editor built on top of VS Code, with powerful features designed to make coding more intuitive, accessible, and collaborative.
So what is Cursor? Cursor is an AI-enhanced code editor that feels familiar if you've used VS Code, but it's upgraded with deeply integrated AI features. You can chat with your code, generate new files, refactor, debug, and even build entire projects—all with the help of a conversational AI interface.
Why choose Cursor over other tools?
While tools like Replit and Bolt are great for prototyping or MVPs, they can limit the depth and flexibility needed for growing and scaling a real-world application. Replit’s browser-based abstraction means you often can’t access the underlying build systems or deployment hooks. Bolt, while AI-native and snappy, lacks basic file system access and enforces proprietary deployment workflows. The short of it is - these are great tools to get some ideas started, but you might struggle to get them into full-fledged apps that can be deployed, sold, scaled, etc.
Google just recently launched their Cursor competitor named Firebase Studio. This app falls more in-line with Replit/Bolt than Cursor, but it does have full file management capabilities. This space is moving at lightning speed.
Cursor, by contrast, gives you the full experience of a local development environment. You can also lean into the quick MVP nature of an idea, but Cursor allows you to create an application that in theory could scale into a business.
Once you get past the initial learning curve, you can:
Control every aspect of your project files and folder structure.
Use the terminal, git, and any build tools you need.
Deploy projects your way—whether that’s Vercel, AWS, or a custom pipeline.
In other words, Cursor helps you go from idea to scalable product—all while maintaining a beginner-friendly, AI-augmented coding experience. You’re not just prototyping. You’re learning to ship. Yes, this all sounds a bit daunting at first - but trust me, getting past the learning curve will allow you an infinite number of possibilities for you to create when shipping a product.
2. How to Download and Set Up Cursor AI
Step 1: Download Cursor
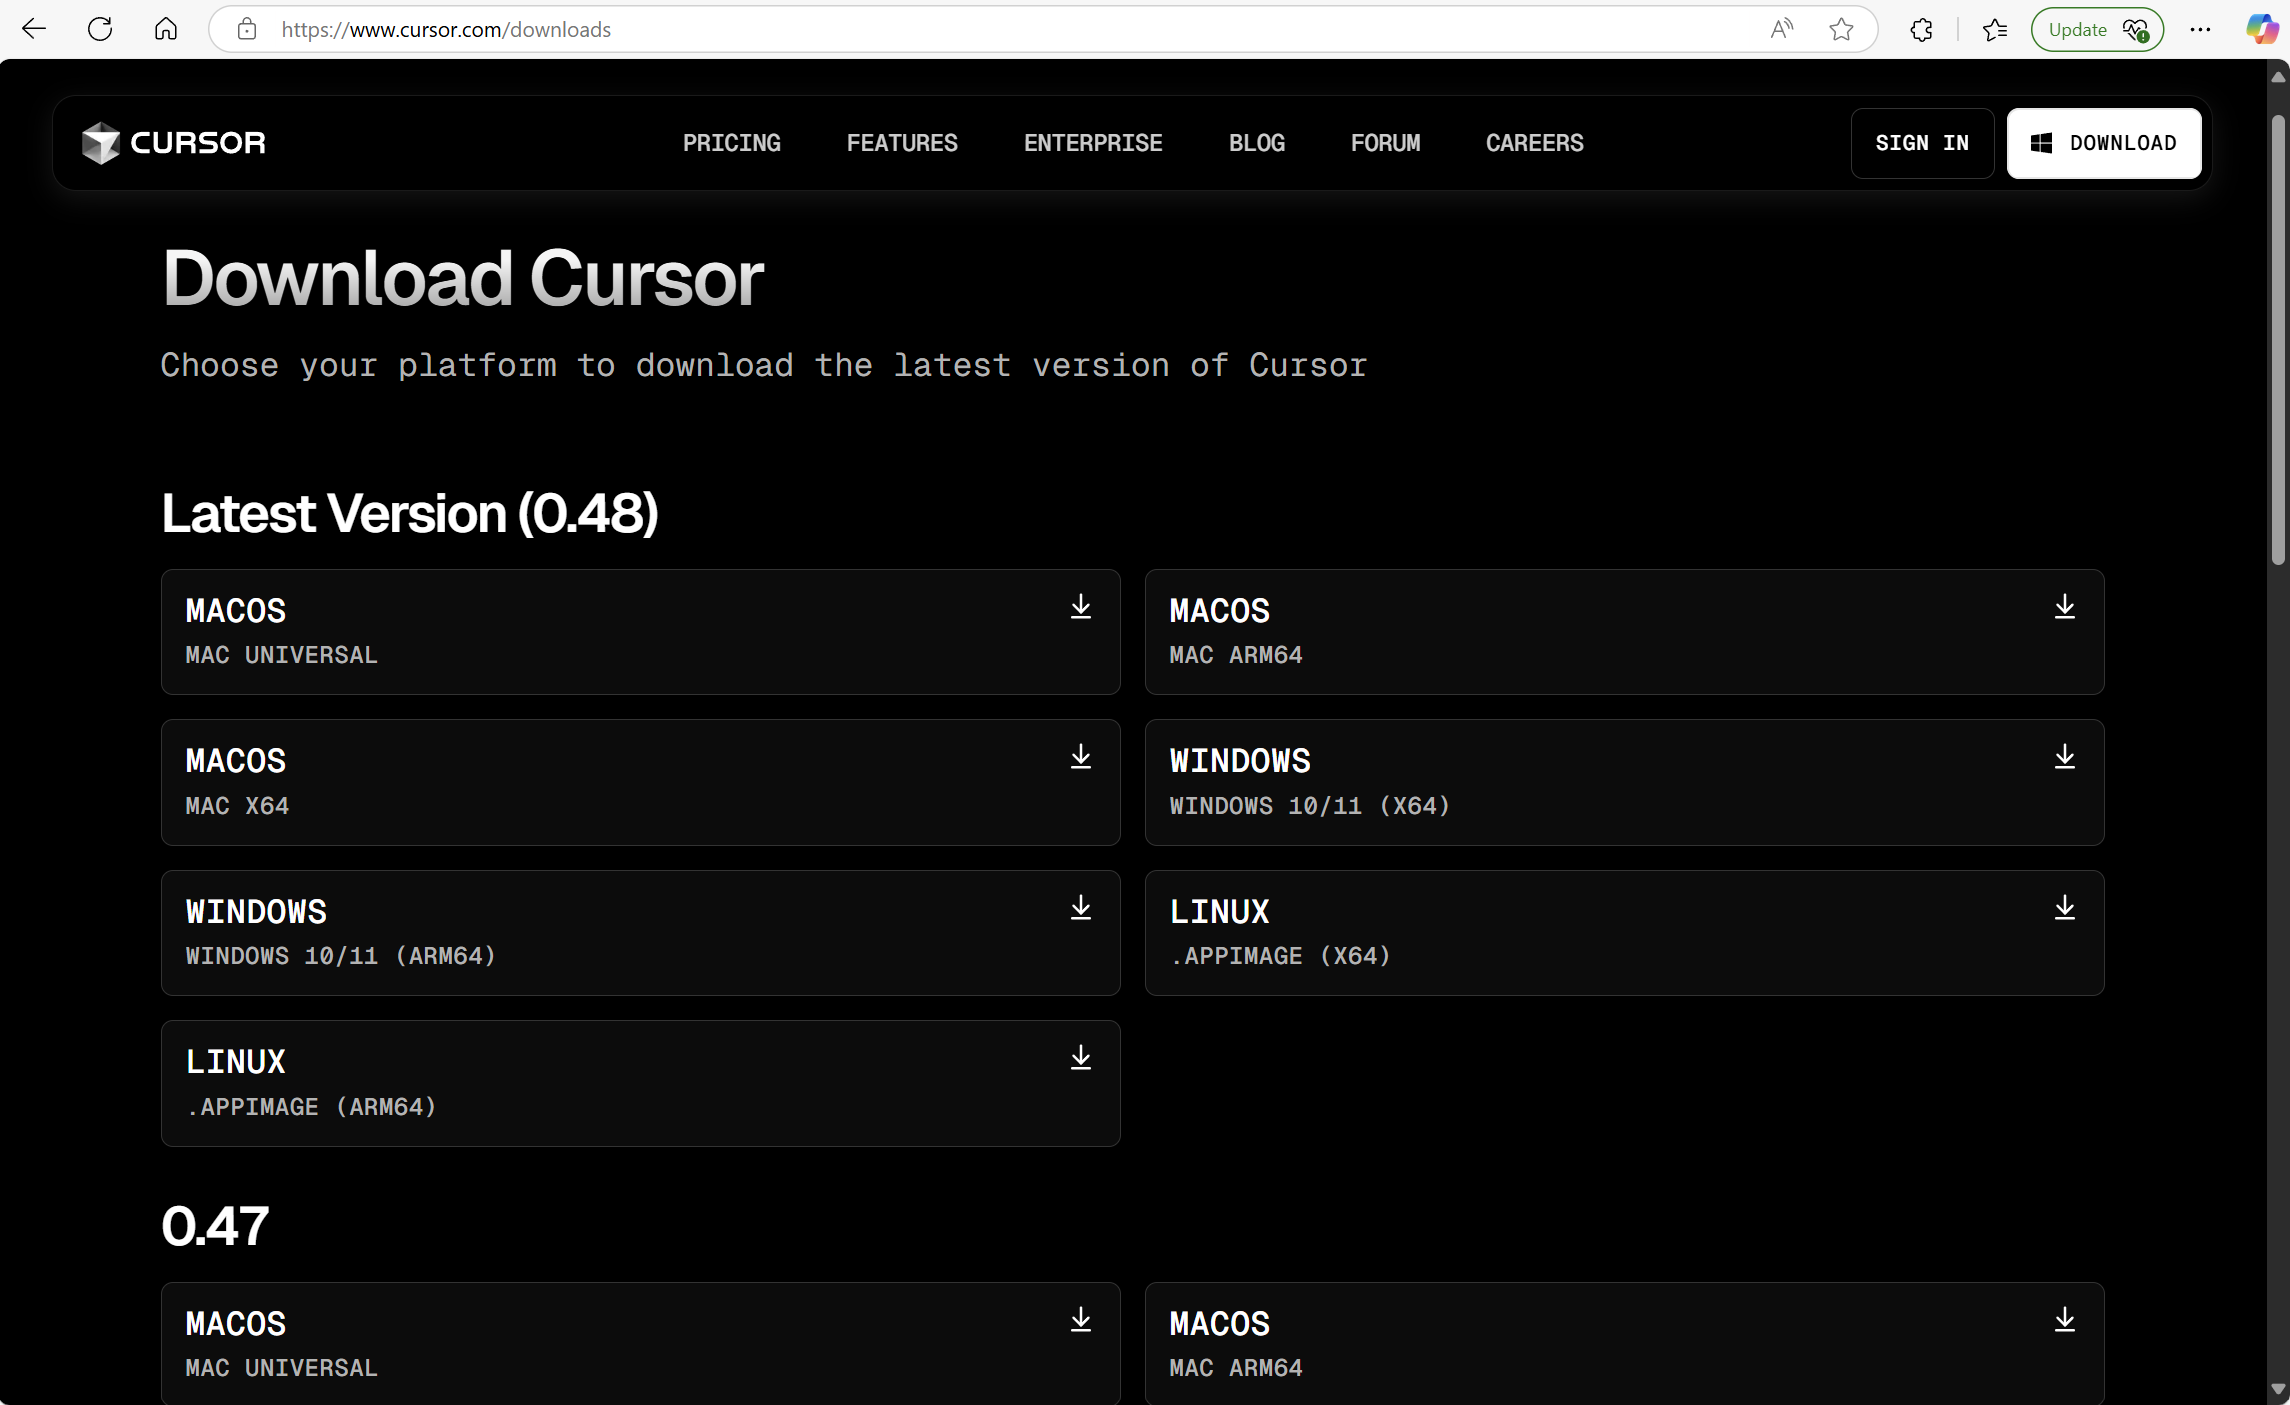
Visit - https://www.cursor.com/downloads
Click Download for Mac or Download for Windows, depending on your system.
Do be mindful of which version of Mac and Windows you have. For example, I am currently running a unique Windows ARM chip, so I downloaded the ARM64 version.
For most Windows users, you’re likely looking at Windows 10/11 x64 versions. For most Mac users with M1 or newer models, you’re looking at ARM64 version.
Once the installer is downloaded, open it and follow the installation prompts.
Step 2: Launch Cursor
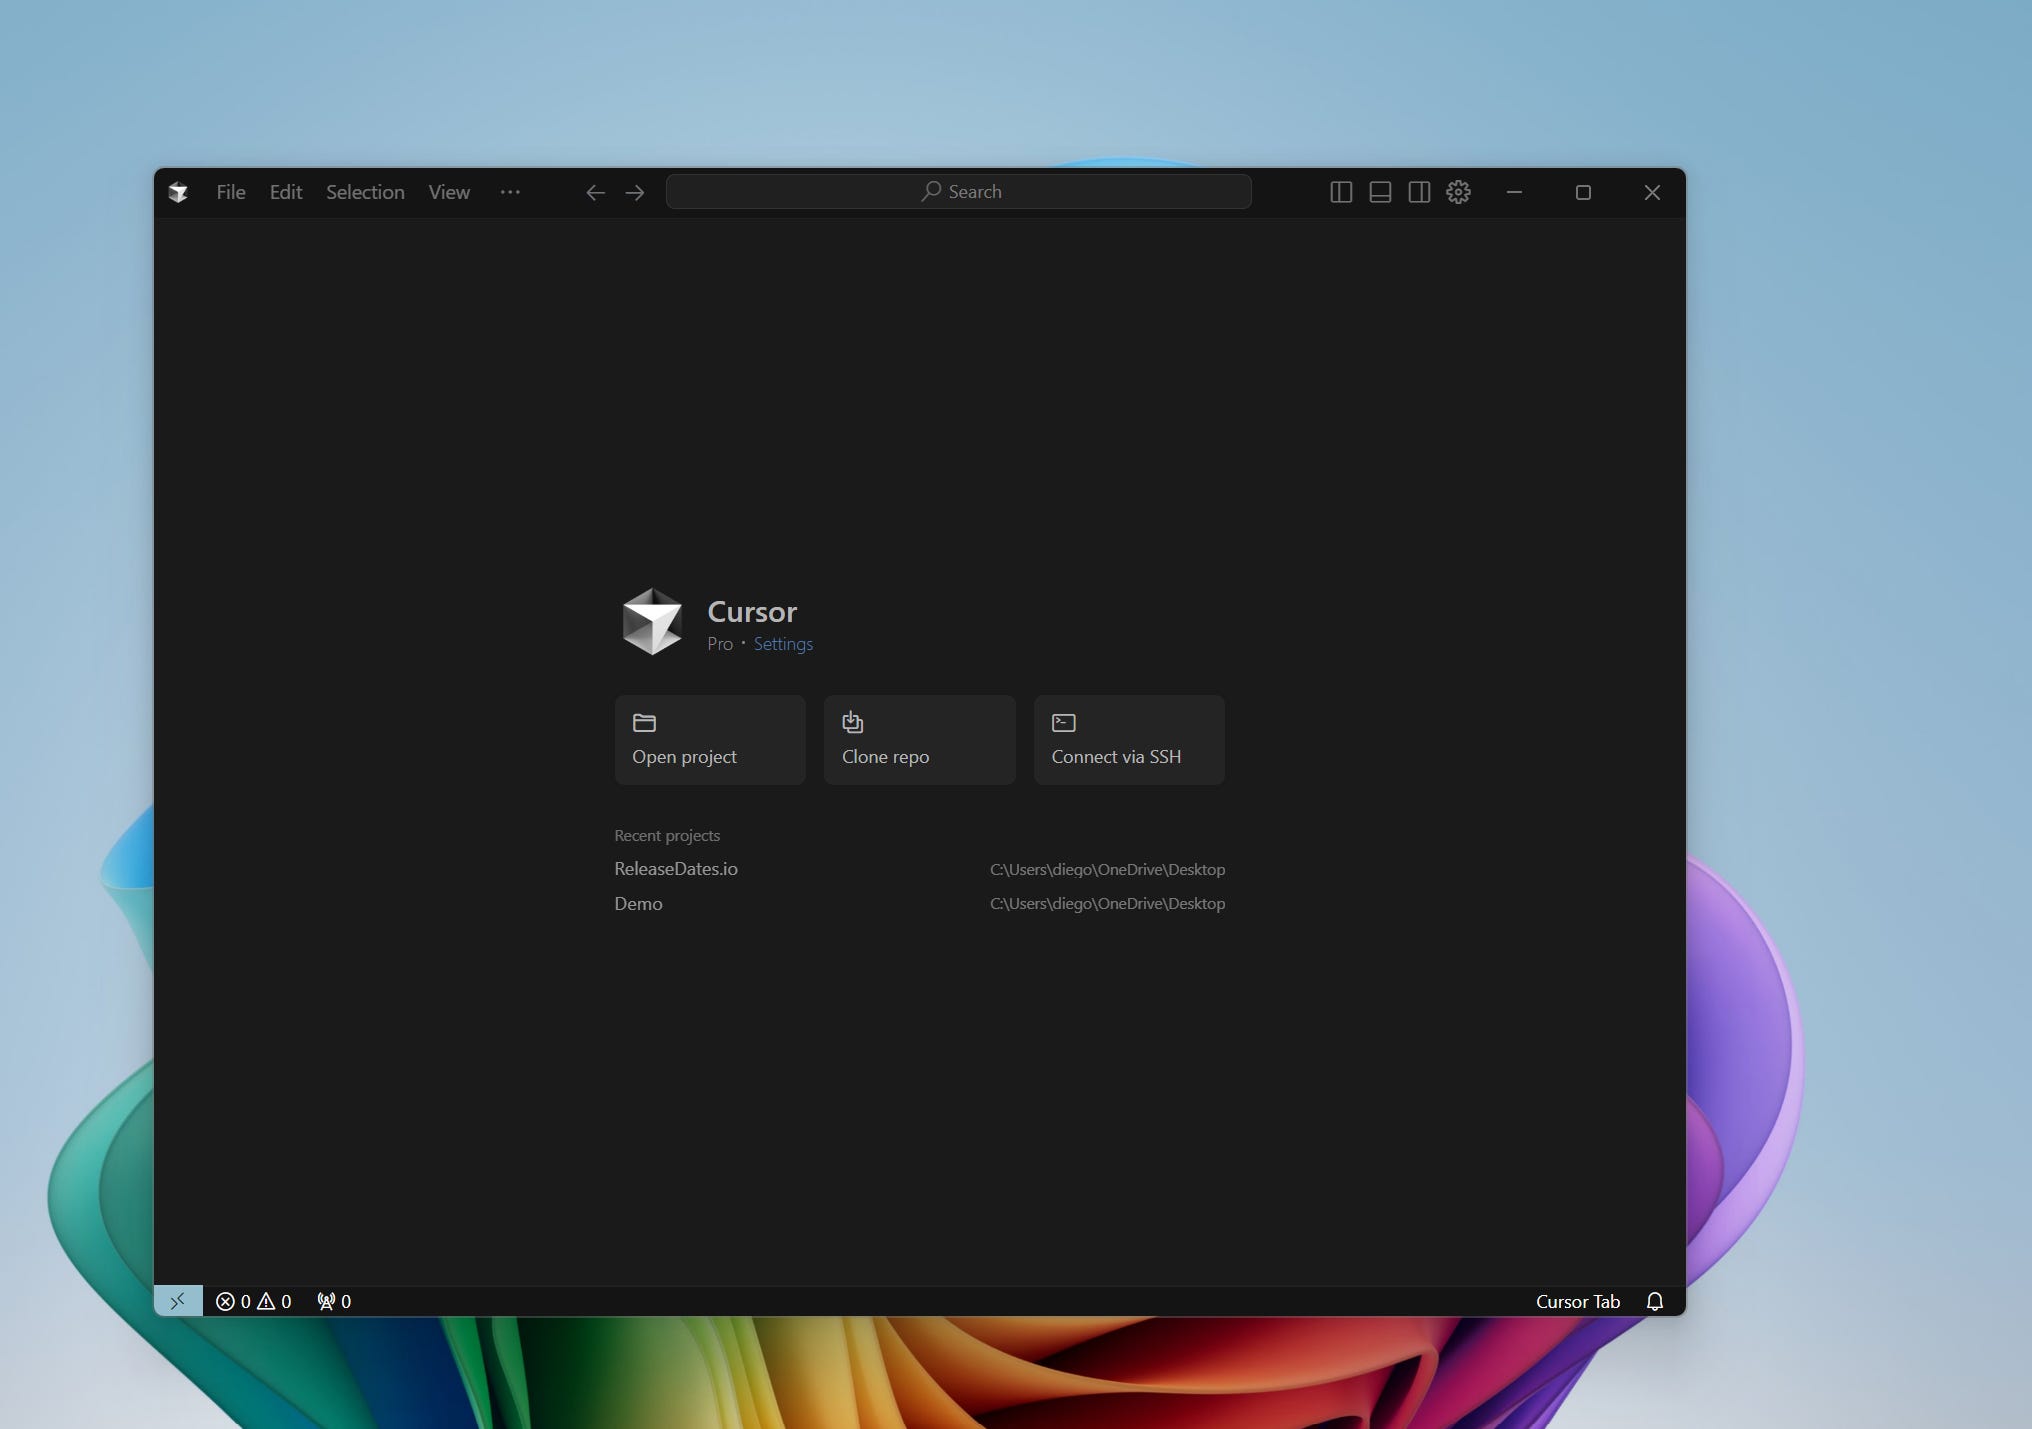
After installation, open Cursor like you would any other application.
You’ll be prompted to sign in with an account from Cursor or Github. You can go ahead and register for free on - https://authenticator.cursor.sh/sign-up?
Cursor will offer you a 14-day trial to Cursor's Pro subscription for free. I recommend you give this a try.
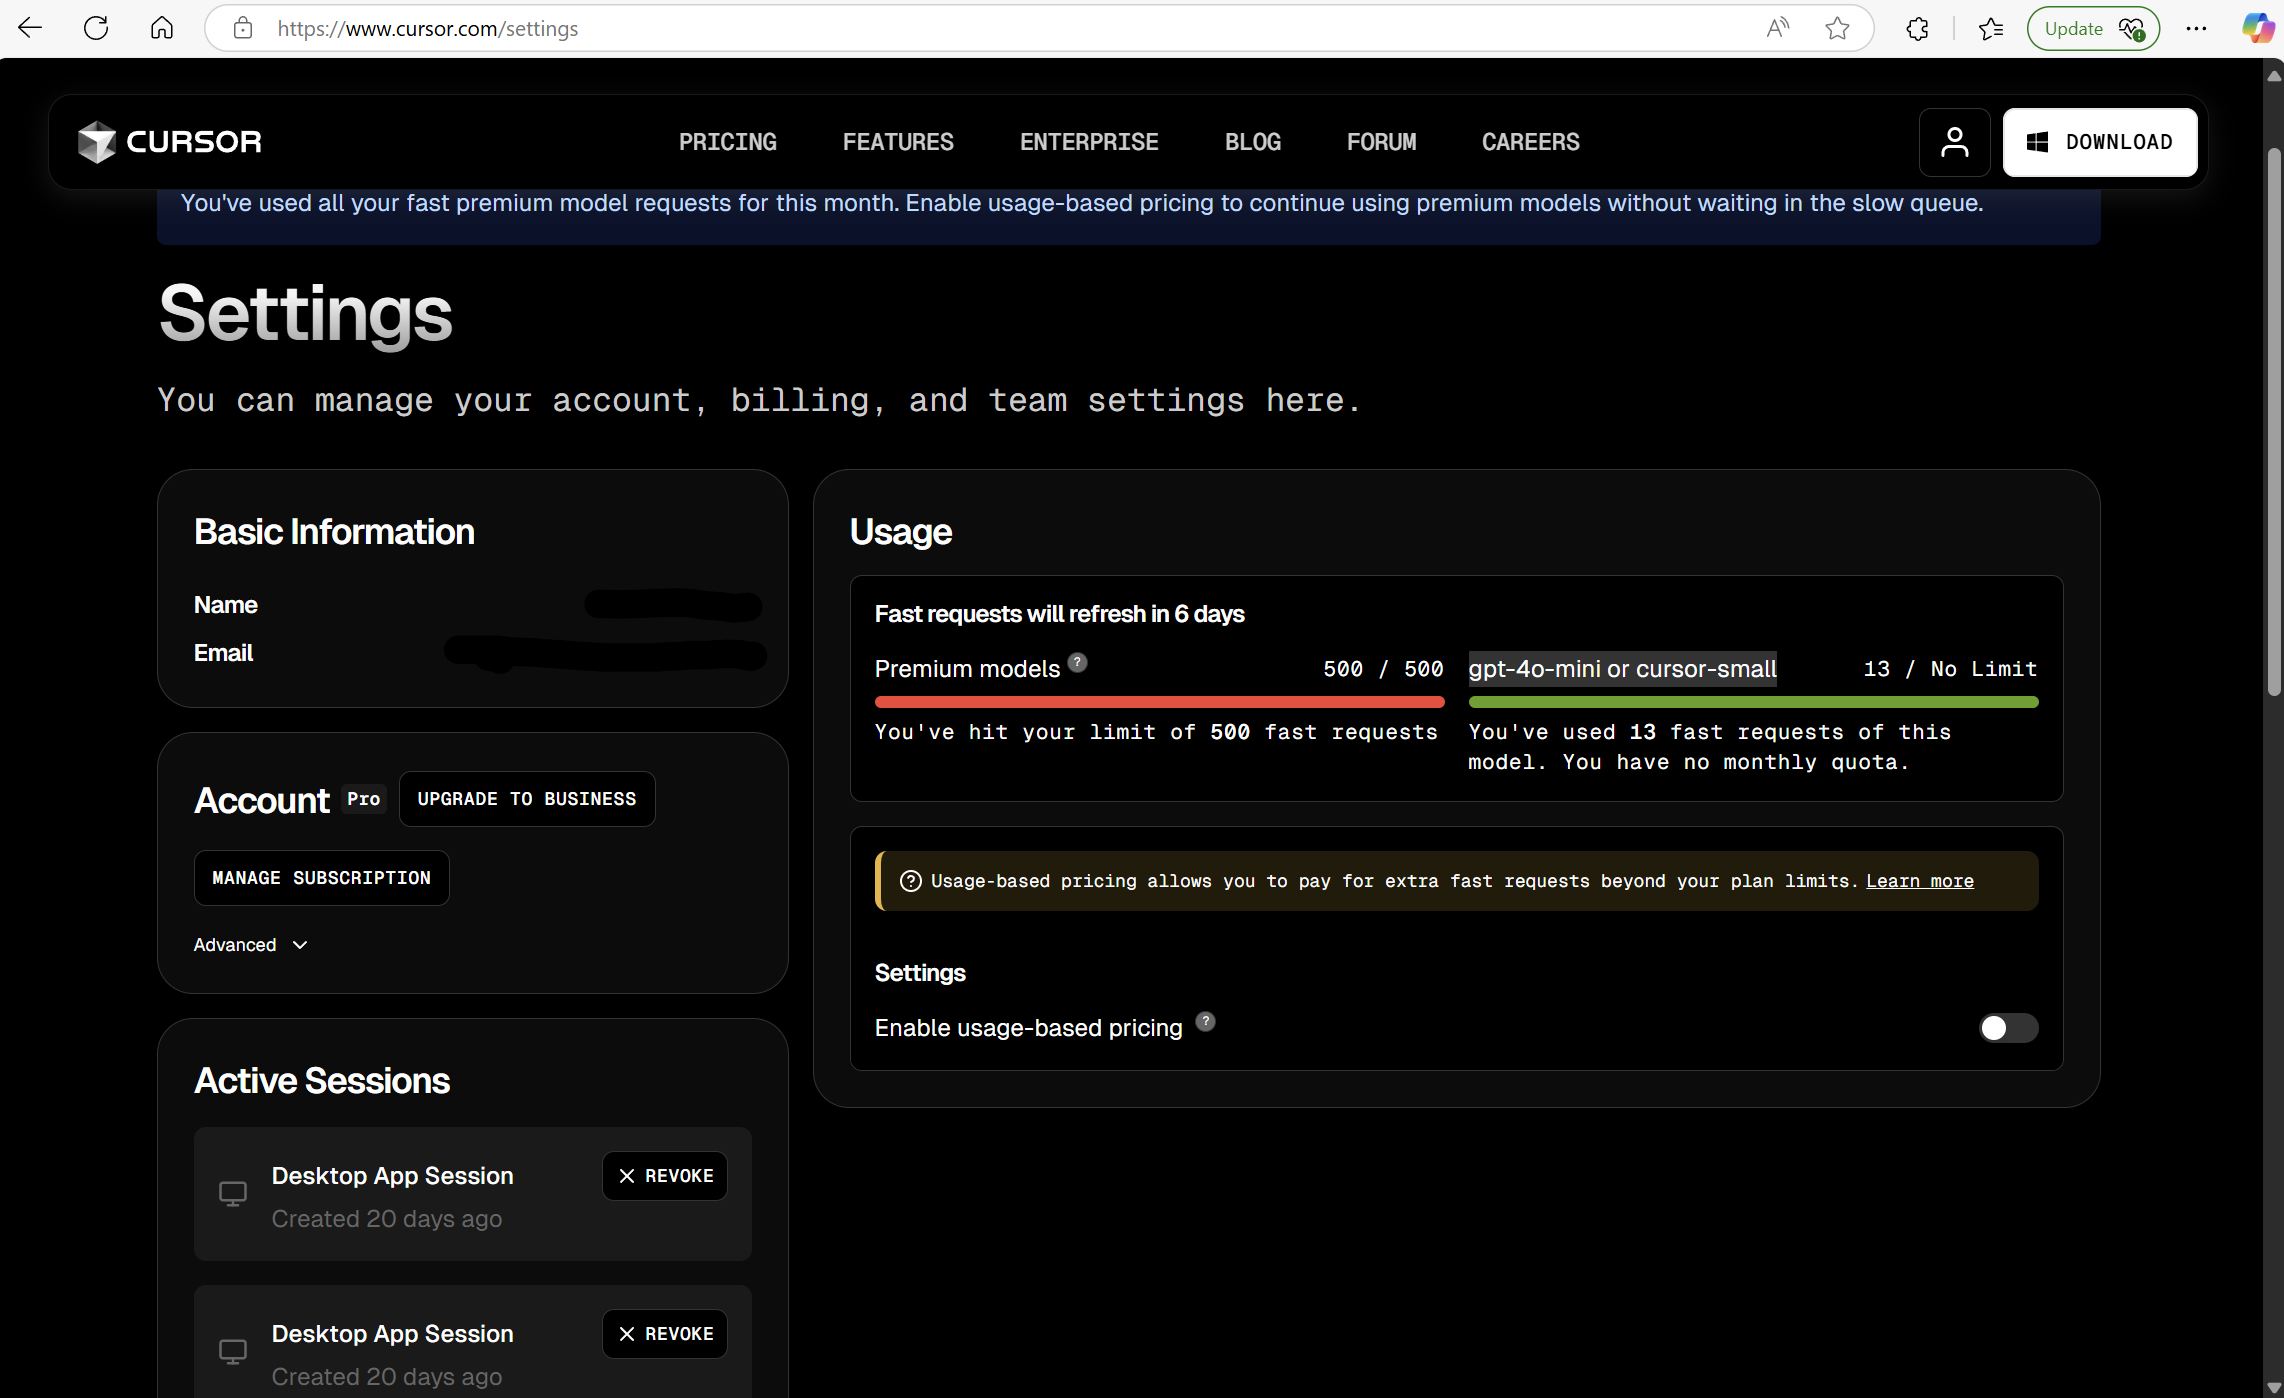
A quick note on the billing structure for Cursor:
Cursor Pro grants you 500 premium “fast” agent requests per month. These requests are currently leveraging Claude Sonnet 3.7, a fantastic AI model for coding.
Once you hit the 500 fast requests threshold within a month, if you can even do that (don’t look at me…), then you get unlimited “slow” requests that use the gpt-4o-mini or cursor-small models that also get the job done.
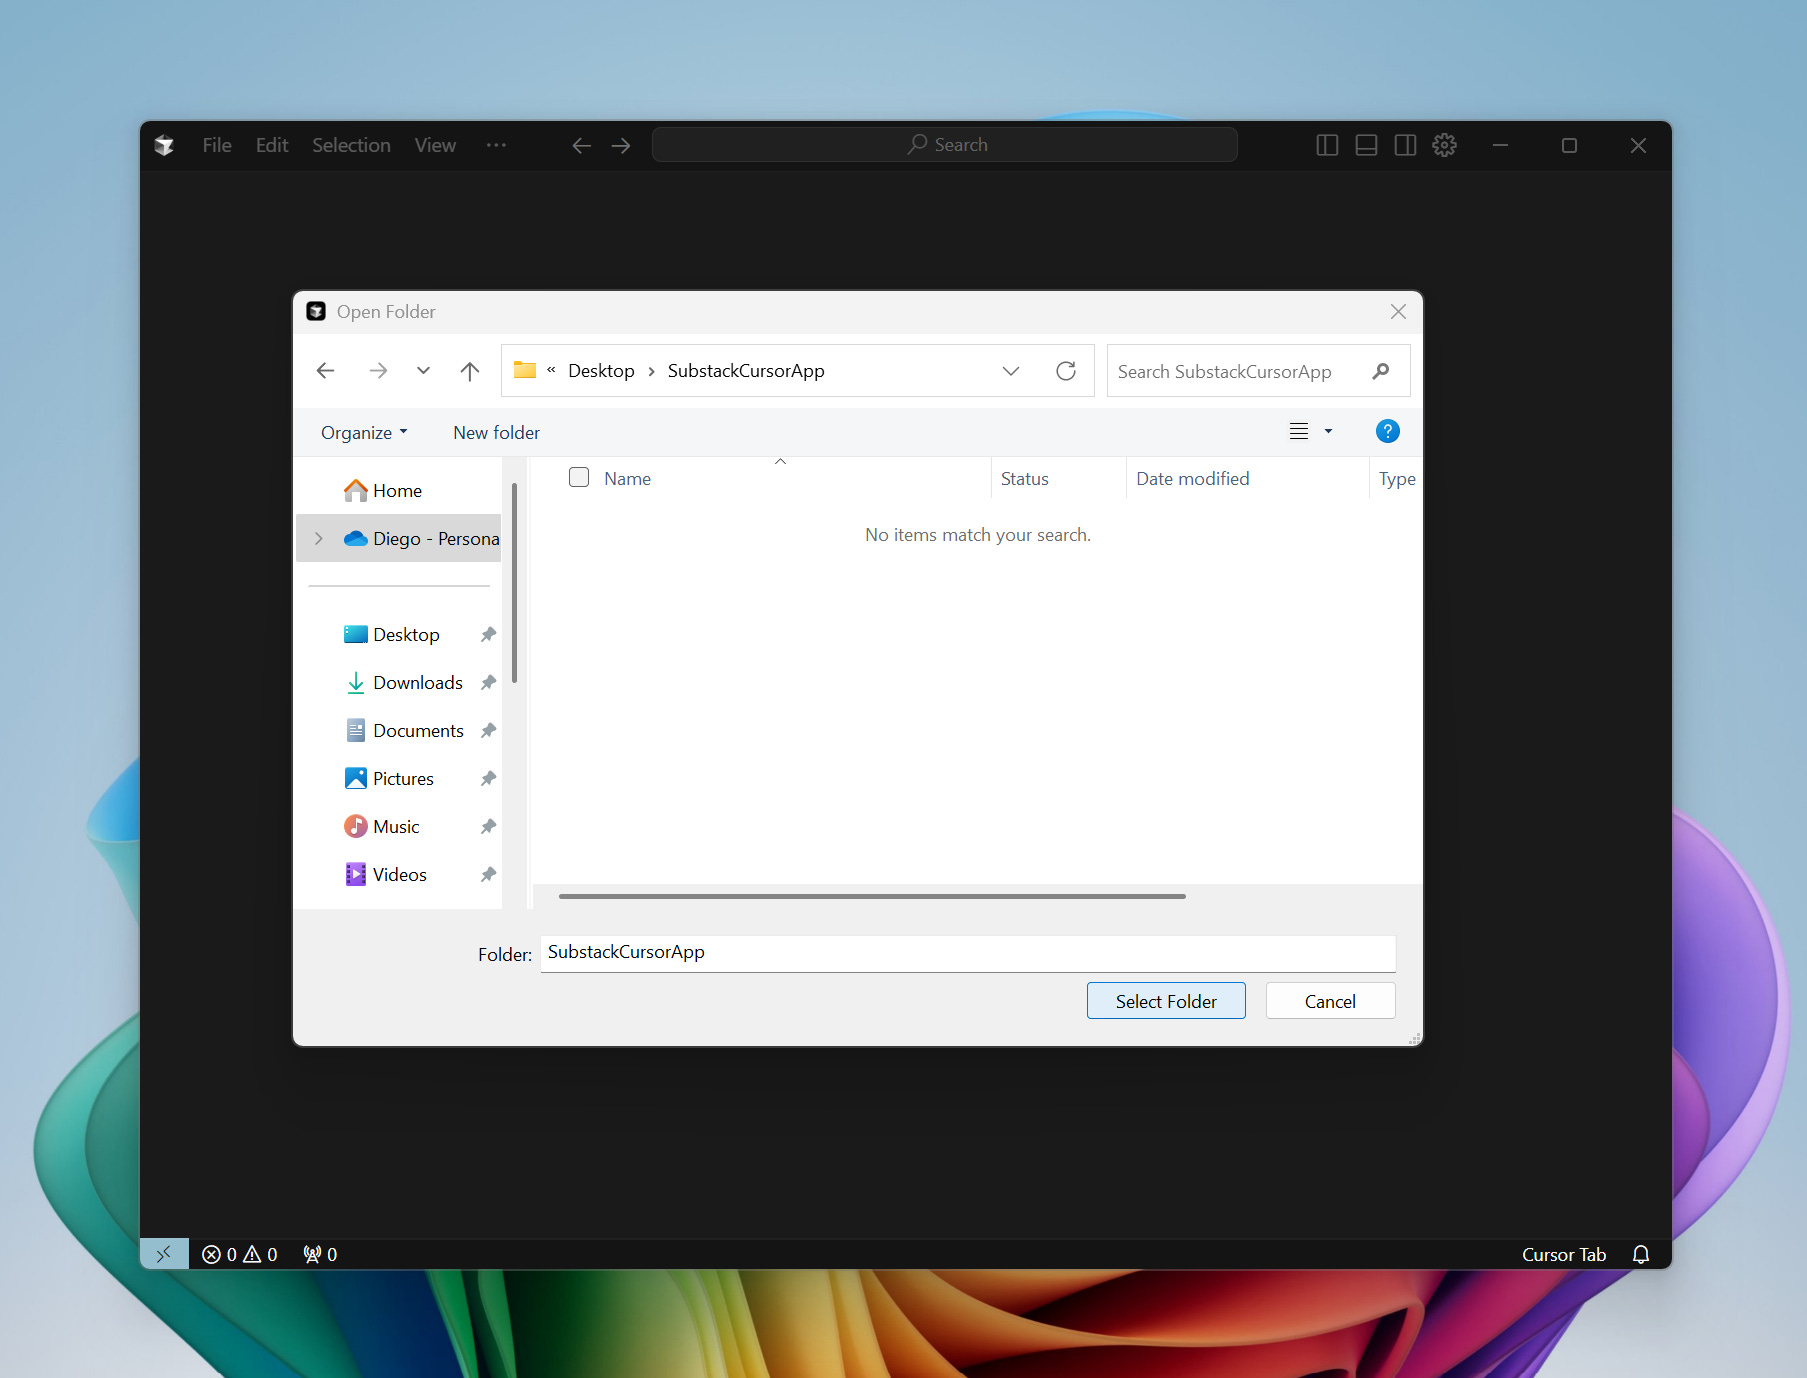
Step 3: Open A New Project
You can open an existing GitHub repo or create a new local folder to start coding.
I recommend you create a new folder somewhere on your desktop and use this for your project folder.

Cursor will index your codebase automatically and make it available to the AI assistant.
Step 4: Getting to know the Cursor Layout
When the app opens up the folder, you’ll notice a handful of areas for us to get to know:
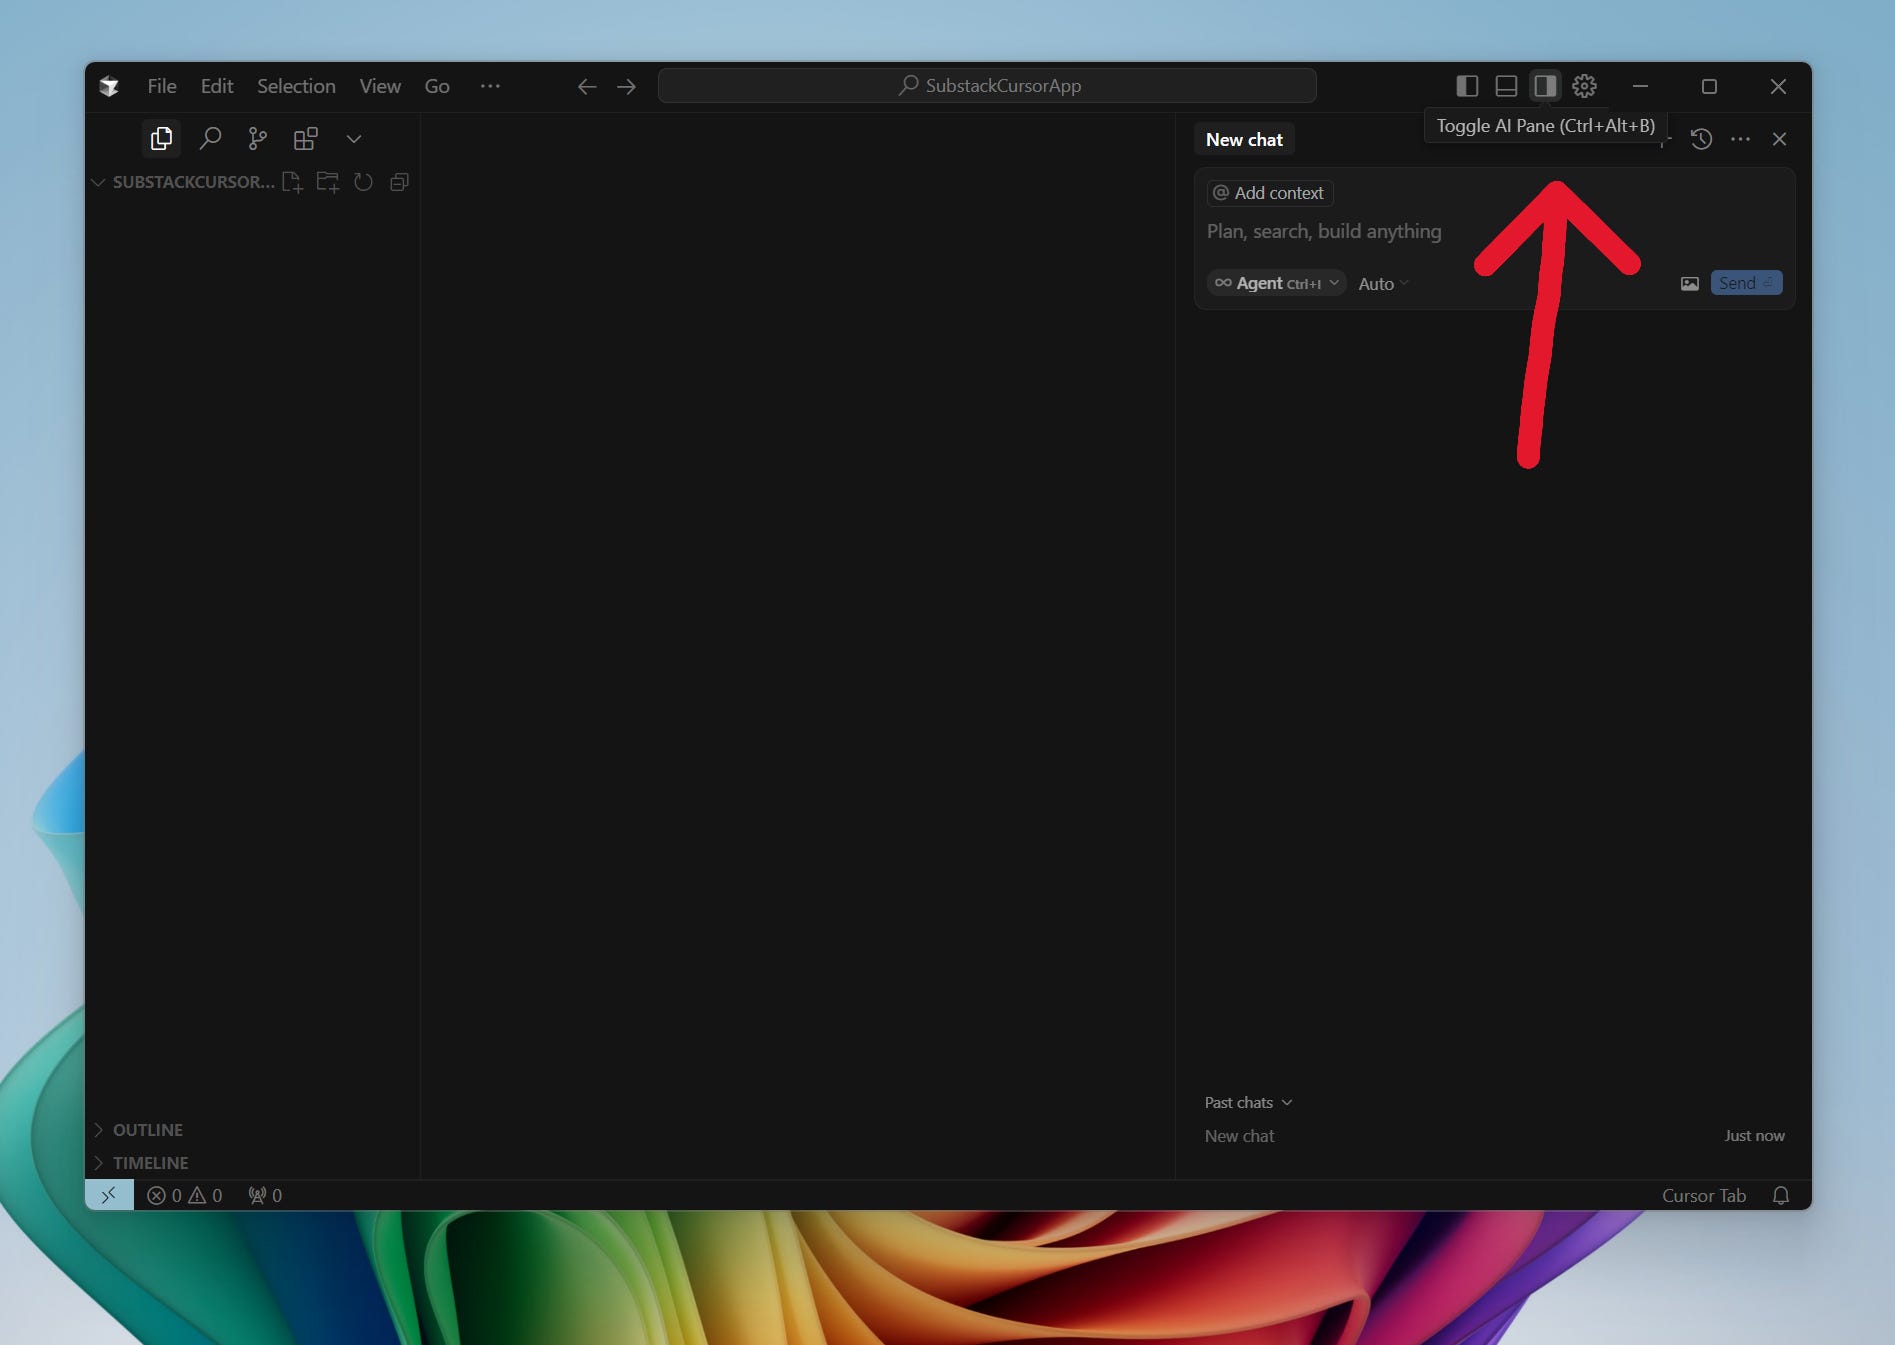
Toggling our Chat Agent (the bread and butter of our app):

Click on the Chat icon in the sidebar or use the hotkey
Cmd+K(Mac) orCtrl+K(Windows) to start chatting with the AI.
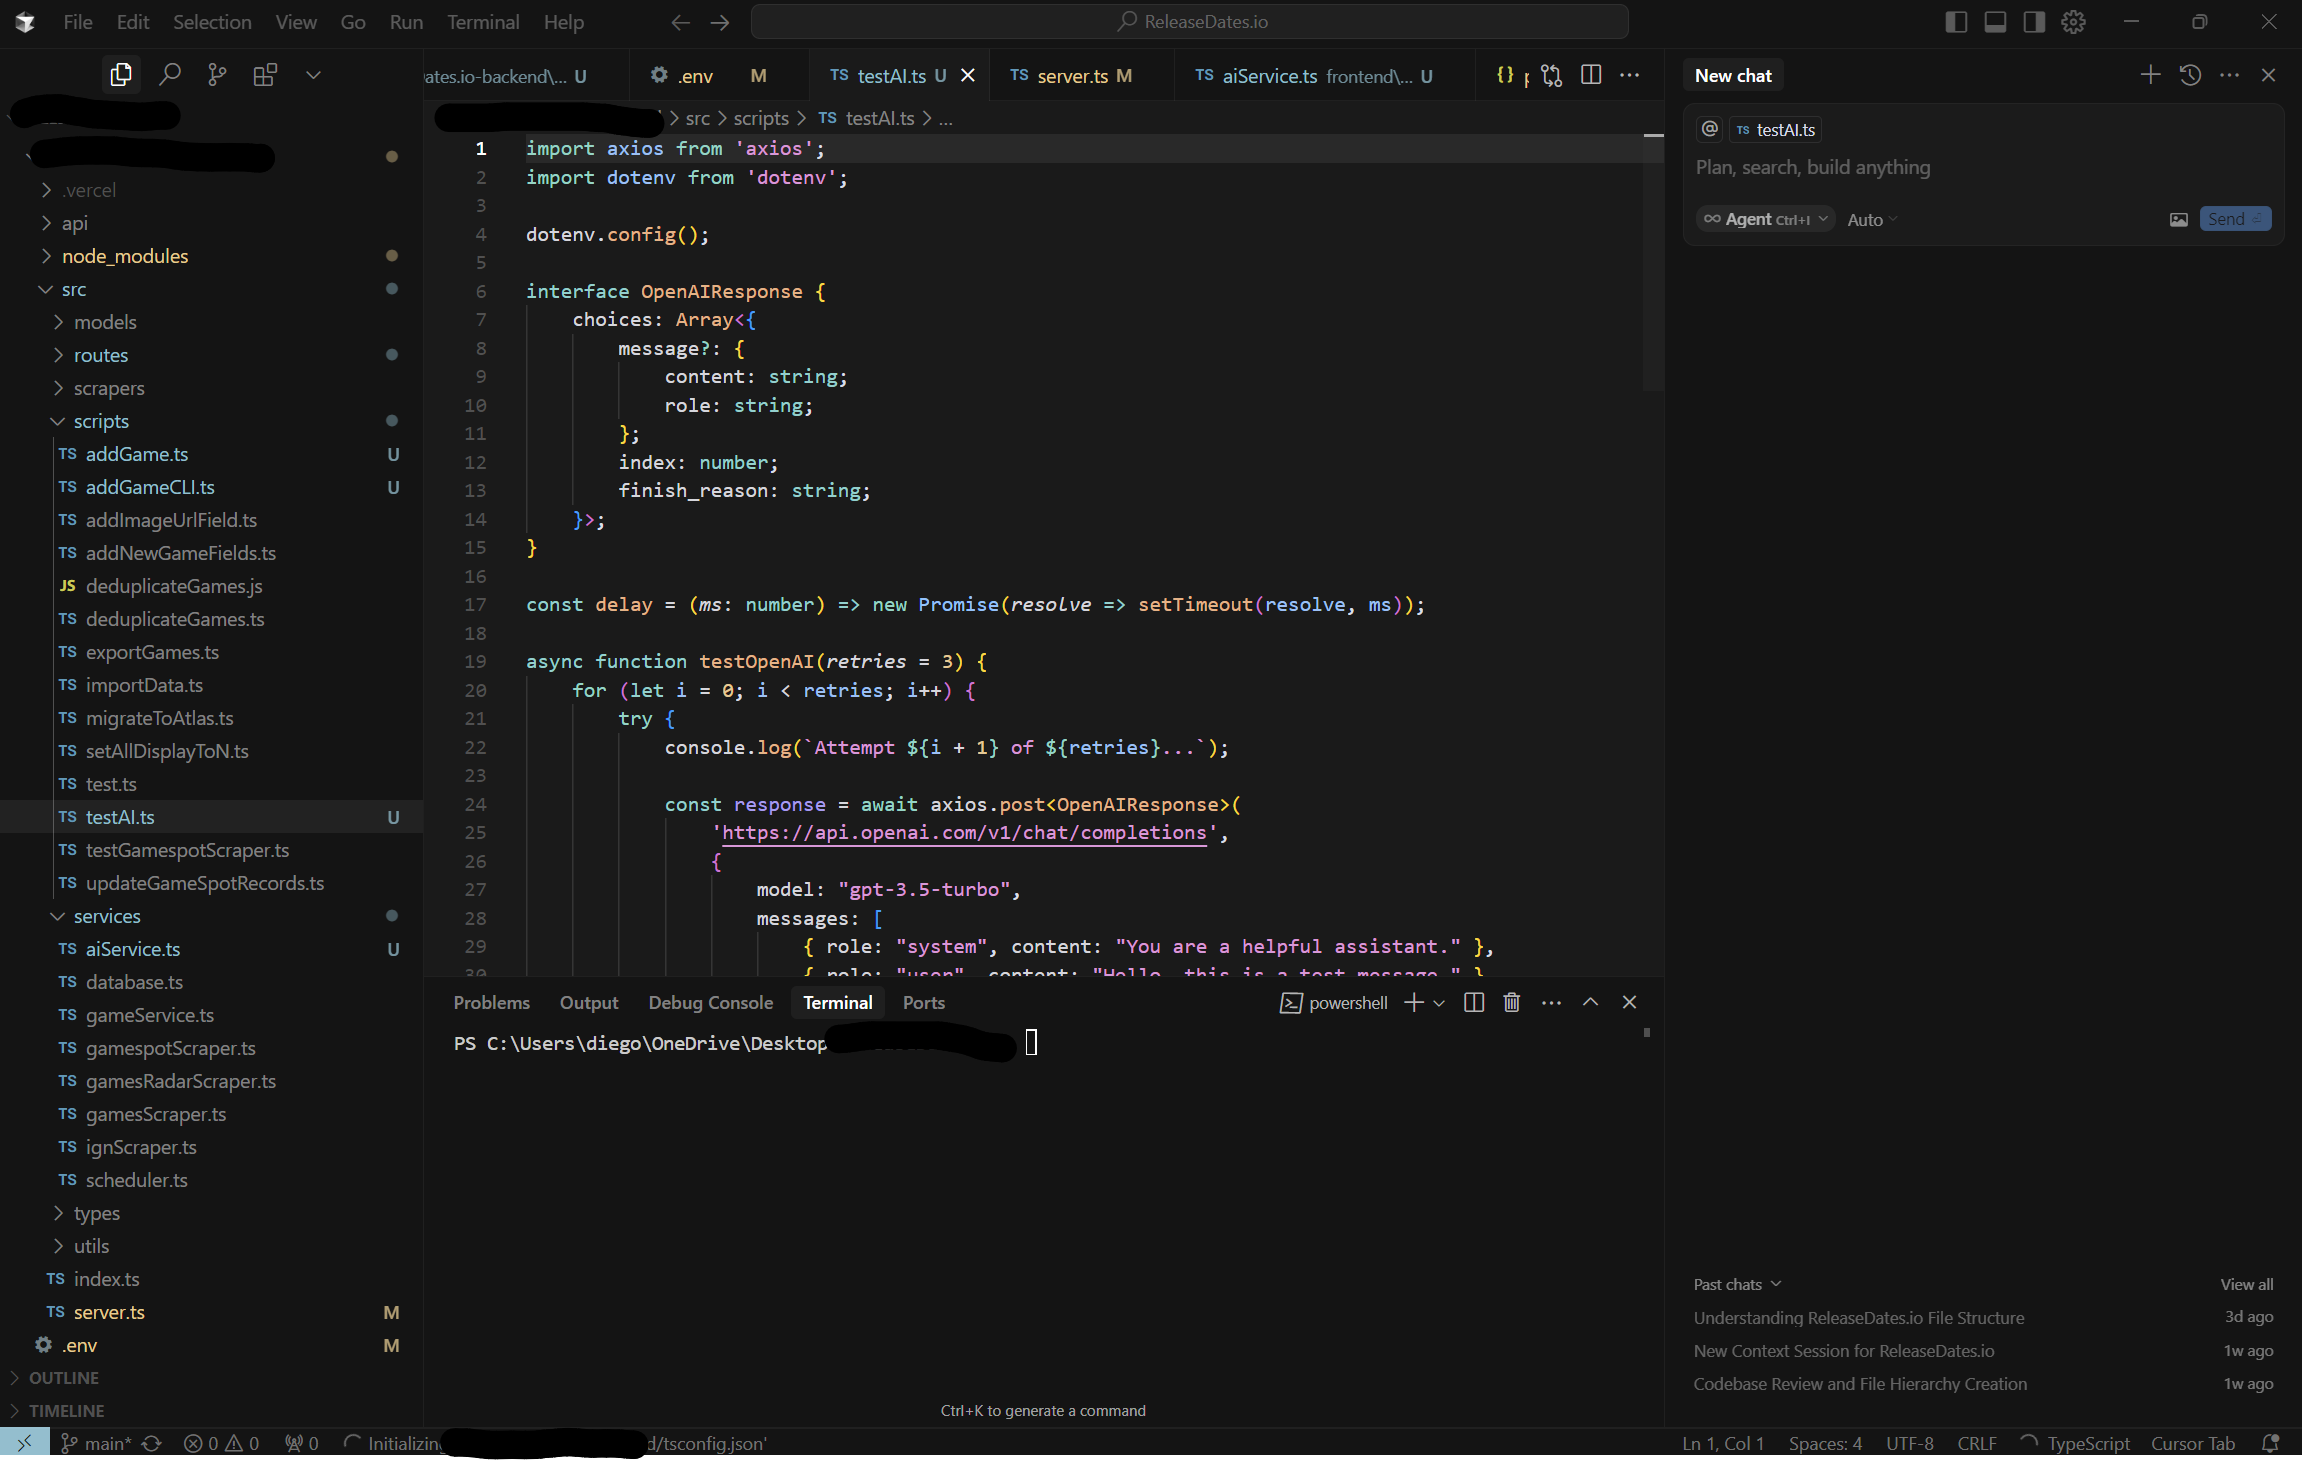
The project and file structure will be on the left panel side (the following is an example of a mature app with an extensive file structure, your folder should be empty):

The code files will show in the center panel, once we generate the code.
Terminal and Console views will show up in the center bottom panel, once we generate commands that prompt these actions.
3. Setting Up a React App with Cursor
To get our bearings for how to use Cursor, let’s start off by creating a React web app. React is a frontend framework created by Meta that's used to build dynamic, responsive user interfaces. It's especially popular for creating applications that work well on both desktop and mobile browsers—what's known as responsive design.
If you're new to React, a great place to start is by creating a simple "Hello World" app. In other words, this will be an app whose sole purpose is to deploy something so that we can prove that we have a working system - and THEN we build our app on top of it.
Here's how to do it in Cursor:
Step 1: Open a New Project Folder
If you haven’t done this step already, in Cursor, create a new folder for your project (e.g.,
SubstackCursorApp).Open that folder in the editor.
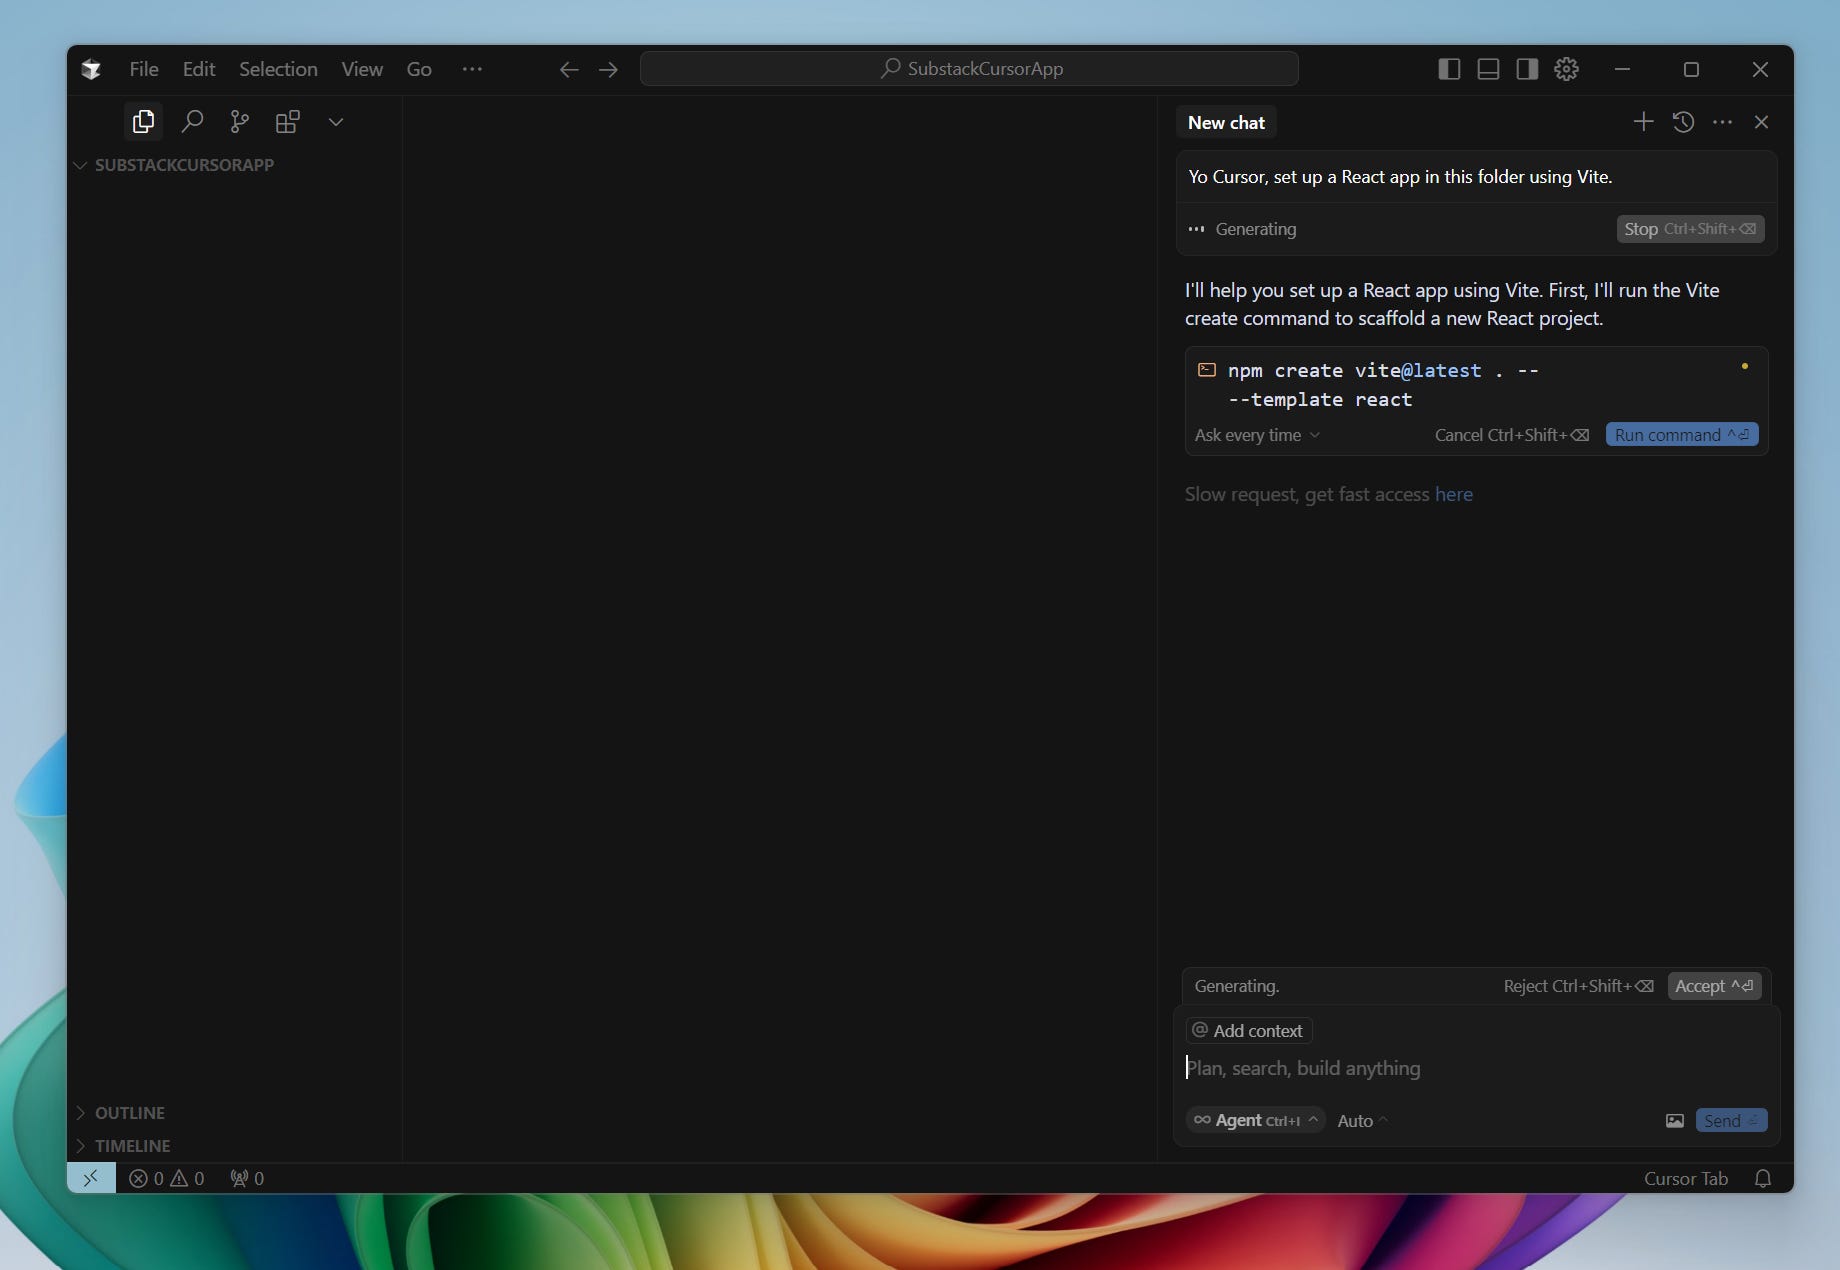
Step 2: Use the AI to Set Up React
Open the AI chat and type:
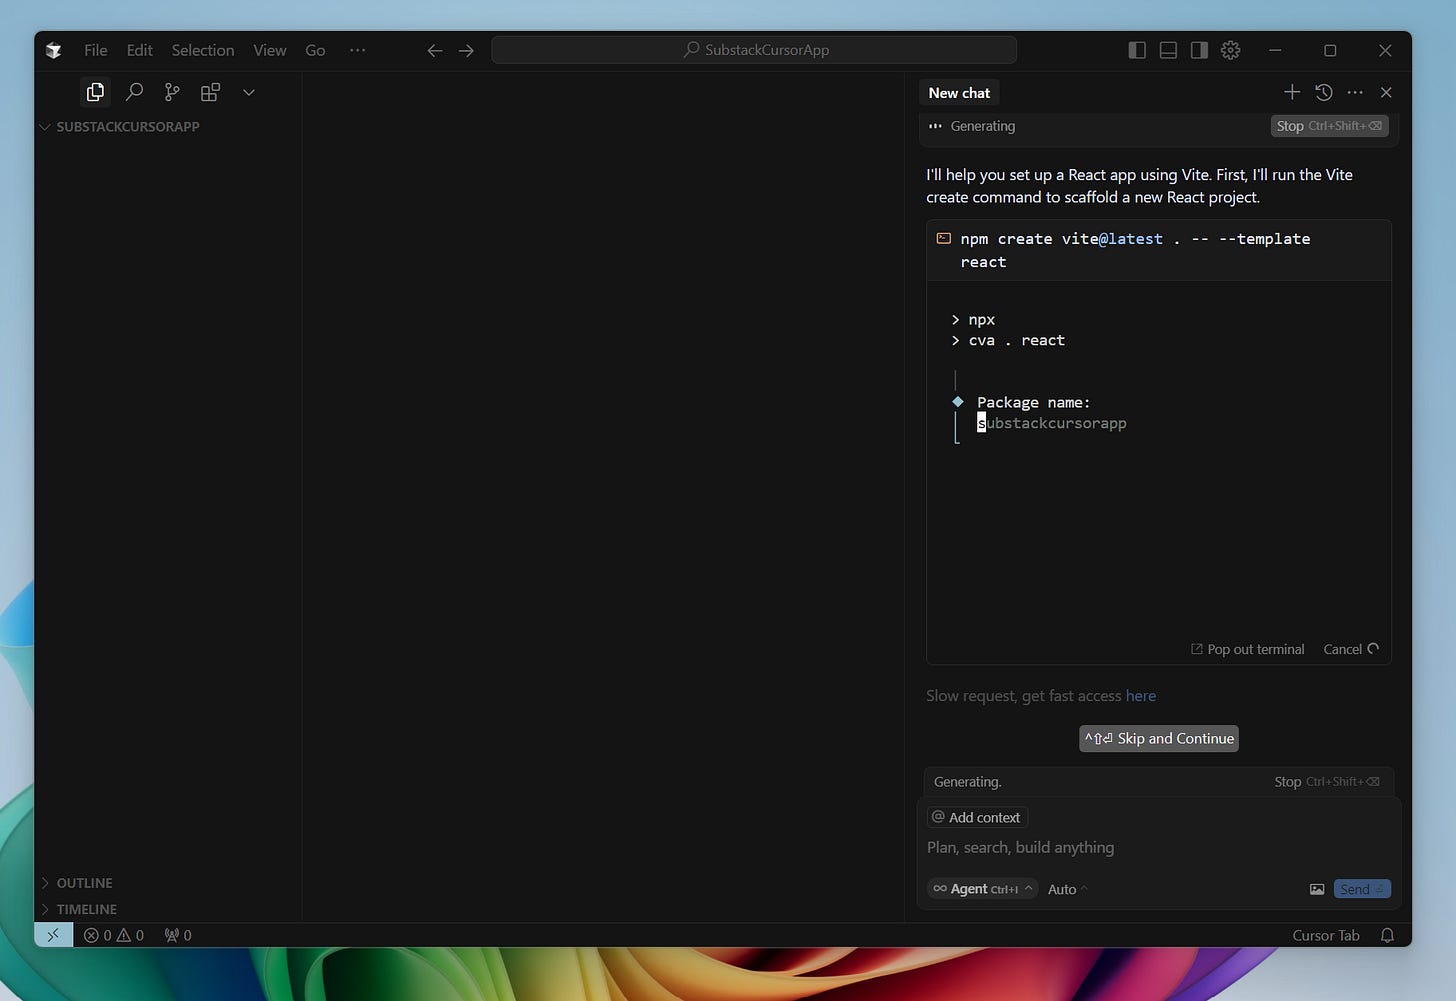
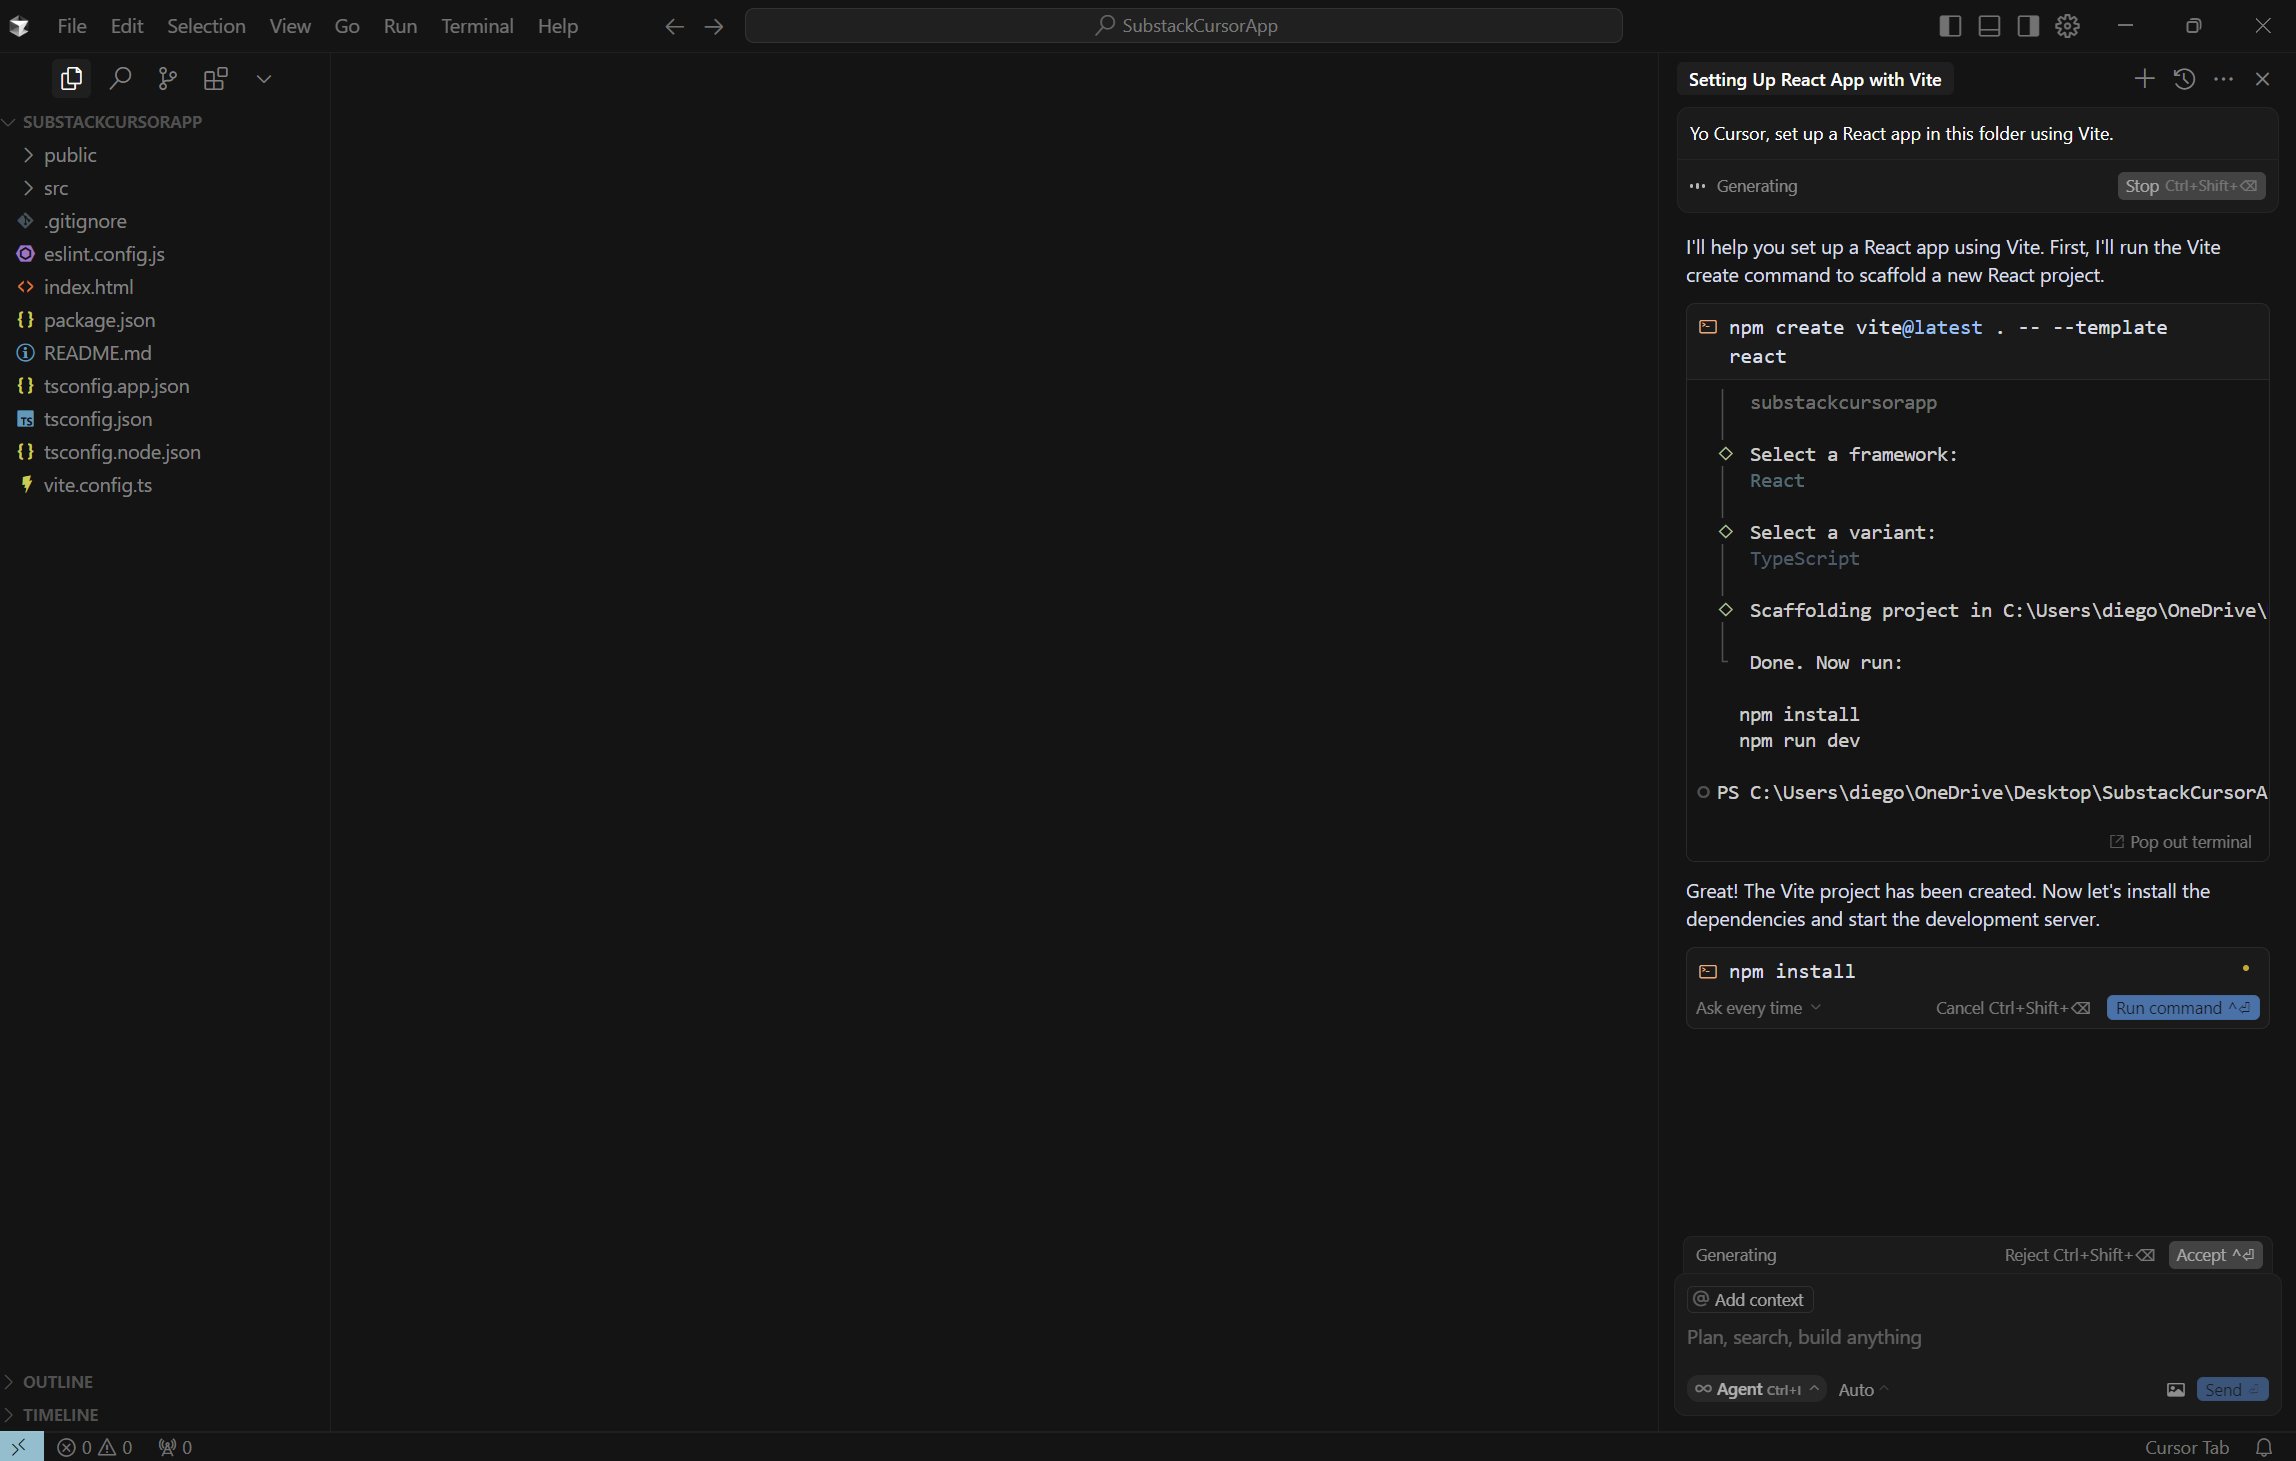
Set up a React app in this folder using Vite.The AI will scaffold a modern React app using Vite, a fast build tool for frontend apps.
Vite (pronounce it like Veet, or someone might make fun of you) - is essentially a tool that tells Cursor HOW to build the web app from a scaffolding perspective. In other words, grab these front end elements, organize them in this way, and make them look a certain way. It allows developers to focus on the important things like alignment, styling, etc. and not the tiny technical annoying things.
Follow any prompts to complete the setup (e.g., installing dependencies).

When Cursor asks about running commands like you see in the image above, what this means is that you need to install certain code libraries to make this app work. In this case, we need to download and install Vite and React.
Anytime you see “npm”, this is a command line that stands for Node packet manager. This is a fancy way of saying these commands facilitate the downloading/installation of libraries for you.
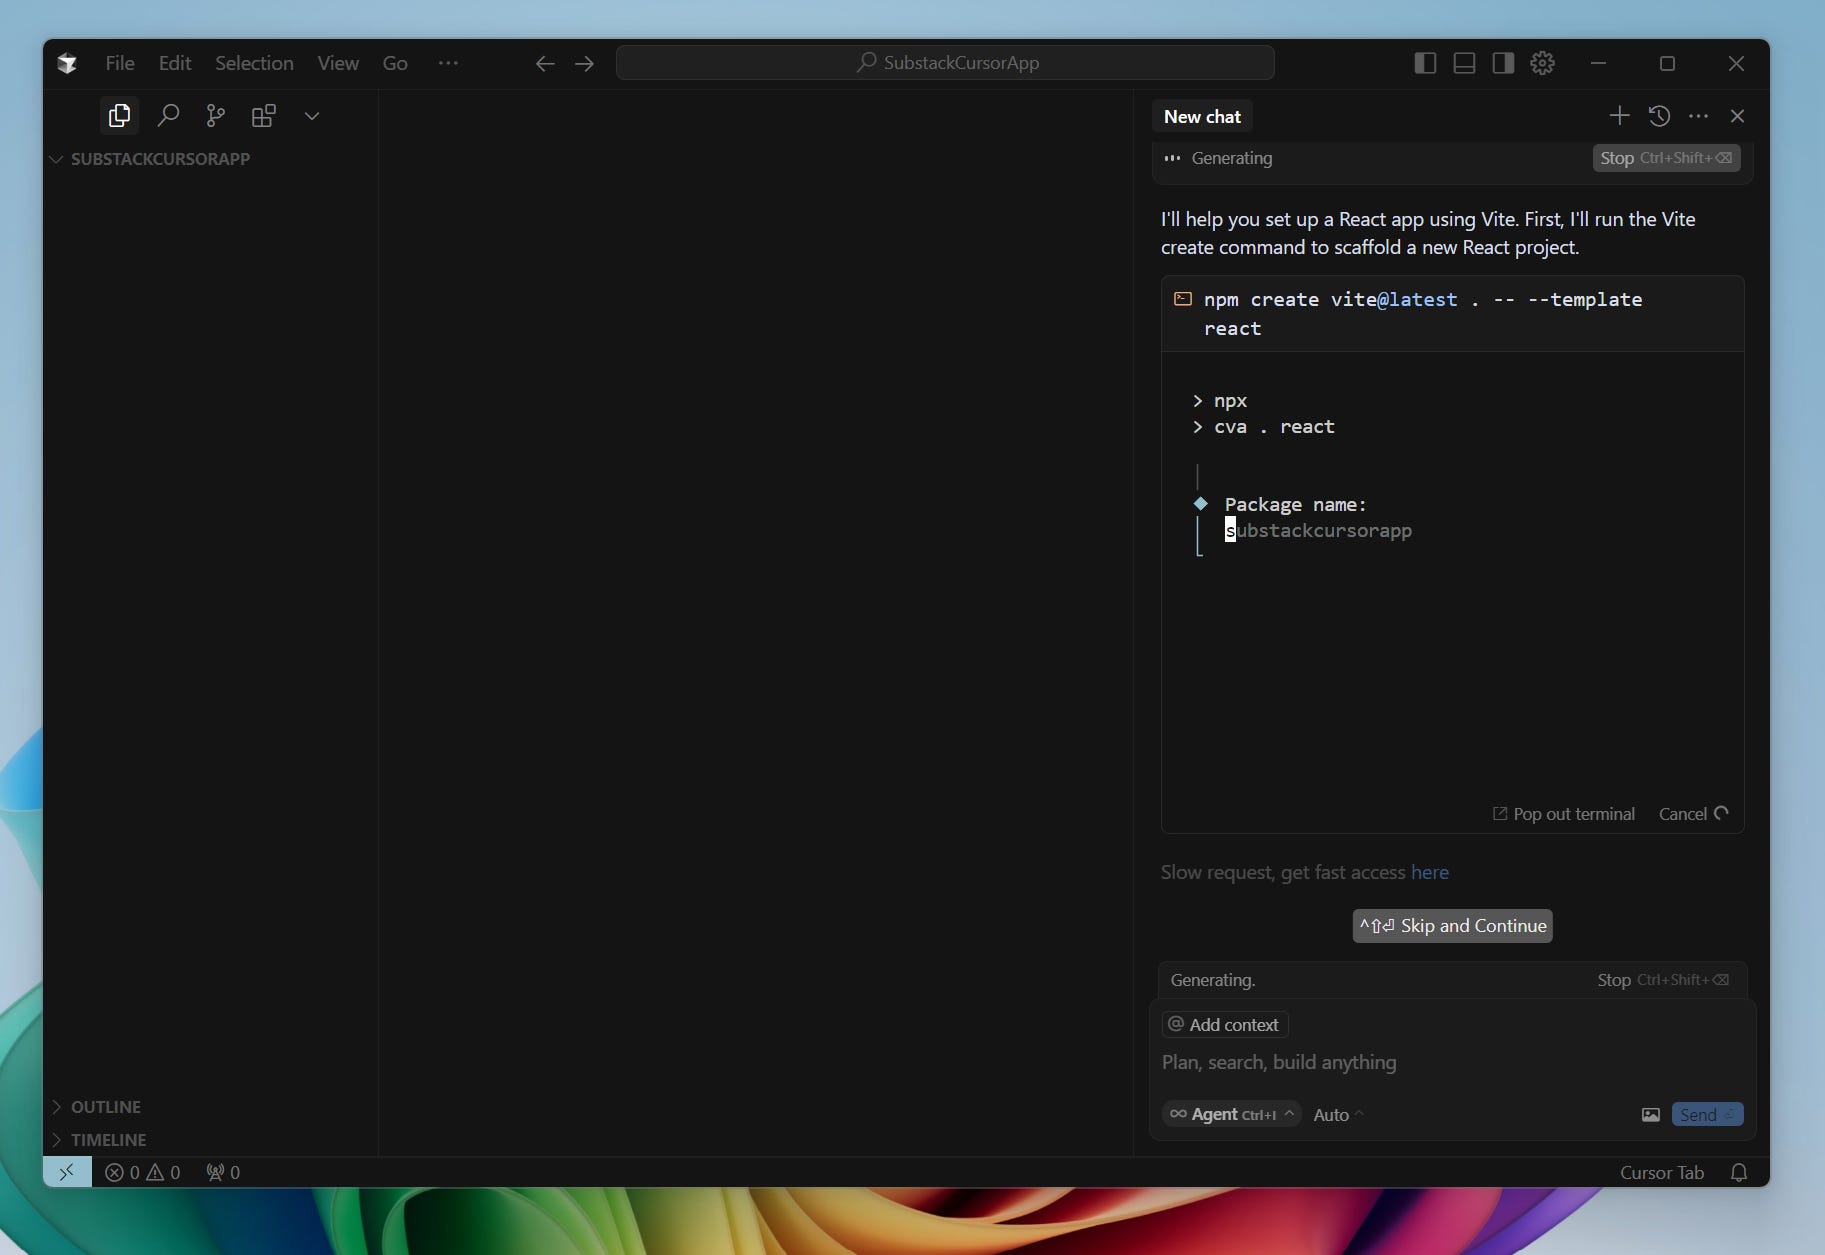
Click on “Run Command” and Cursor’s nifty Command Line will show up in the AI agent window where it will prompt you for a few more responses:
Here, it asks you for the name of the package, just name it the same name as the folder (project name seen above ^^)
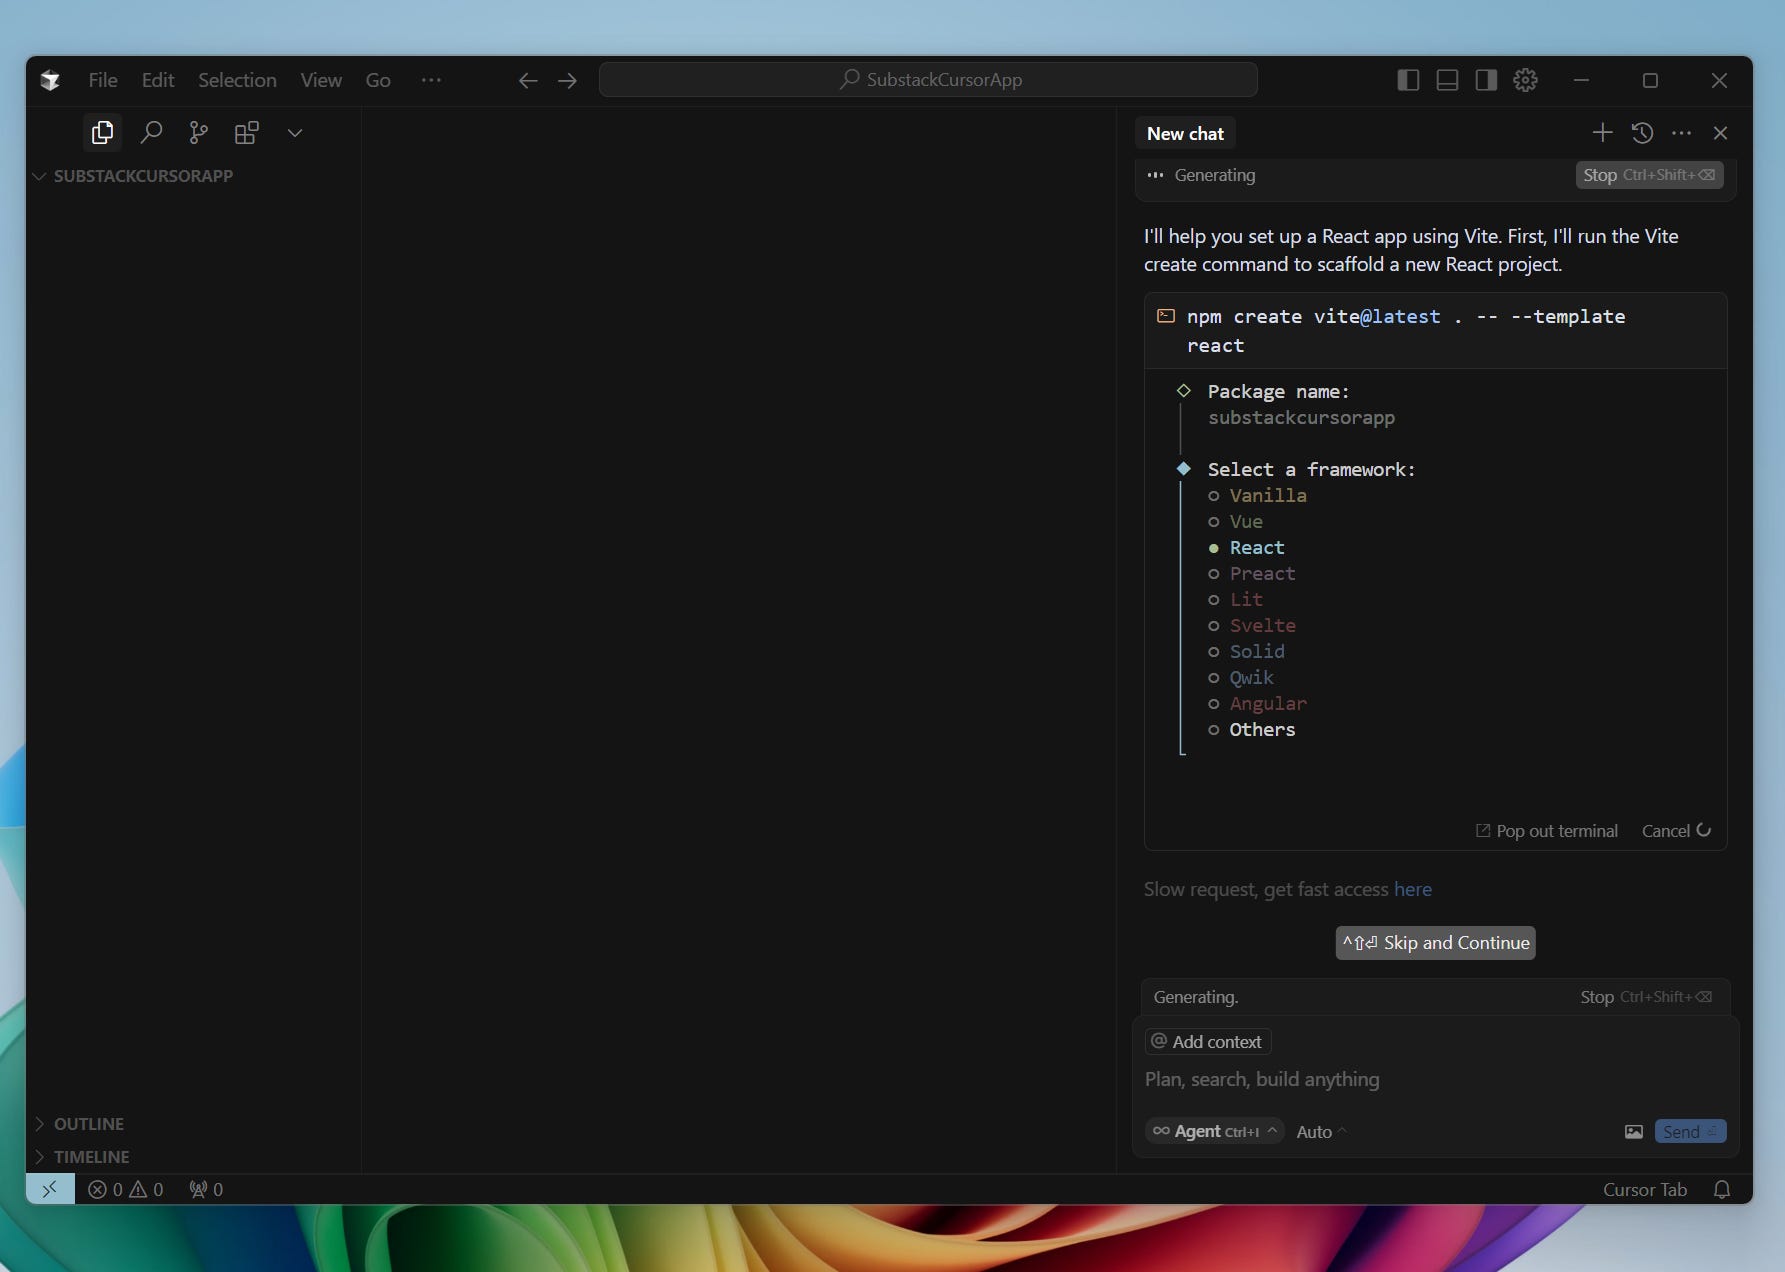
Now, the npm installer is asking you to select a framework, using the arrow keys (up and down) select React and press Enter.
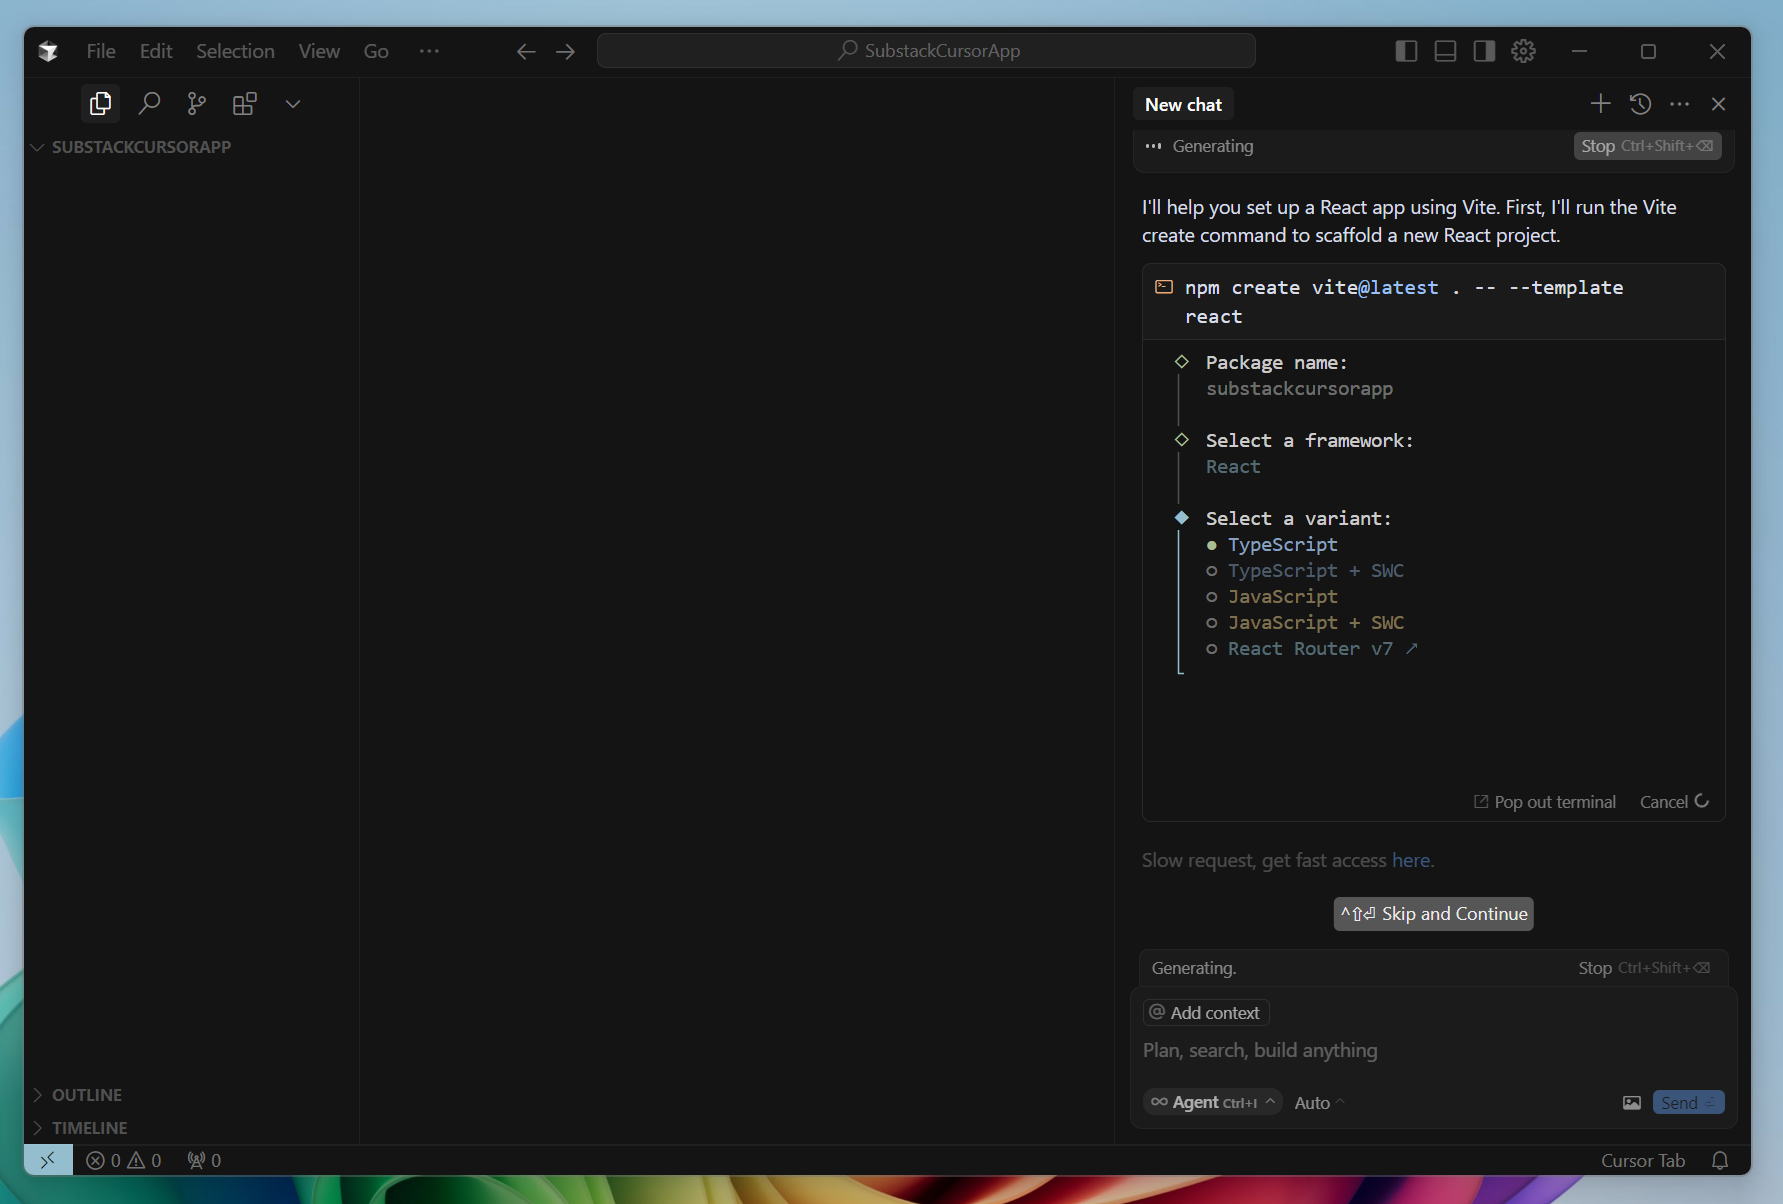
Lastly, it will ask you for which type of base programming language variant you want. For now we will go with Typescript (because it’s the new sexy thing):
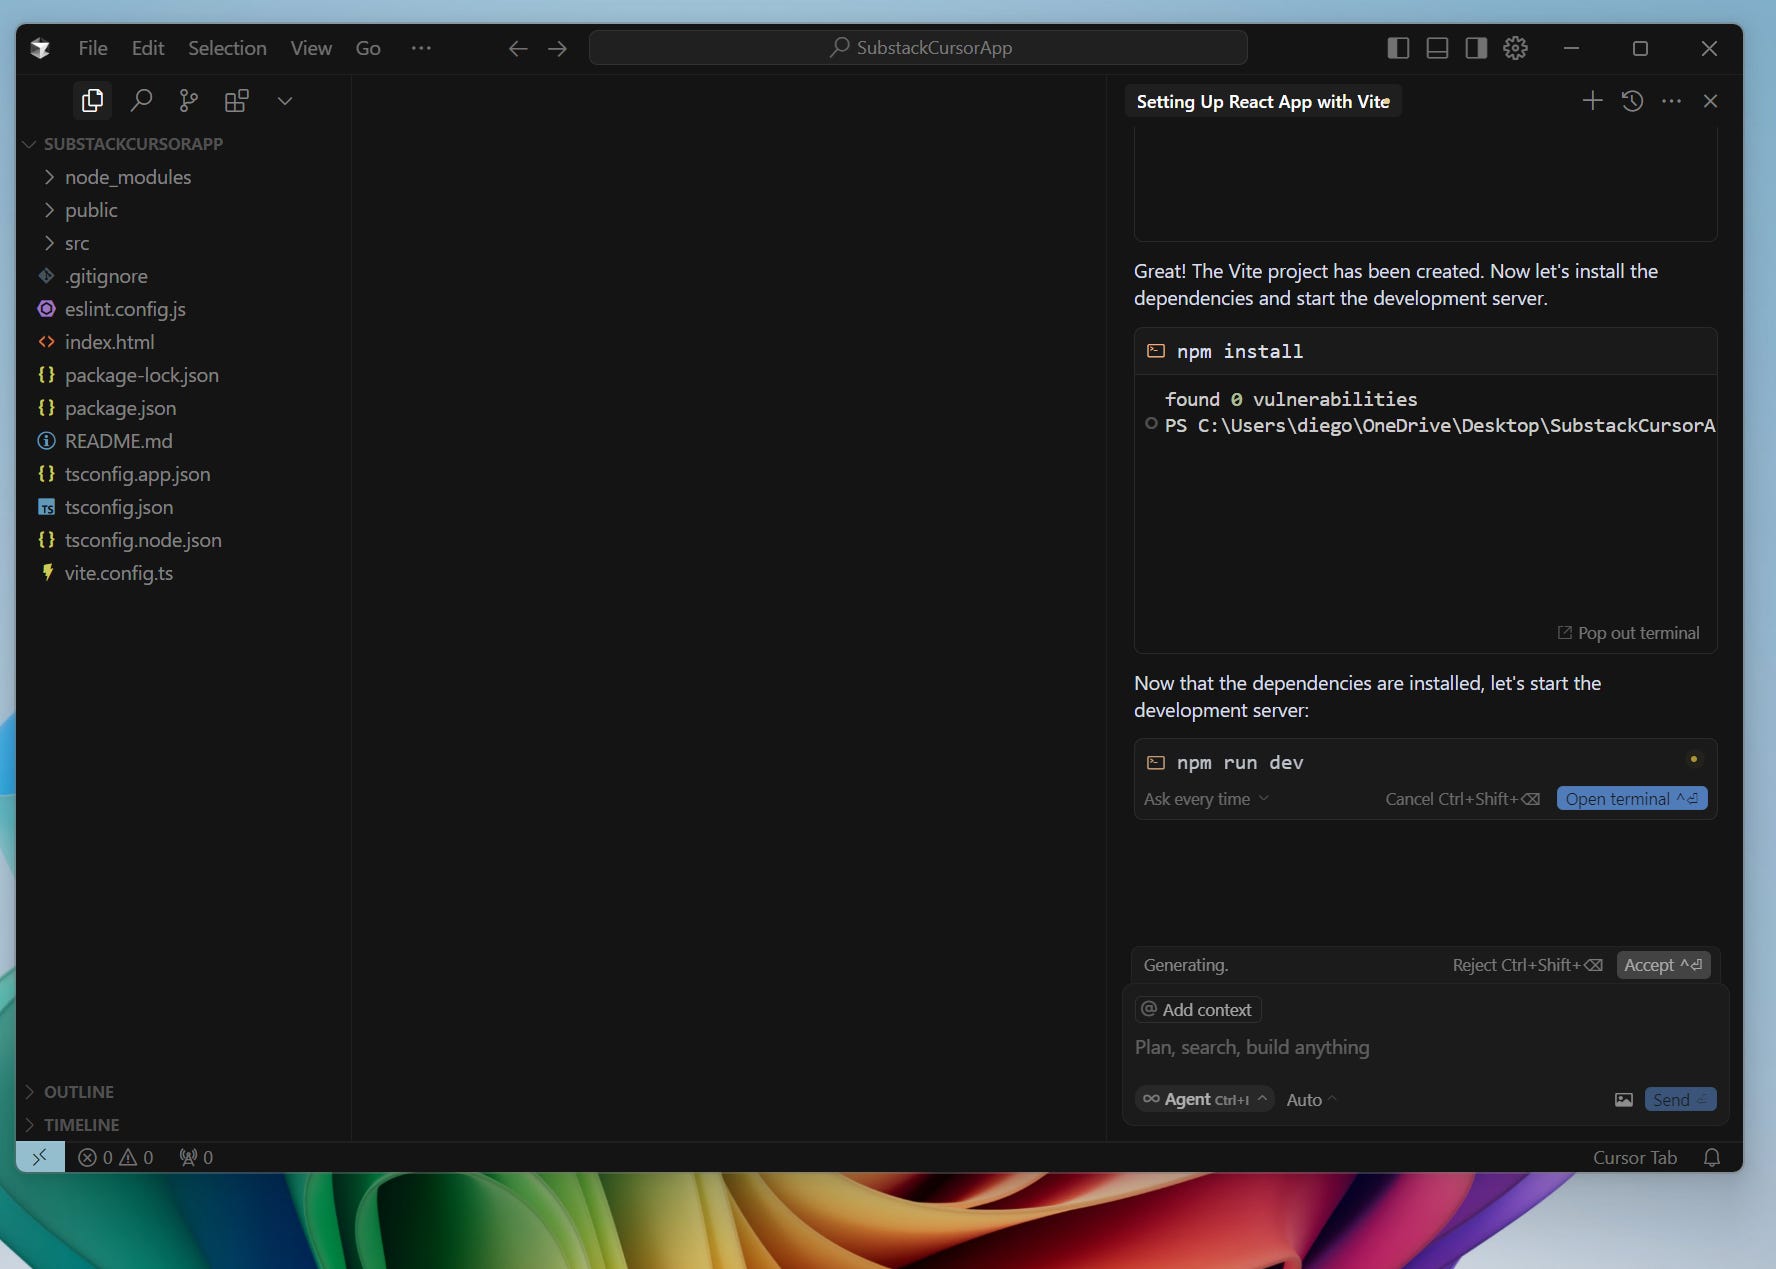
At this point, the framework will be mostly installed and a few dependencies will be left. Once more, click on Run Command within the in-line command line in the AI agent window:
And now, we need to actually start a development server that will host our web app locally. Follow the commands to do this:
A development server in this context is going to look like a command line window that is running this program in the background for a local host address. Whenever you use that local host address in your browser, it will redirect you to your new web app!
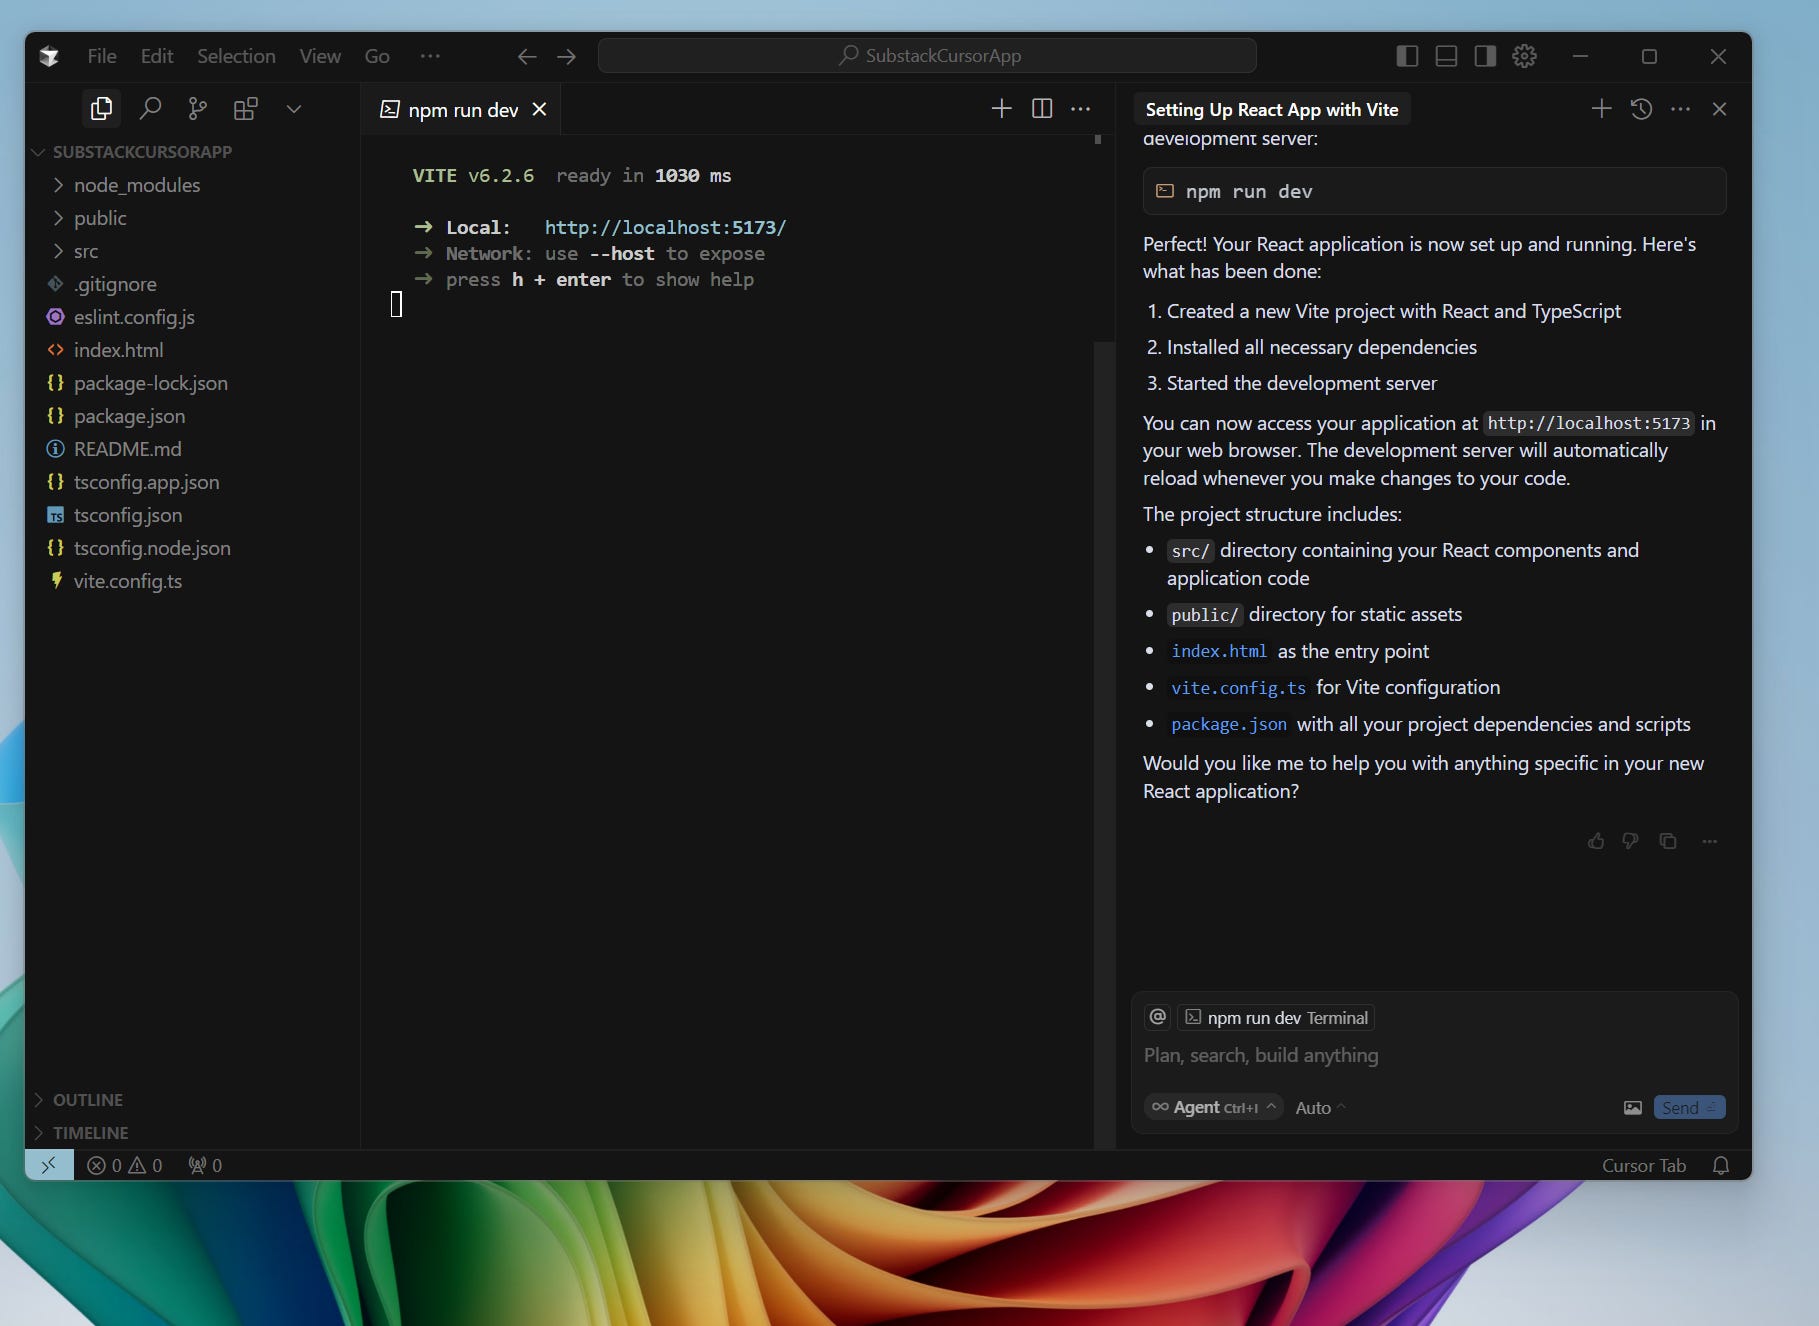
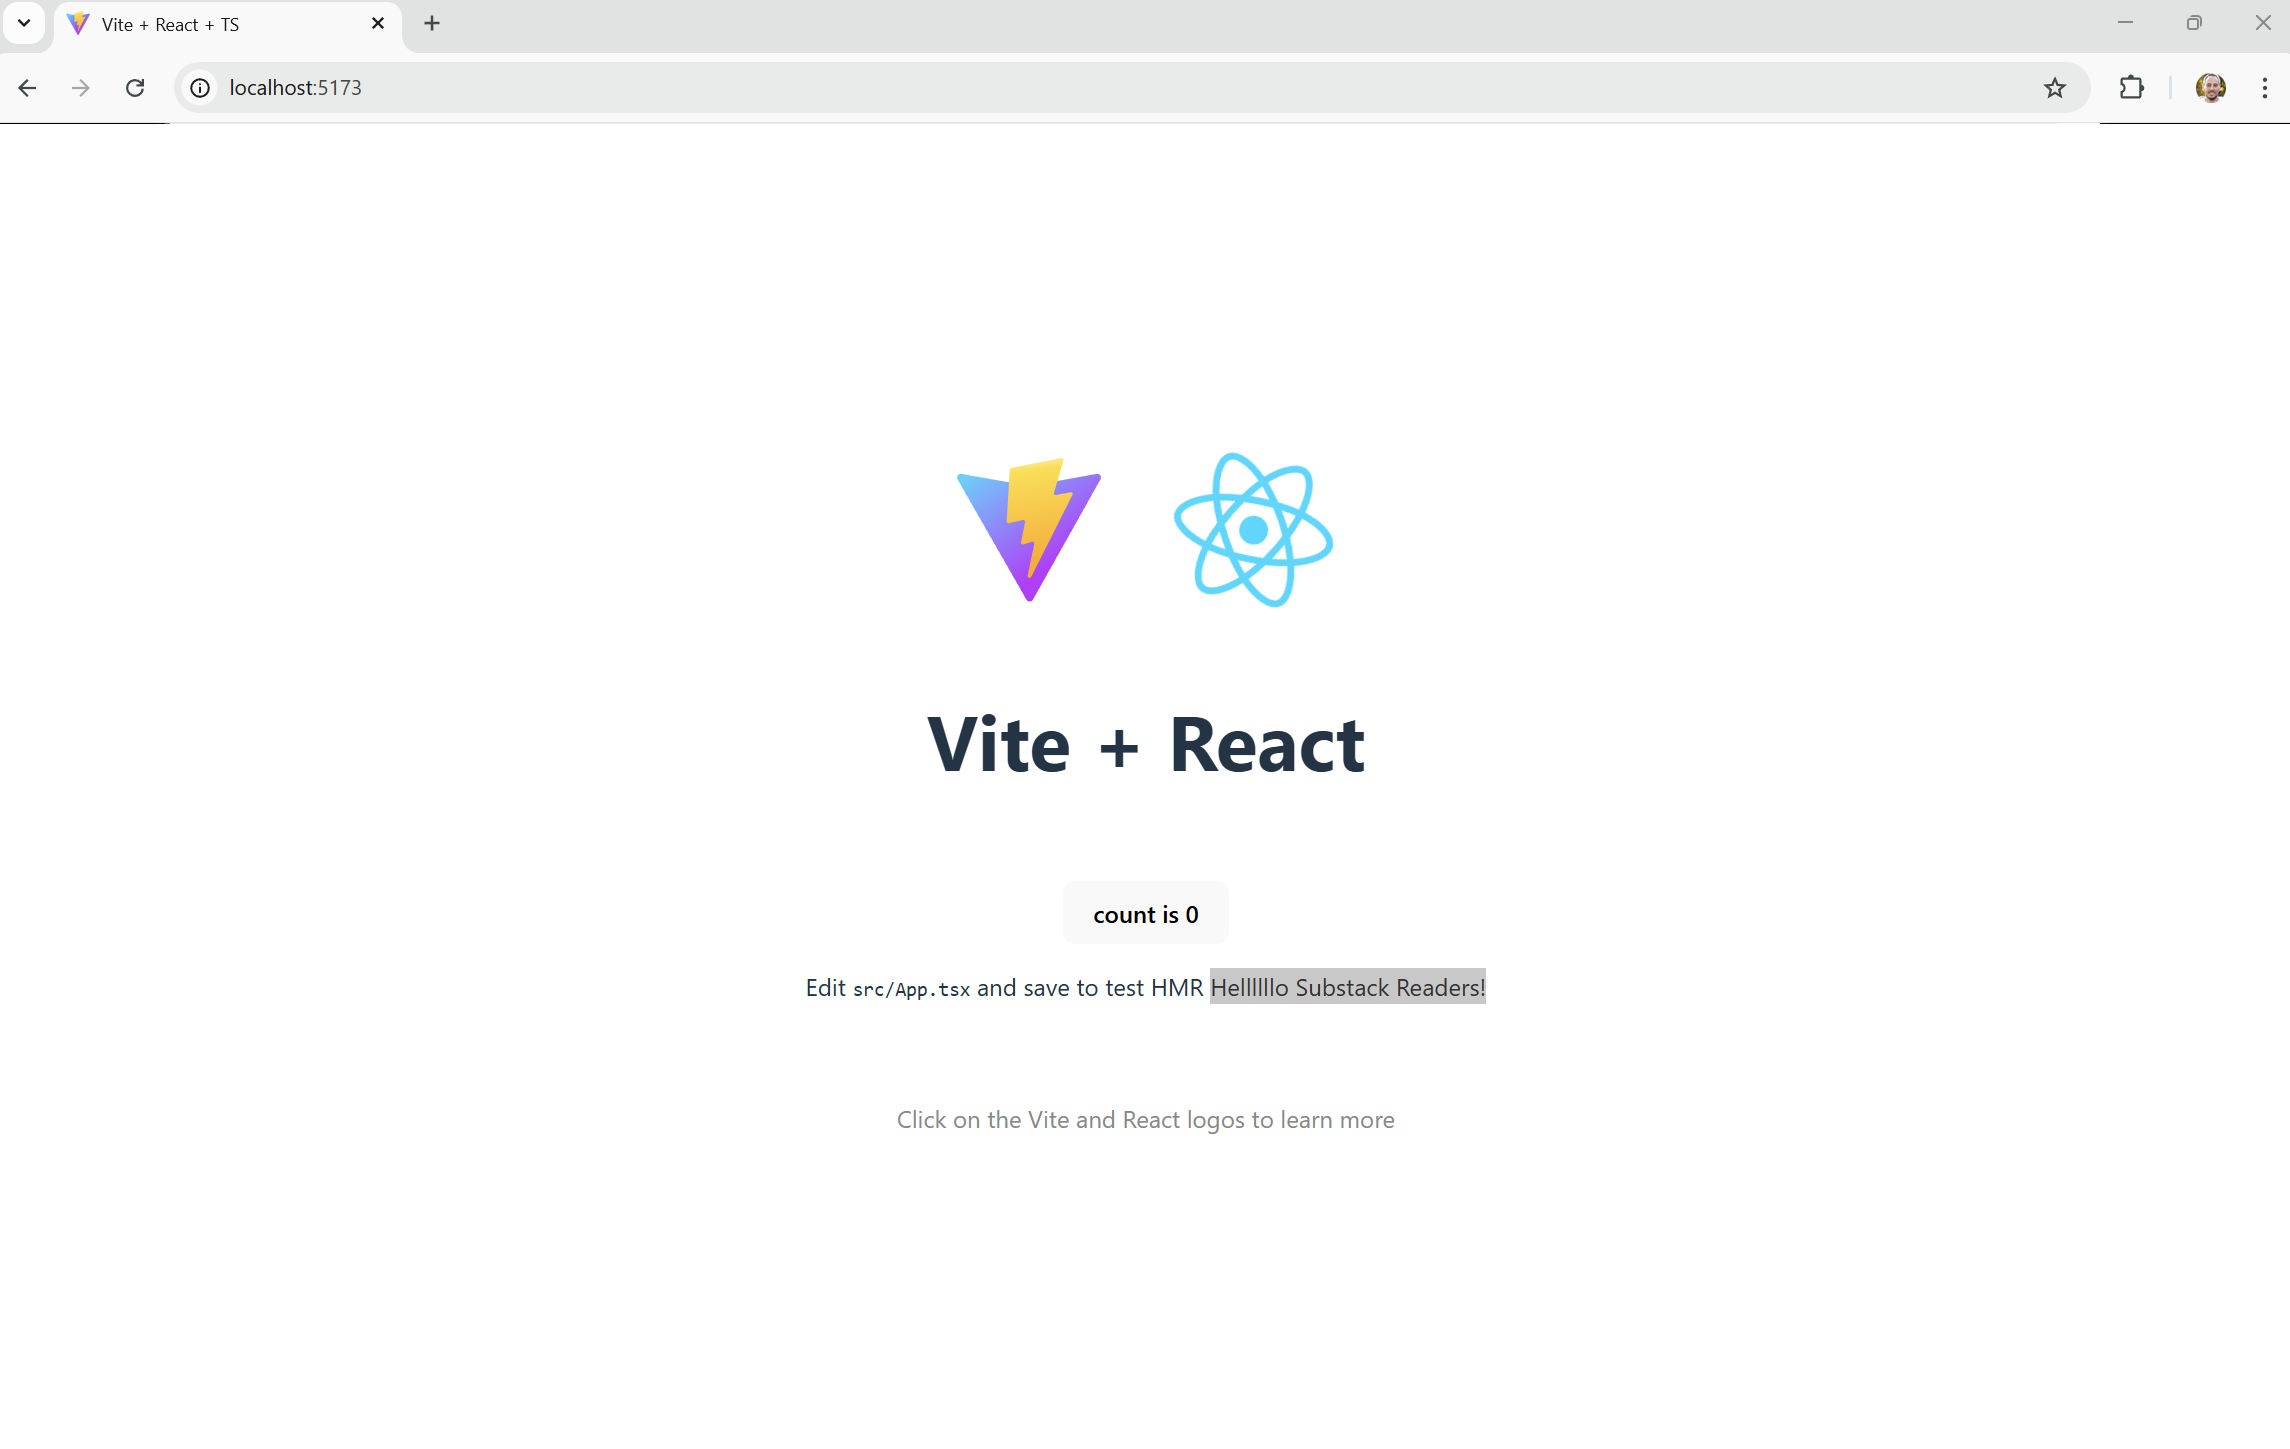
For my example, the URL localhost is 5173. So when I grab that URL and put it into a browser…. this is what I get:
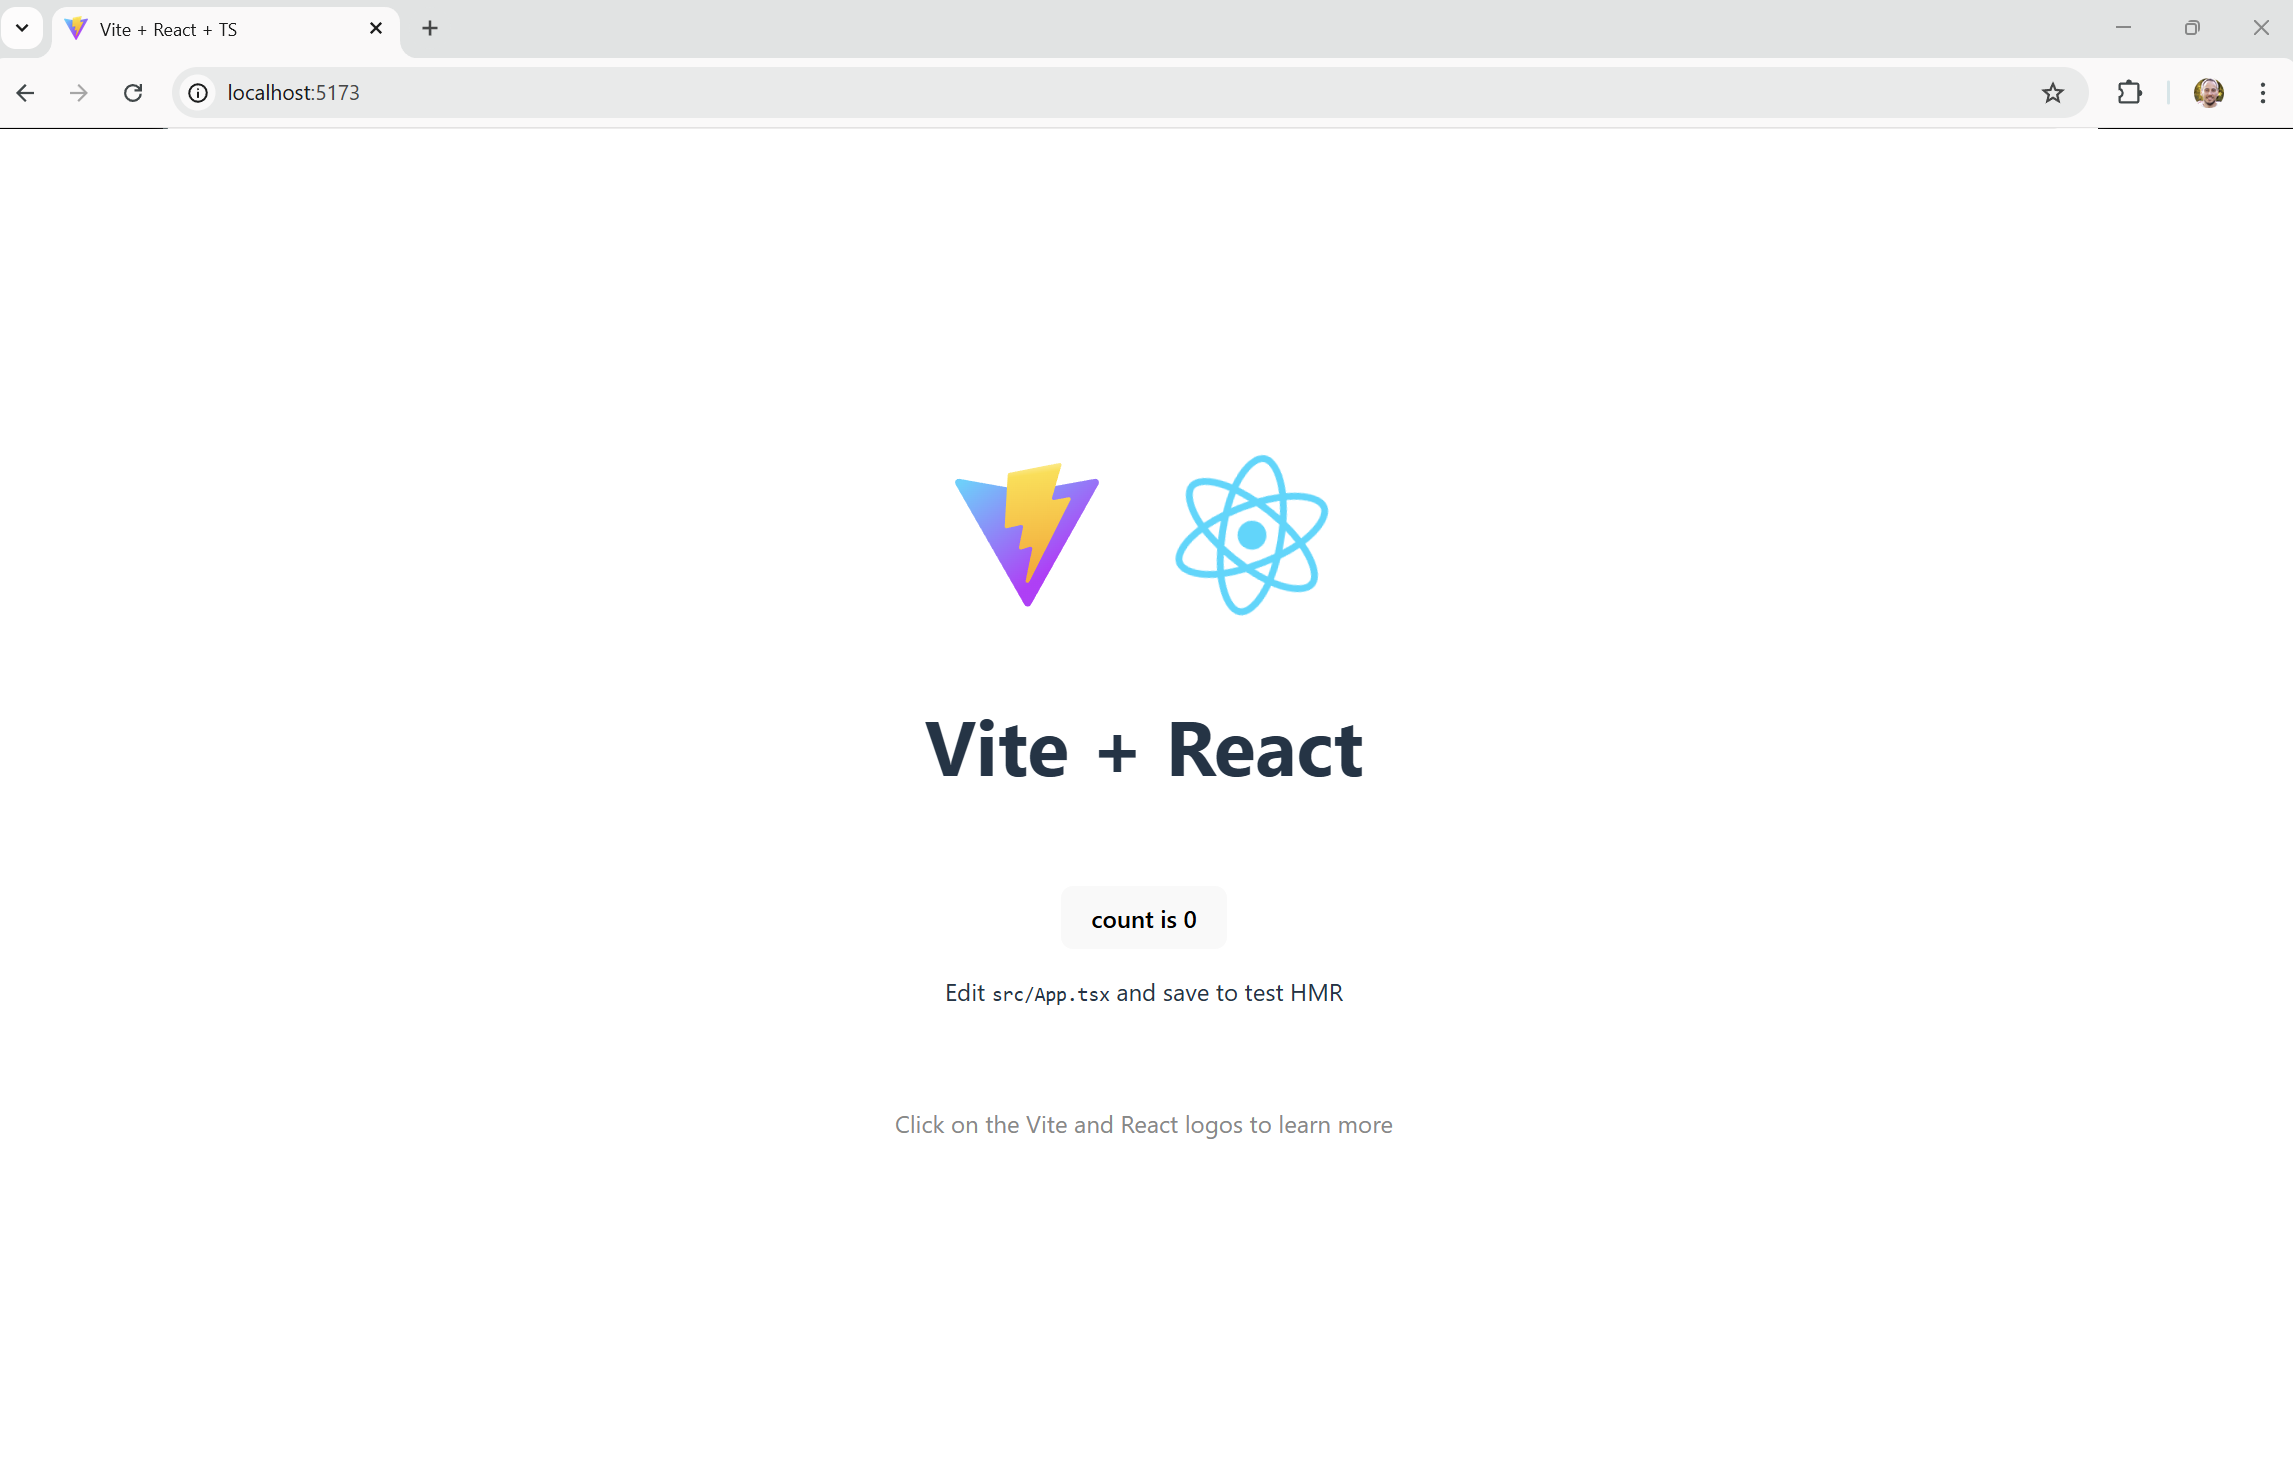
We now have our web app running locally.
Whenever we say something is running locally, that means this is running off of our local computer. If I give the following URL (http://localhost:5173/) to someone that is not on my computer, they will not see my application running.
For someone to see our app, we need to host our app. We can chat more about how to do just that using Vercel later.
Step 4: Modify Your App - Now we have fun
On the left-hand panel, you’ll see the code file structure where you’ll see files such as:
.css files - CSS = Cascading Style Sheet, these are files that help format the styling for the look and feel of your web app. Think about font sizing, padding, coloring, etc.
.tsx files - Typescript, this is a programming language file that is an enhanced version of a super old, but popular, language called JavaScript. Our Typescript files will hold all of our programming logic. If this, then that.
.json files - JavaScript Object Notation, this is a type of file that houses configuration information for your project. We won’t be messing with these files too often.
.env files - Environment files, these are files that help explain global values that tells our application how to interpret different environments between our local (our computer) and our hosted (Vercel). This becomes more important the more mature our application becomes.
Open
src/App.jsxand change the content to add something silly like:
function App() {
  Helllllo Substack Readers
}
Save the file, and your browser will update in real time.
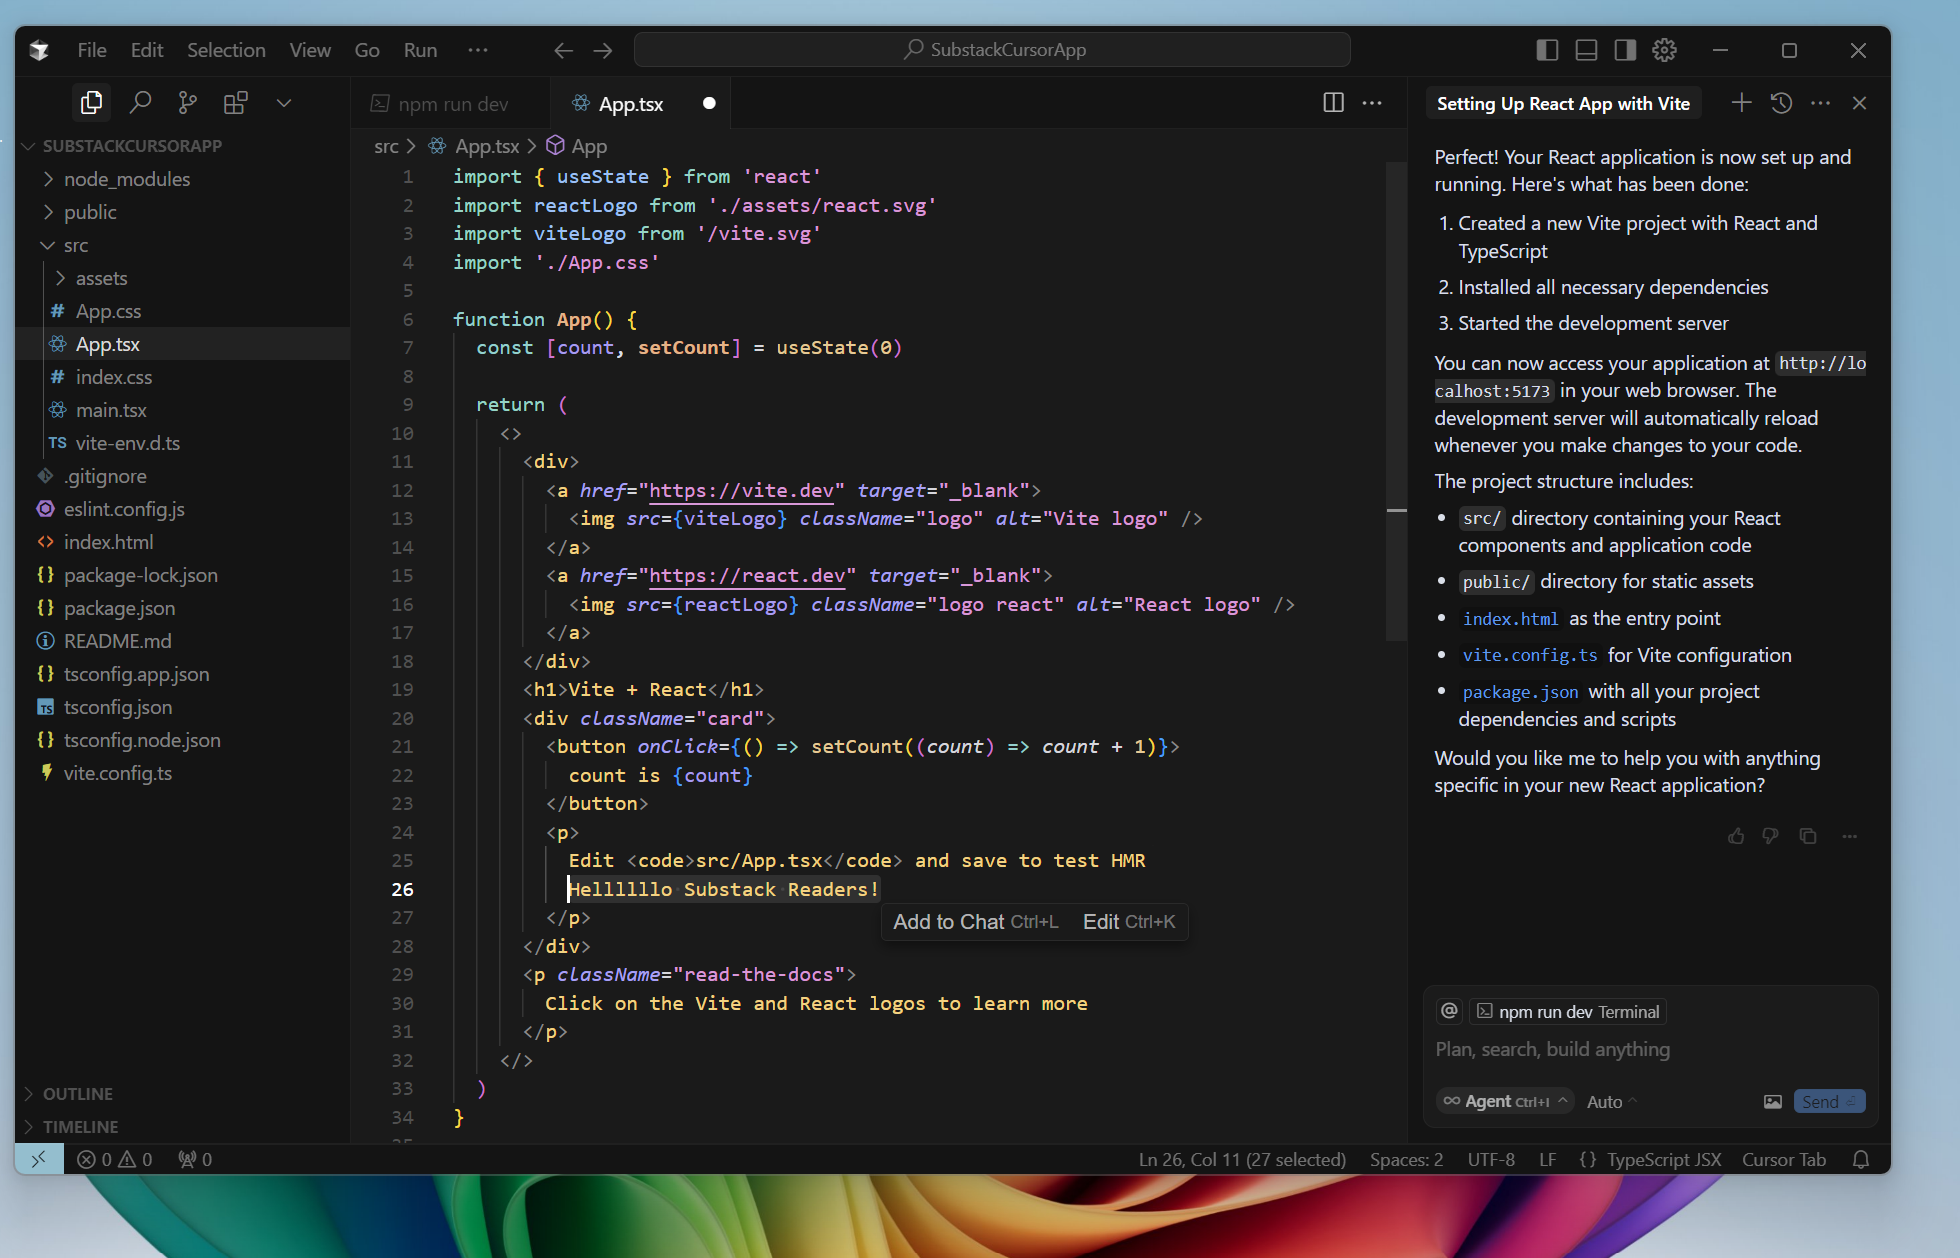
This is a small and silly example of the power you now have over the code you build for this app.
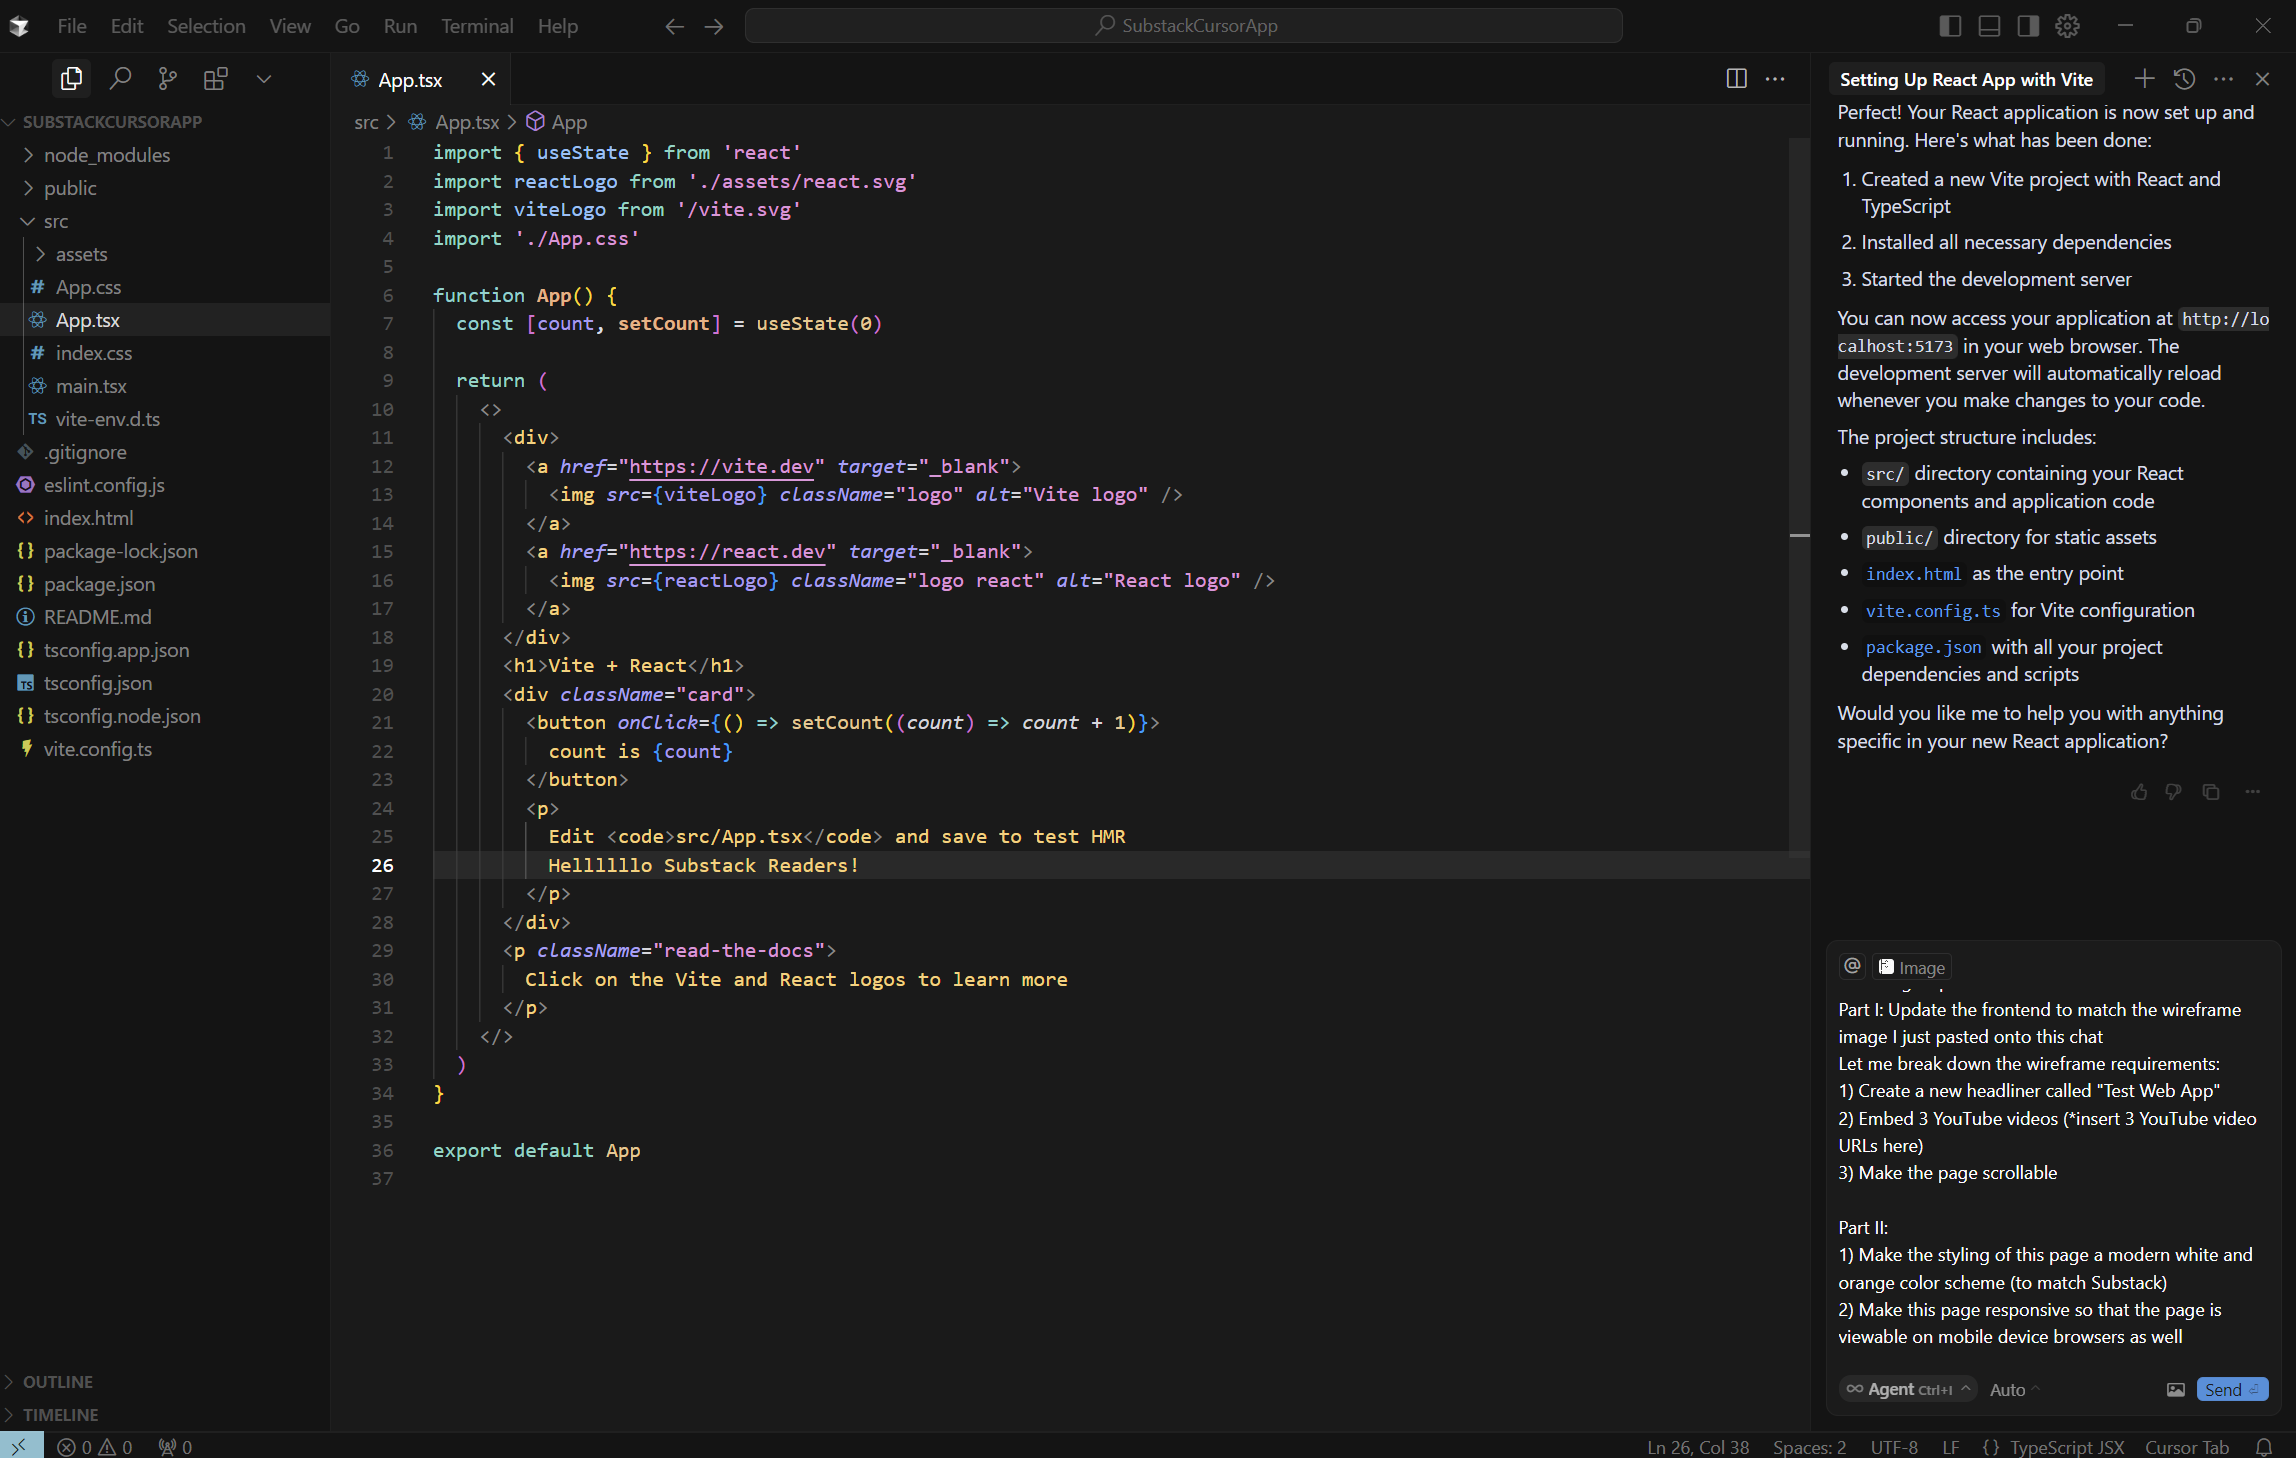
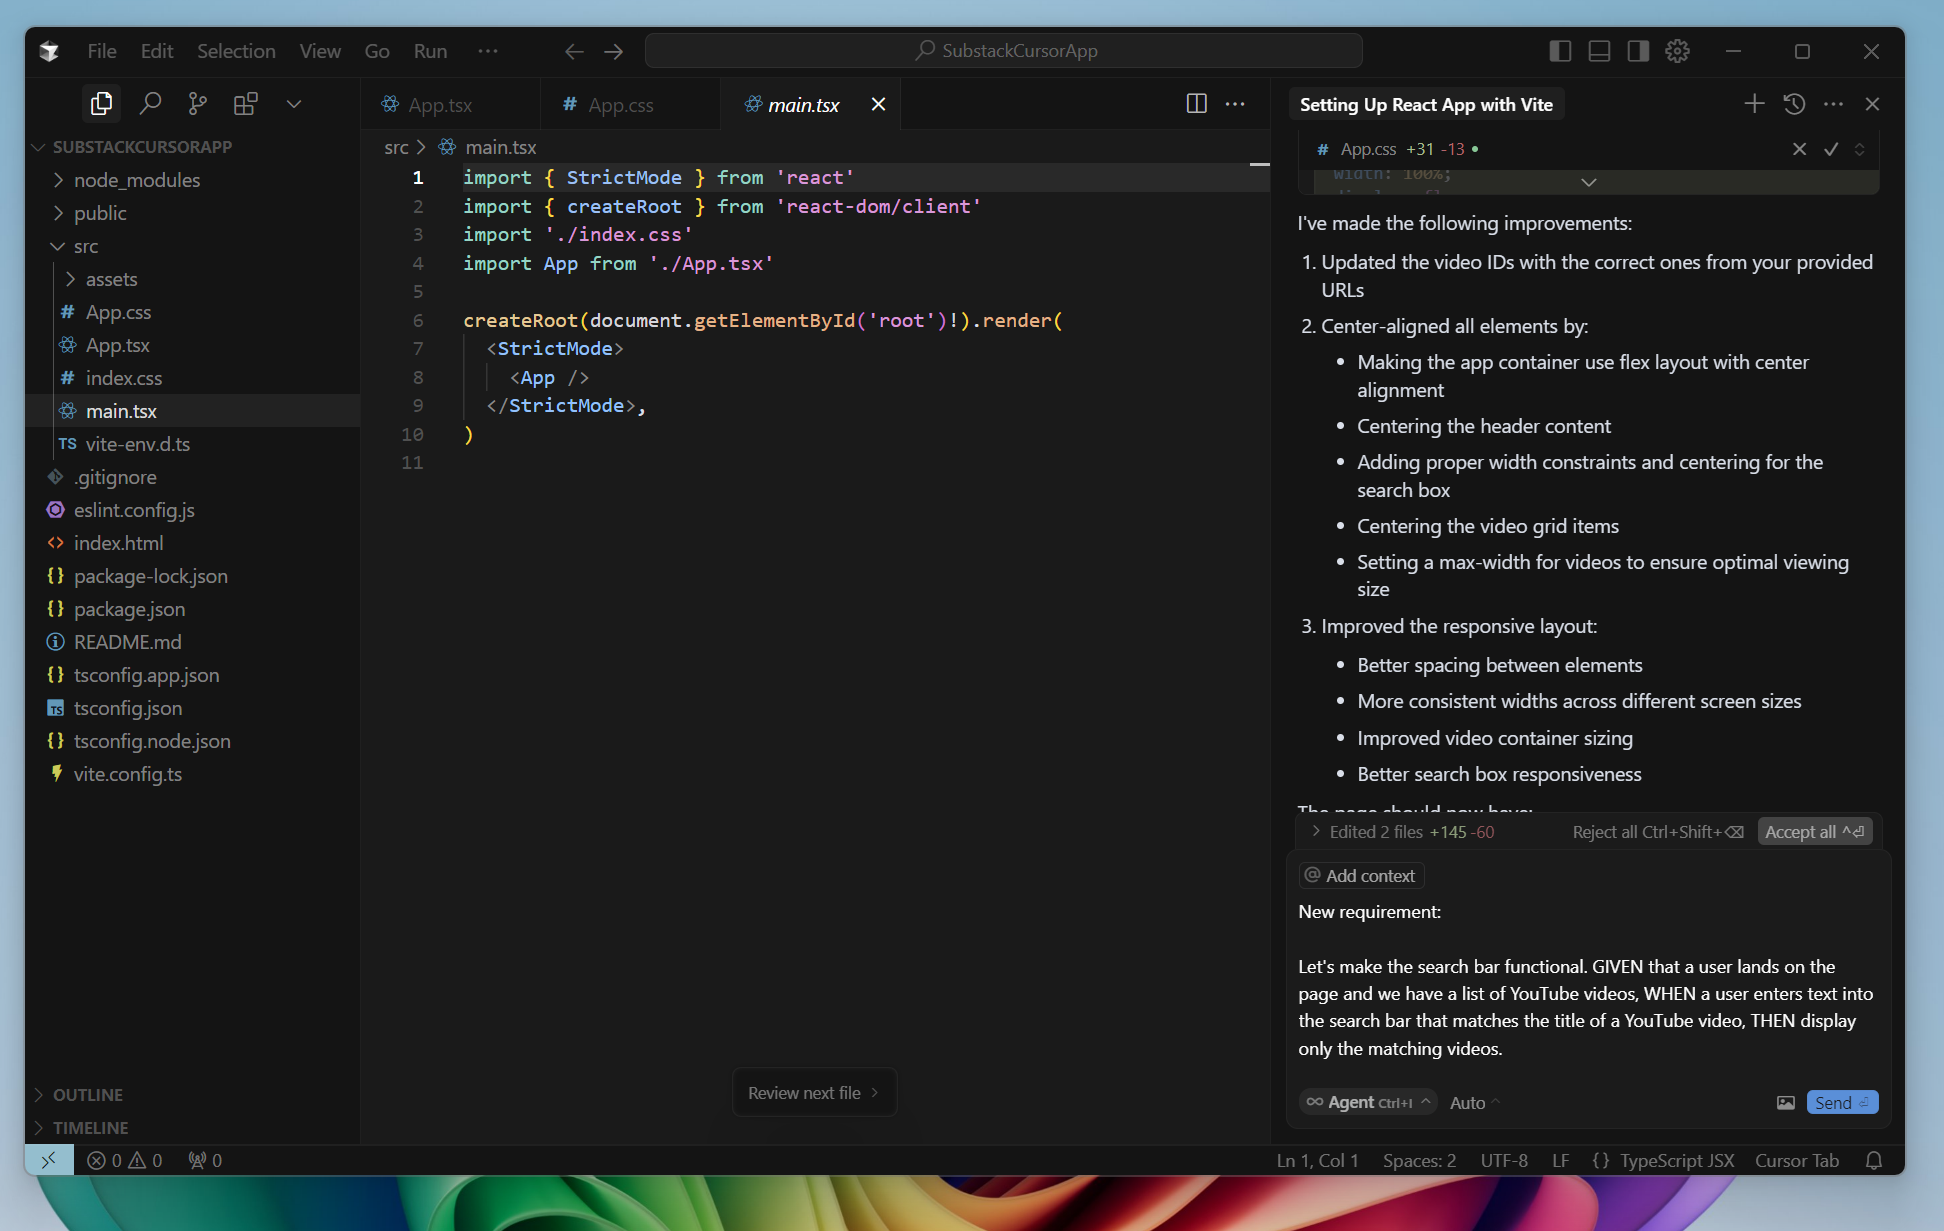
Now let’s turn our web app into something useful! Let’s create a web app that allows you to embed YouTube videos and a user can scroll through them. This is just a starter app, so let’s not go crazy. To show you the power of the Claude AI Agent, why don’t we provide it with the following wireframe:

So let’s create the following prompt (when we give a prompt, the AI will be very literal, so this is where prompt engineering is going to be crucial. The more specificity and guard rails, the better):
Let's modify our web app landing page with the following requirements:
Part I: Update the frontend to match the wireframe image I just pasted onto this chat
Let me break down the wireframe requirements:
1) Create a new headliner called "Test Web App"
2) Embed 3 YouTube videos (*insert 3 YouTube video URLs here)
3) Make the page scrollable

Part II:
1) Make the styling of this page a modern white and orange color scheme (to match Substack)
2) Make this page responsive so that the page is viewable on mobile device browsers as well
Once you hit Enter on this request, Cursor is going to do a lot of interpretation of these requirements. Because AI Agents are probabilistic in nature, this means that this is where our tutorial is likely to diverge in terms of results (and honestly, that’s super fun).
p.s. - do NOT forget to copy and paste the wireframe image into the prompt chat also. Look at my image below and you’ll see the word “Image” above my prompt, that is the copy/paste of the wireframe image.
Alright, here’s how it went for me:
I’m actually leaving this mistake here to show examples of walking through troubleshooting with Cursor. My example forgot to submit the actual YouTube URLs, so I told Cursor to go build this site with YouTube videos that I never actually provided.
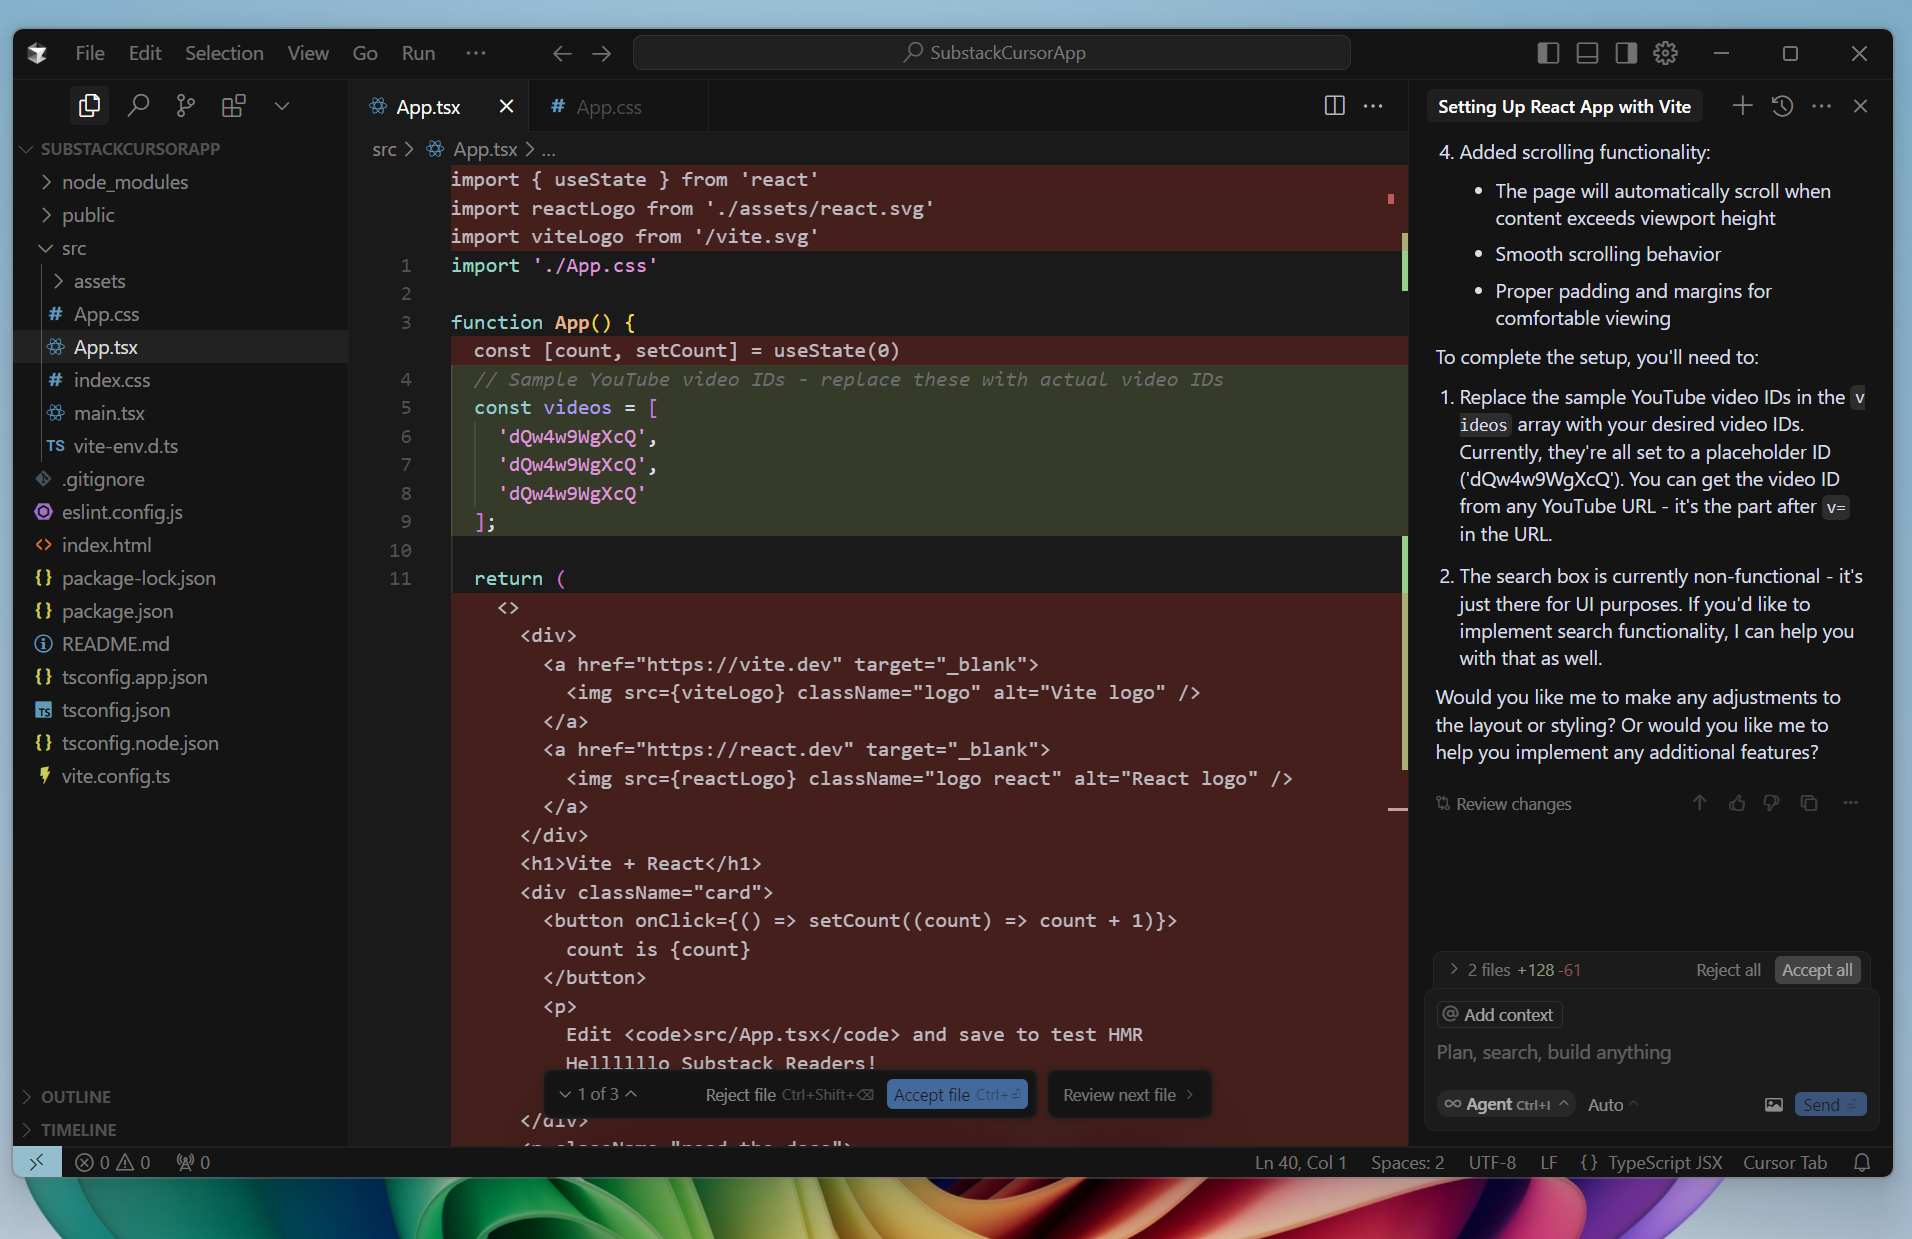
Note - Before you accept files, you can actually refresh your web page to see what it looks like and then choose to either accept the code changes or not. This is really more of a hack for web files (Javascript, Typescript) and less of a useful thing when changing backend code.
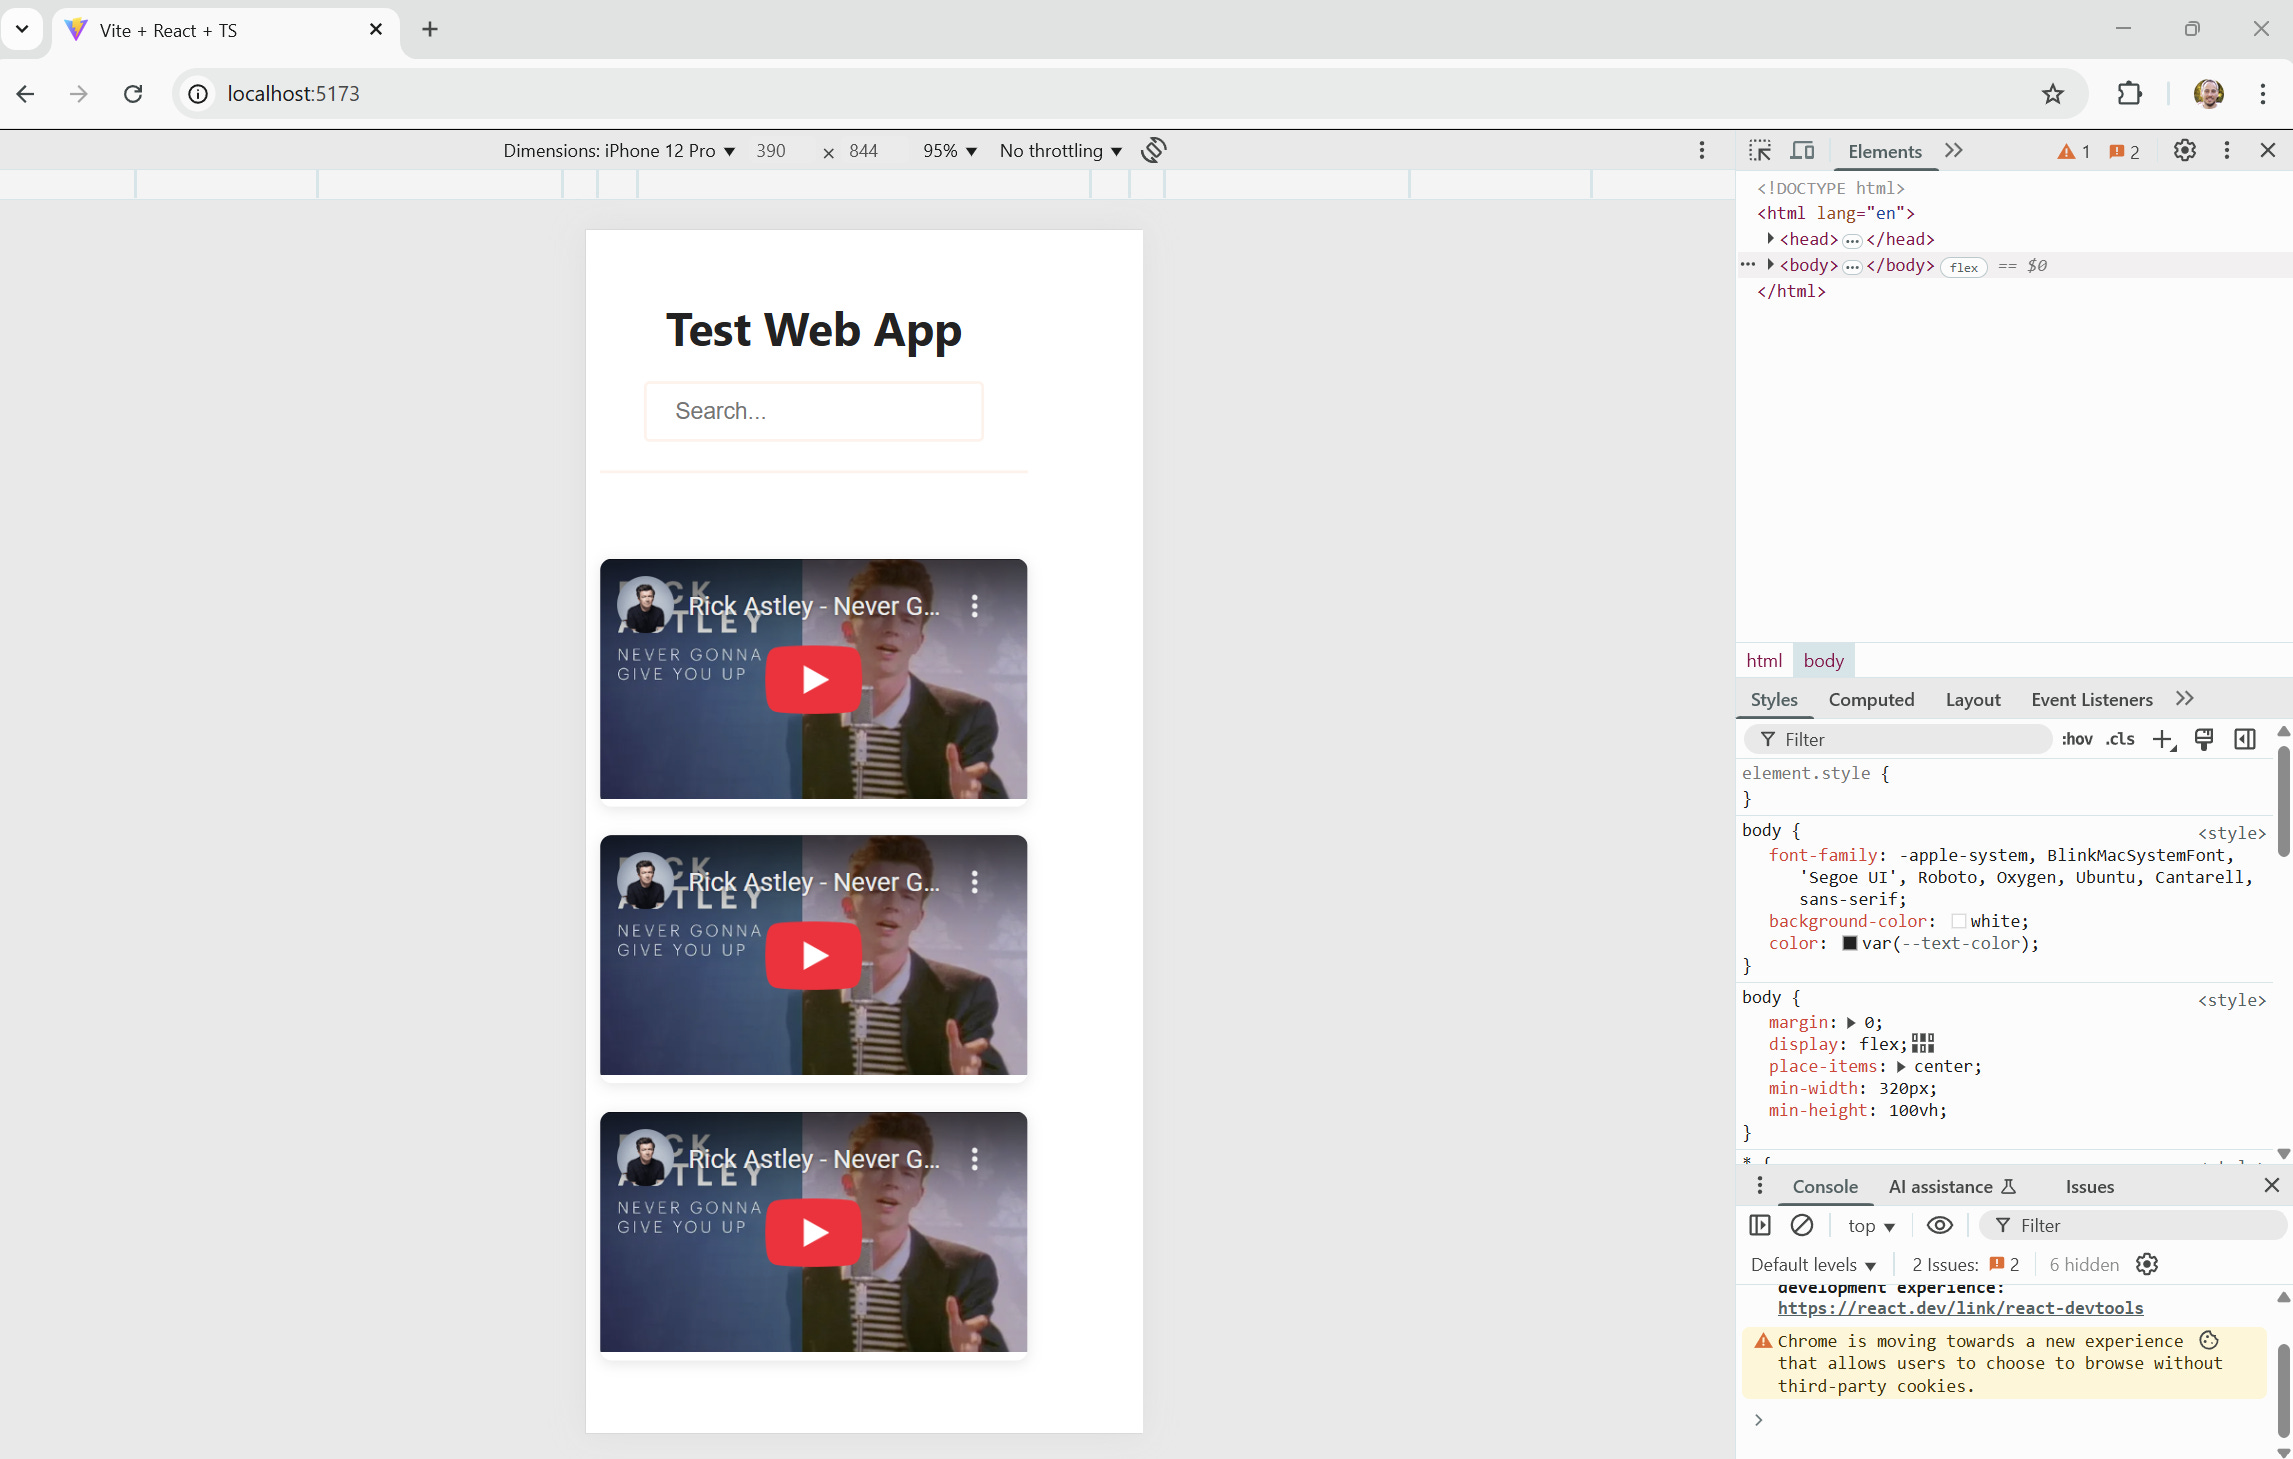
LOL - Cursor automatically pre-filled those YouTube videos with…. Rick Roll. AI Agents have a sense of humor:
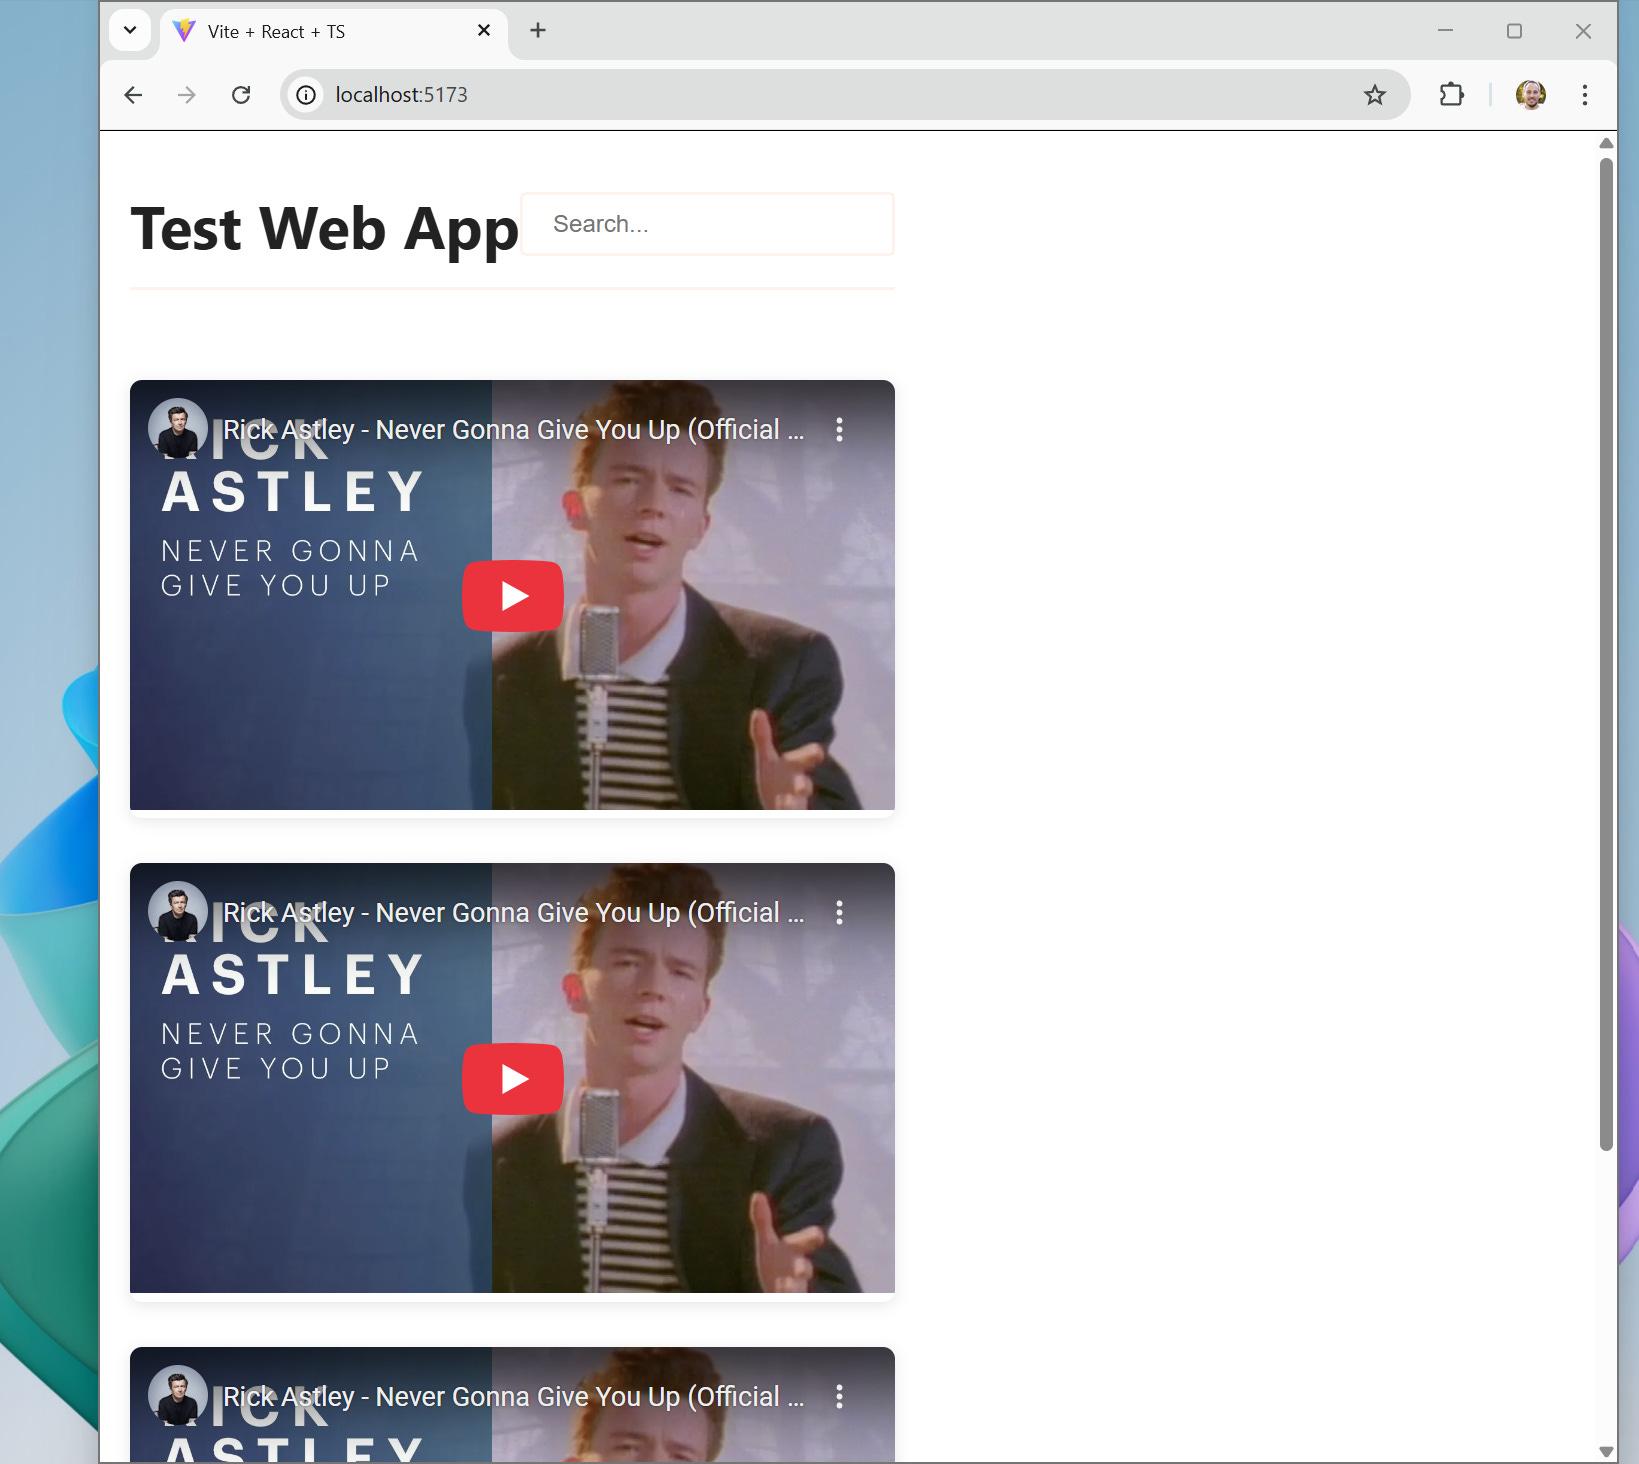
So let’s analyze our web app - a few thoughts:
The styling isn’t anything special, although I do see hints of orange.
Everything is left justified which is a really poor use of real estate for the page
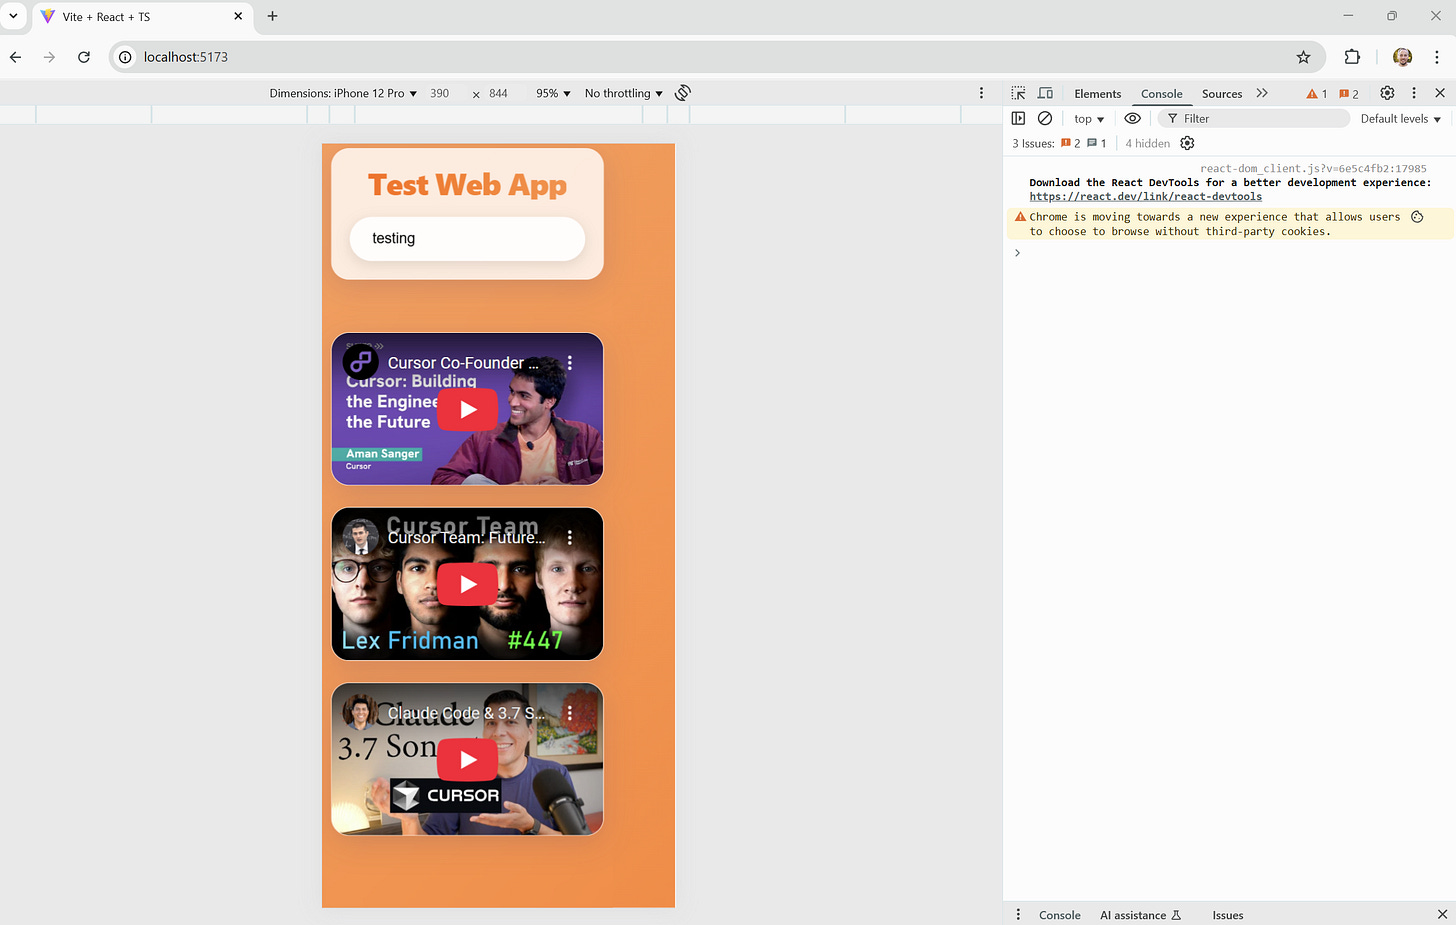
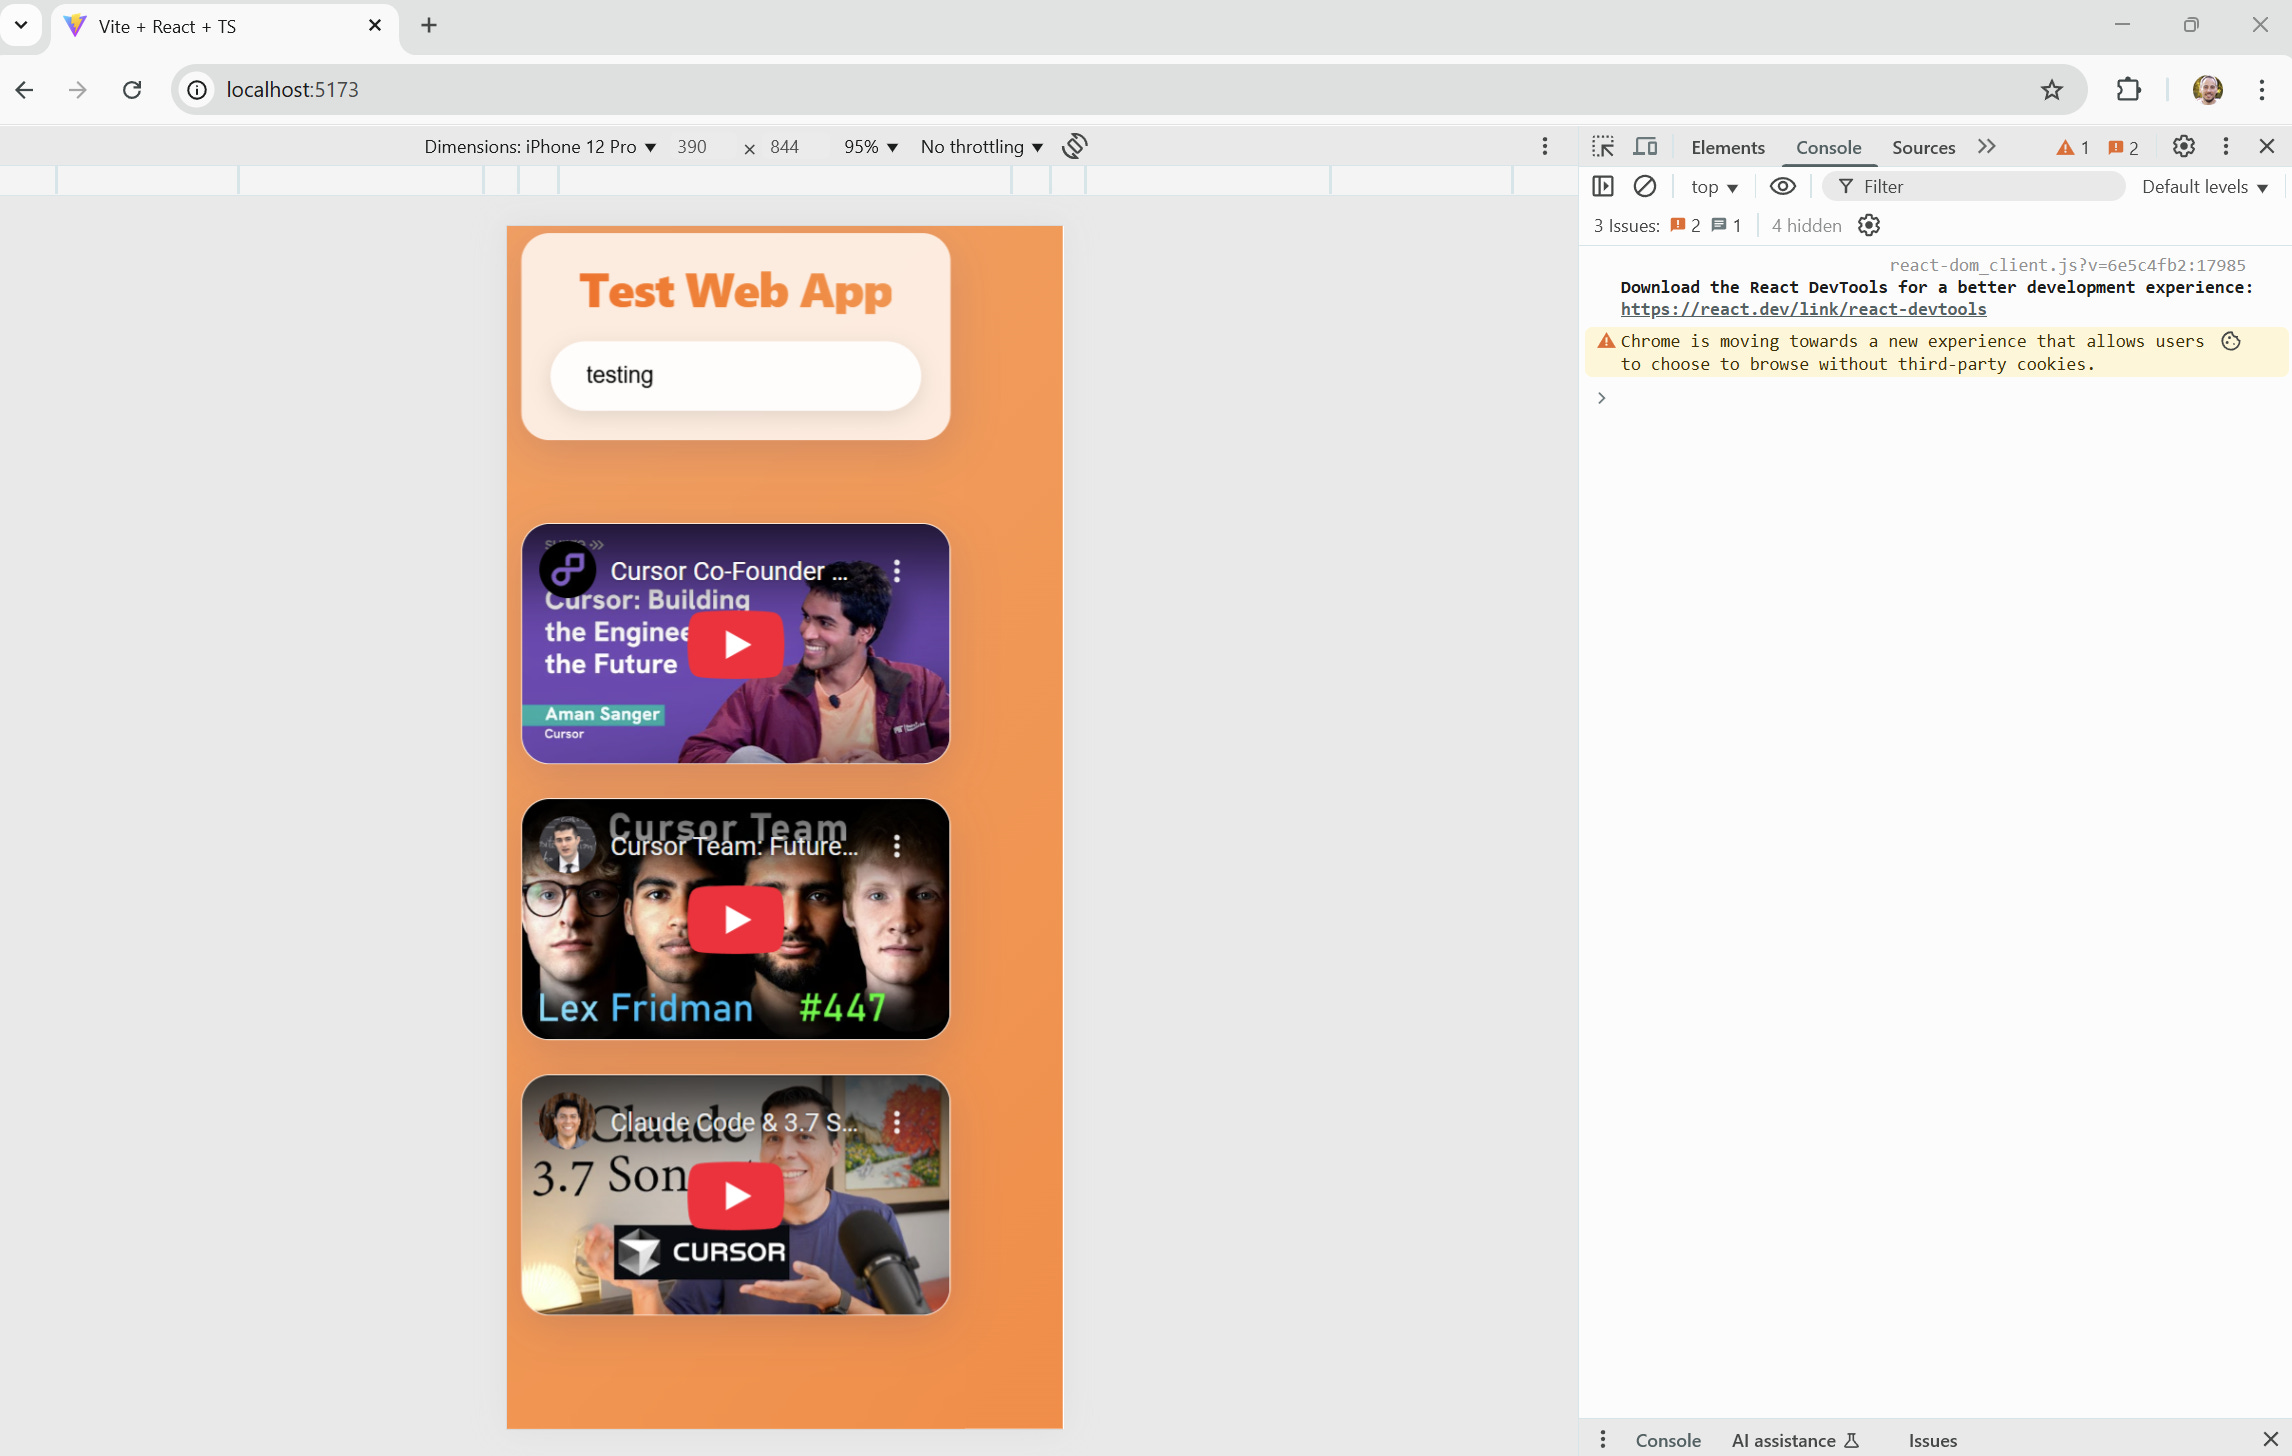
The web app IS actually web responsive and looks decent on a mobile browser. To switch to a mobile view, on a browser you can press F12 or right-click and click Inspect. You can select Device Toolbar/Emulation depending on Browser and select device type. Here, I selected an iPhone 12 Pro

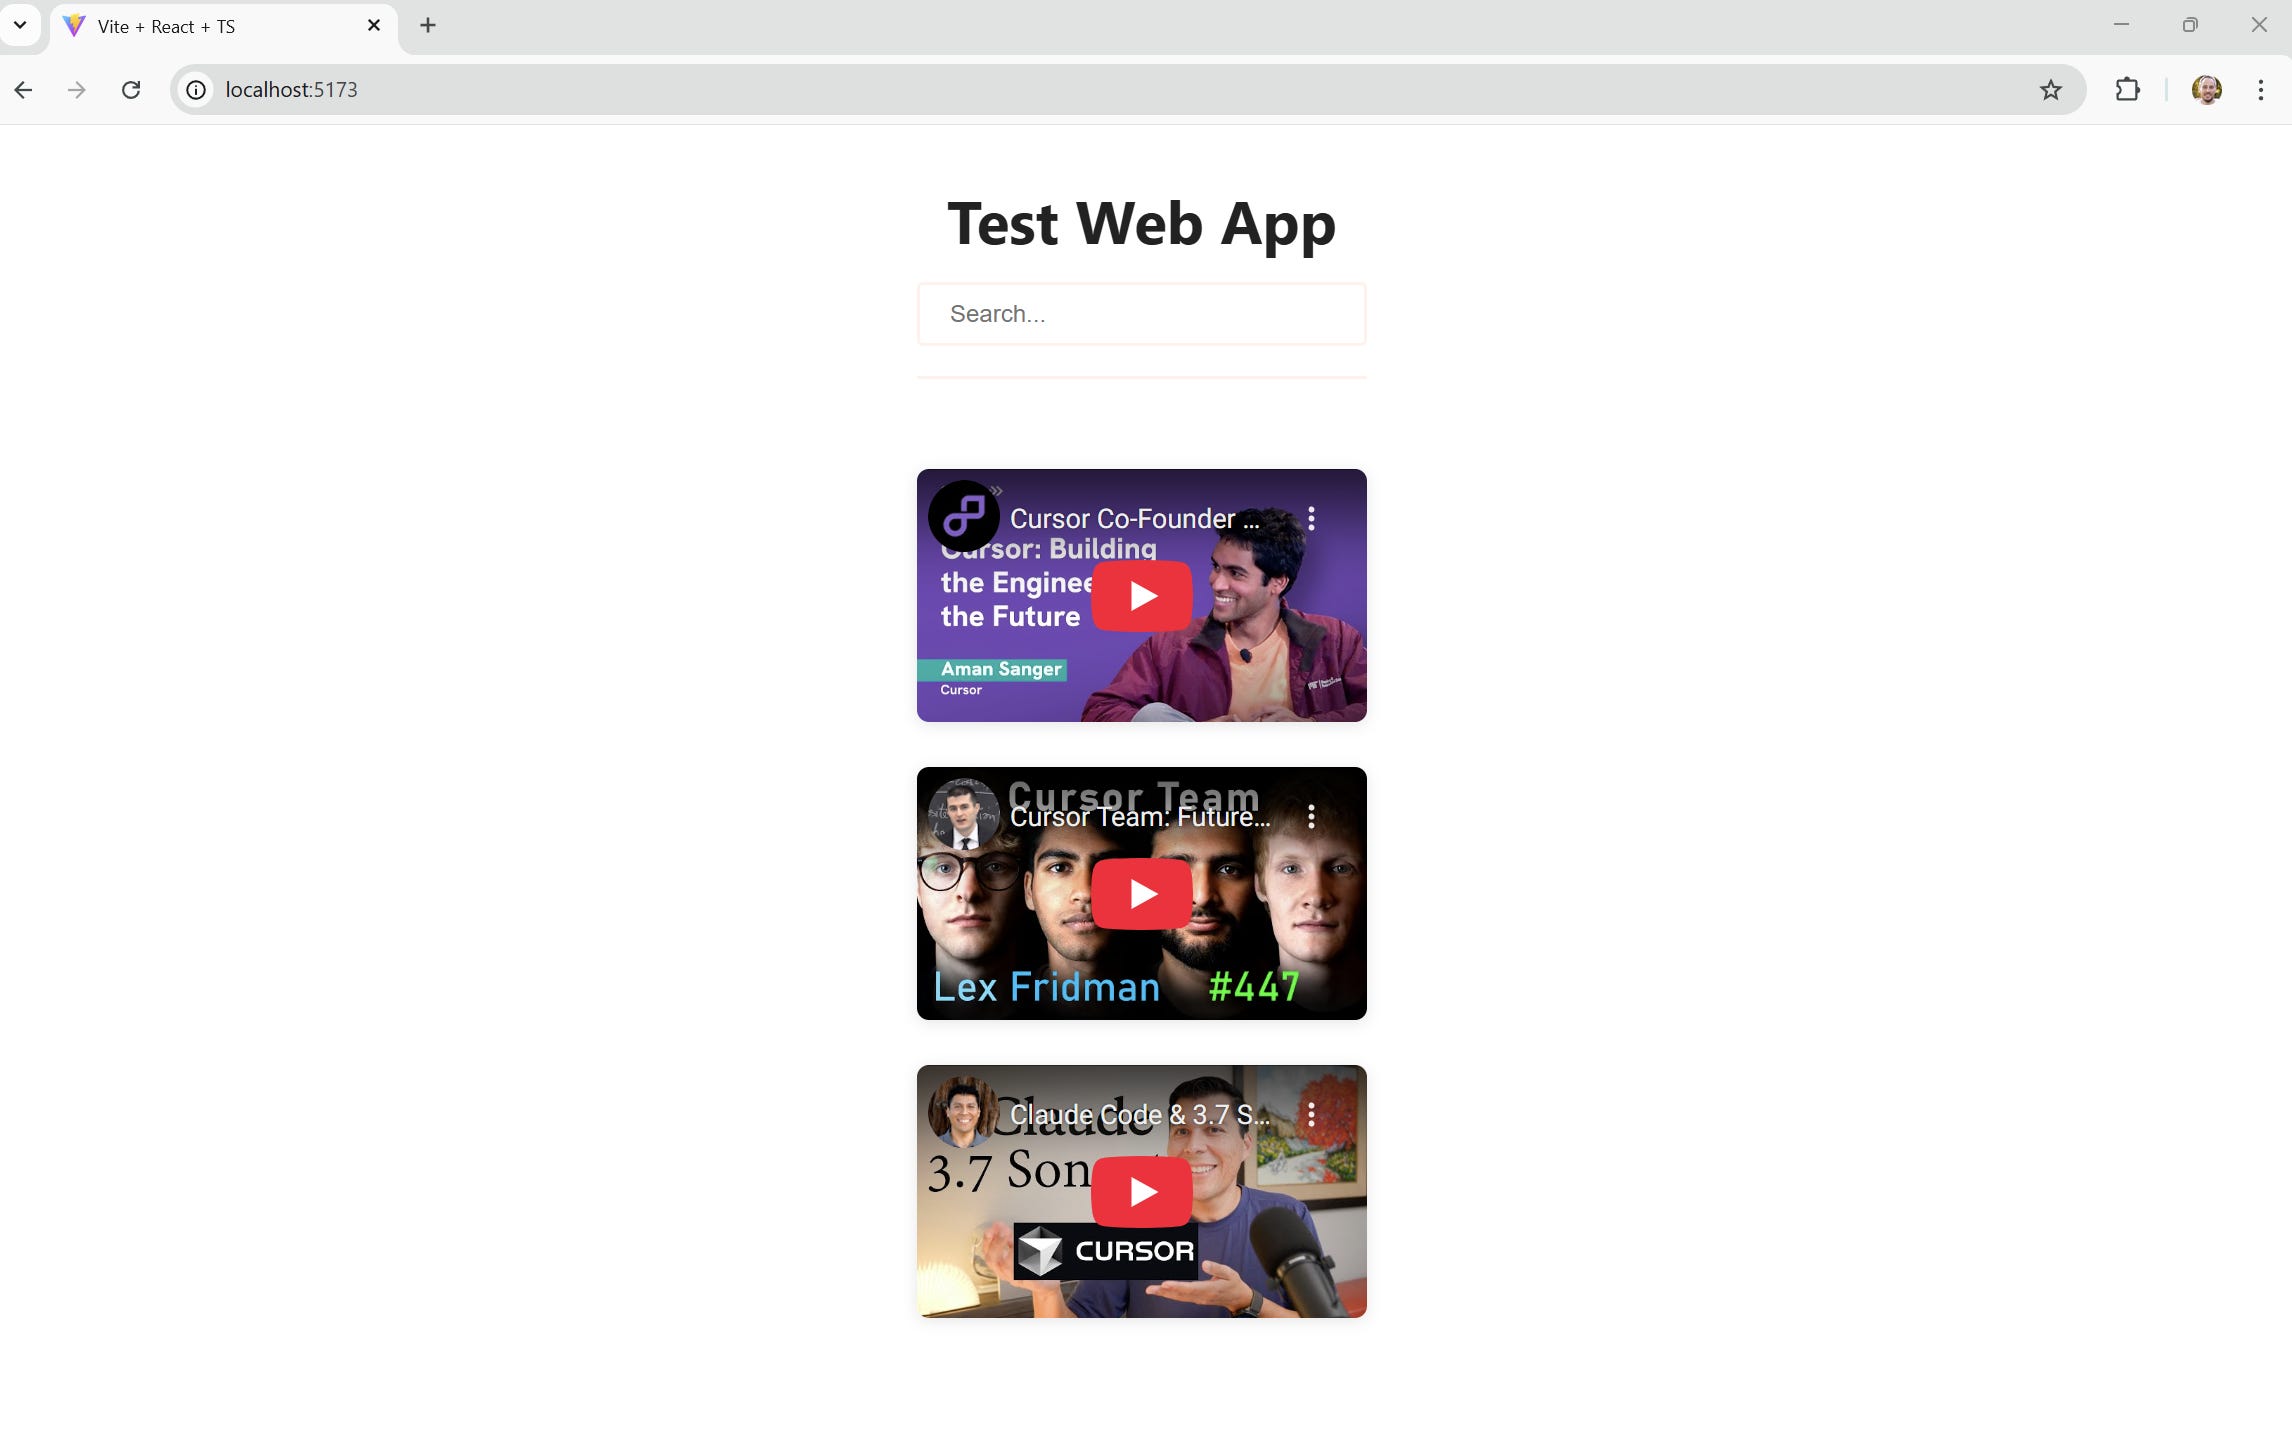
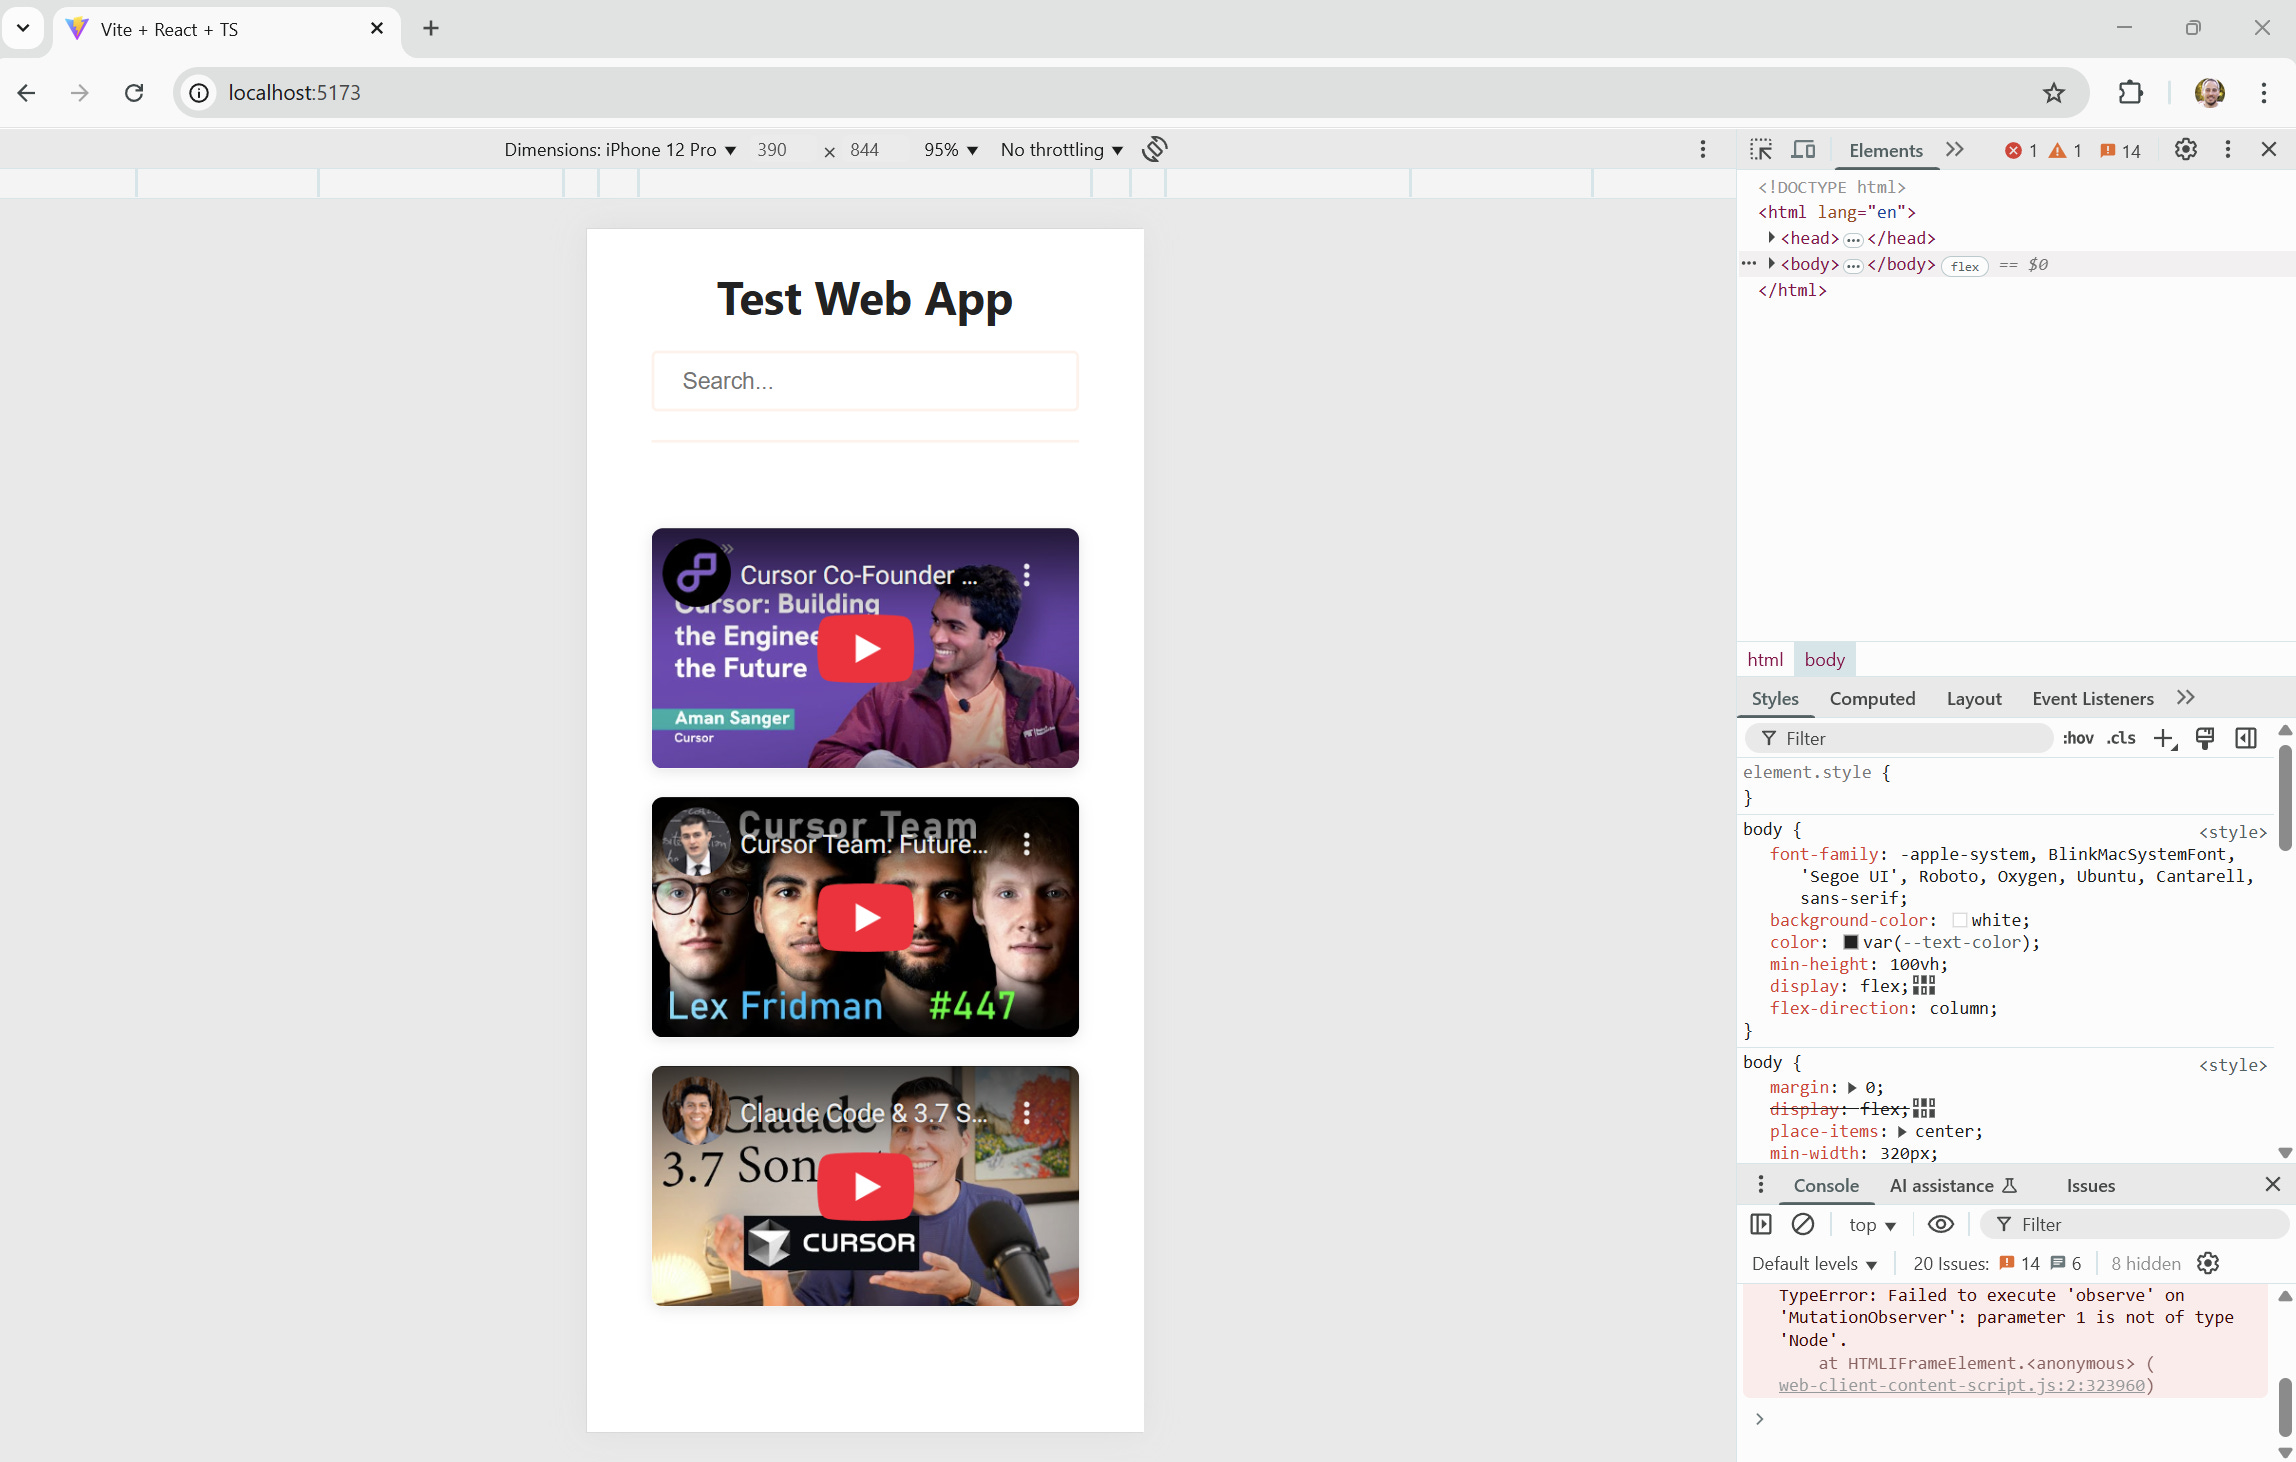
Let’s embed non-Rick Roll URLs and see if we can’t spruce up our app with a few prompts:

Here’s the result of these changes on the web app:
And now here is the result on mobile:
A couple of ideas I have after these changes:
We could add search bar functionality to search for a video
We could add functionality to add new videos
We likely want to keep tinkering with the desktop view so that the videos take up more of the page for better UX
We could play around with styling and ask Cursor to look into other fun modern frontend libraries like Tailwind CSS to make things look even more sleek.
However, this guide would likely be a full dissertation long if we document all of these changes. So, we’ll take on one more change. Let’s take on the Search Bar functionality challenge with this prompt:
The format in which I gave this requirement is called Gherkin format. This is a very common format used by product folks in tech. This is also a very readable format of instructions for our Agent AI.
Okay, Cursor decided to use an implementation that requires using a direct connection to YouTube via an API connection:
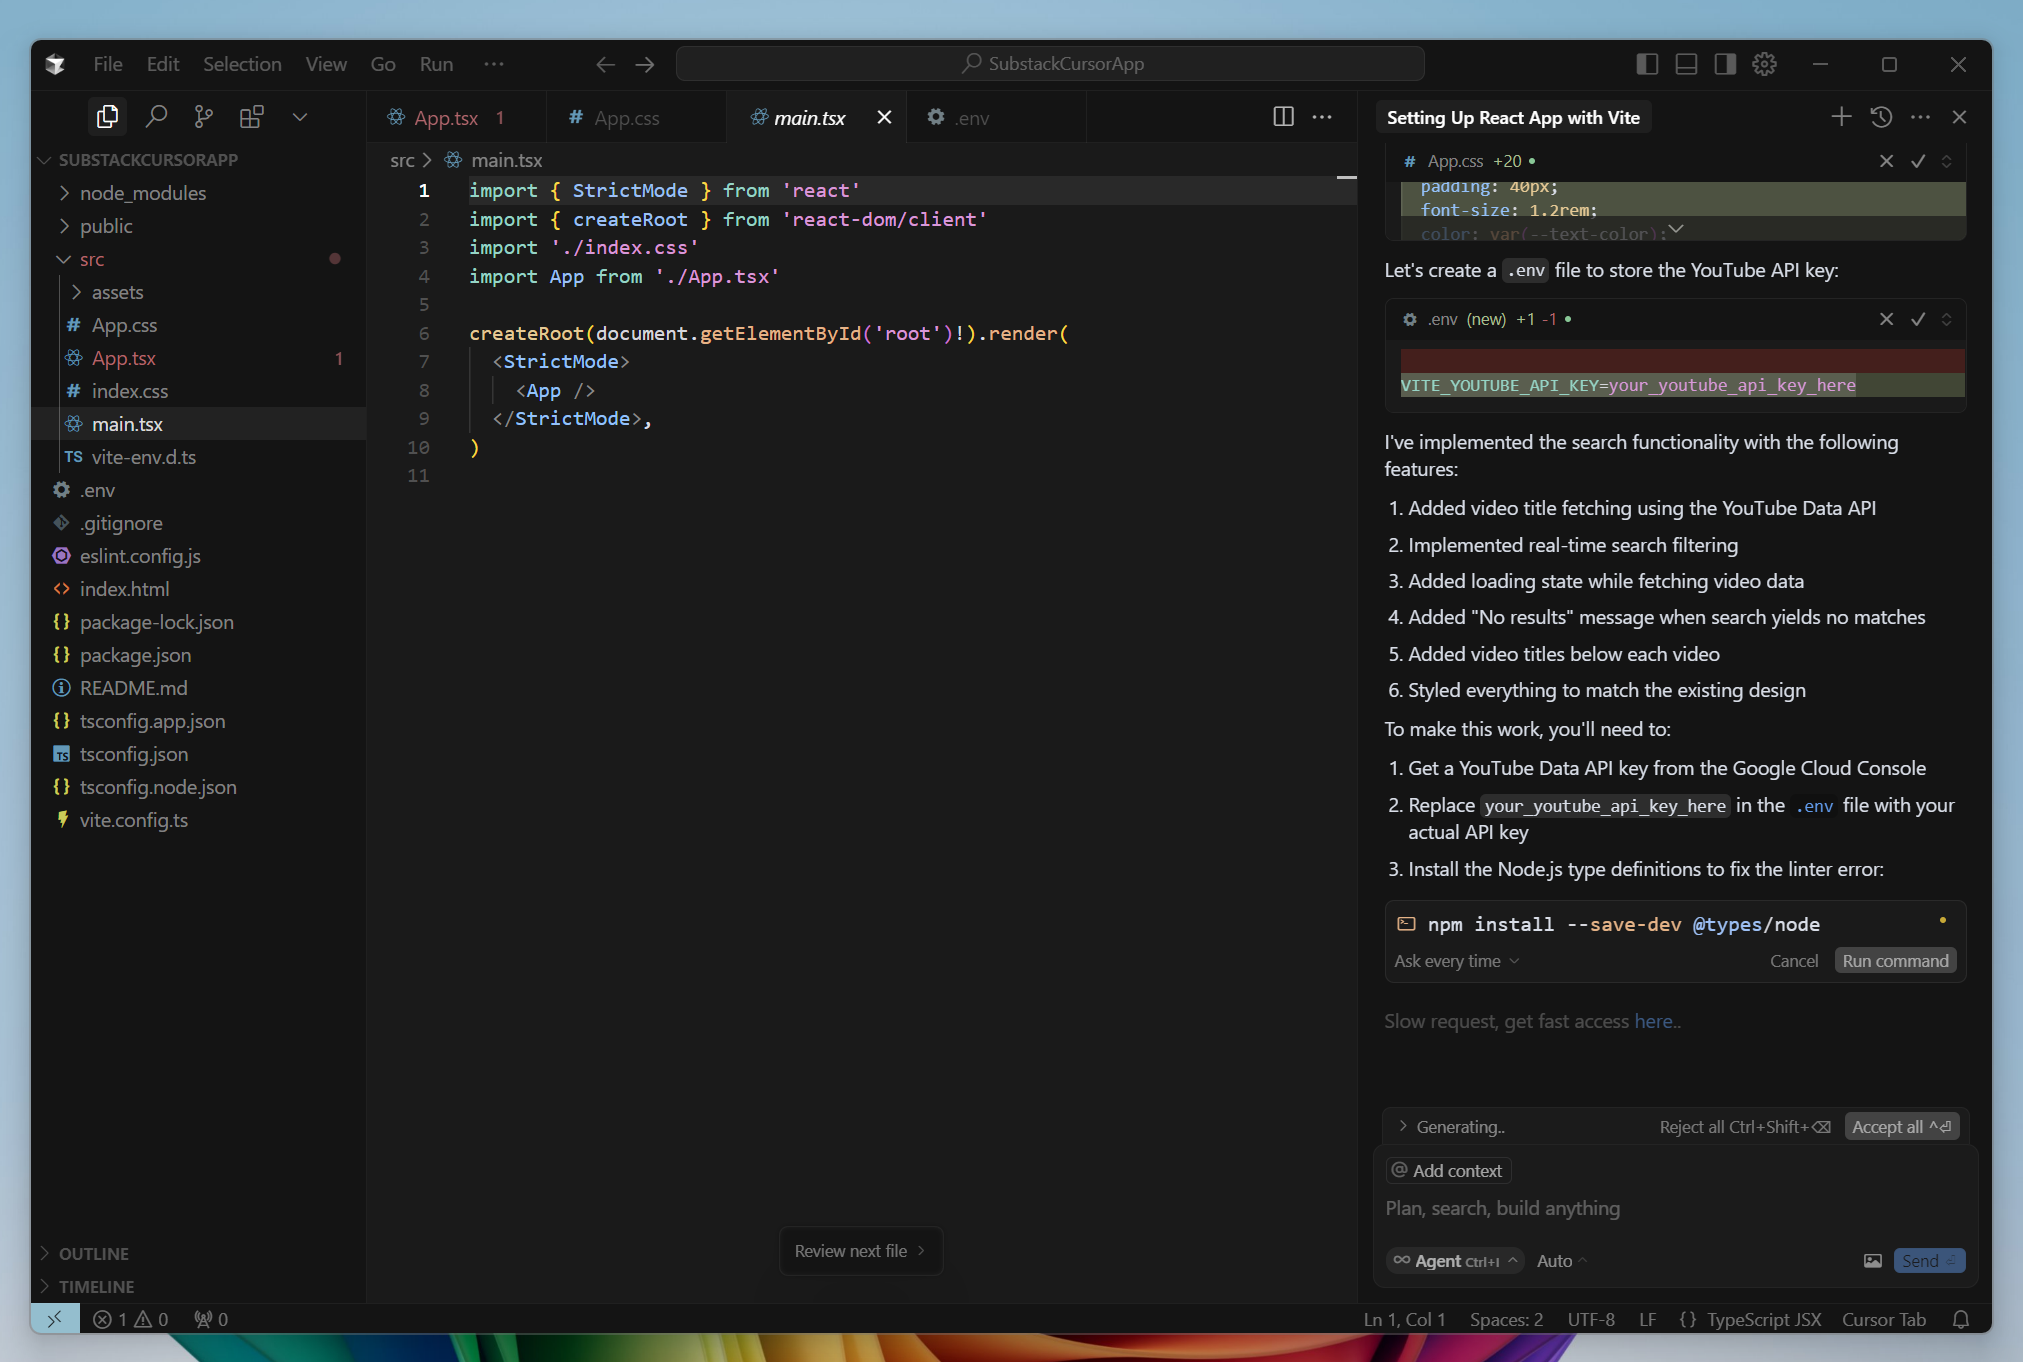
For this to work, now we need to register on YouTube and generate an API key. I’m going to cancel these changes because we should only take on these steps if these are things we actually are trying to do for our apps. Anytime, we take on API connections to other services, we run the risk of being charged per API call (you have to read the pricing agreement carefully, if there is one). For the purposes of this walkthrough, I think this still shows examples of how we could do this.
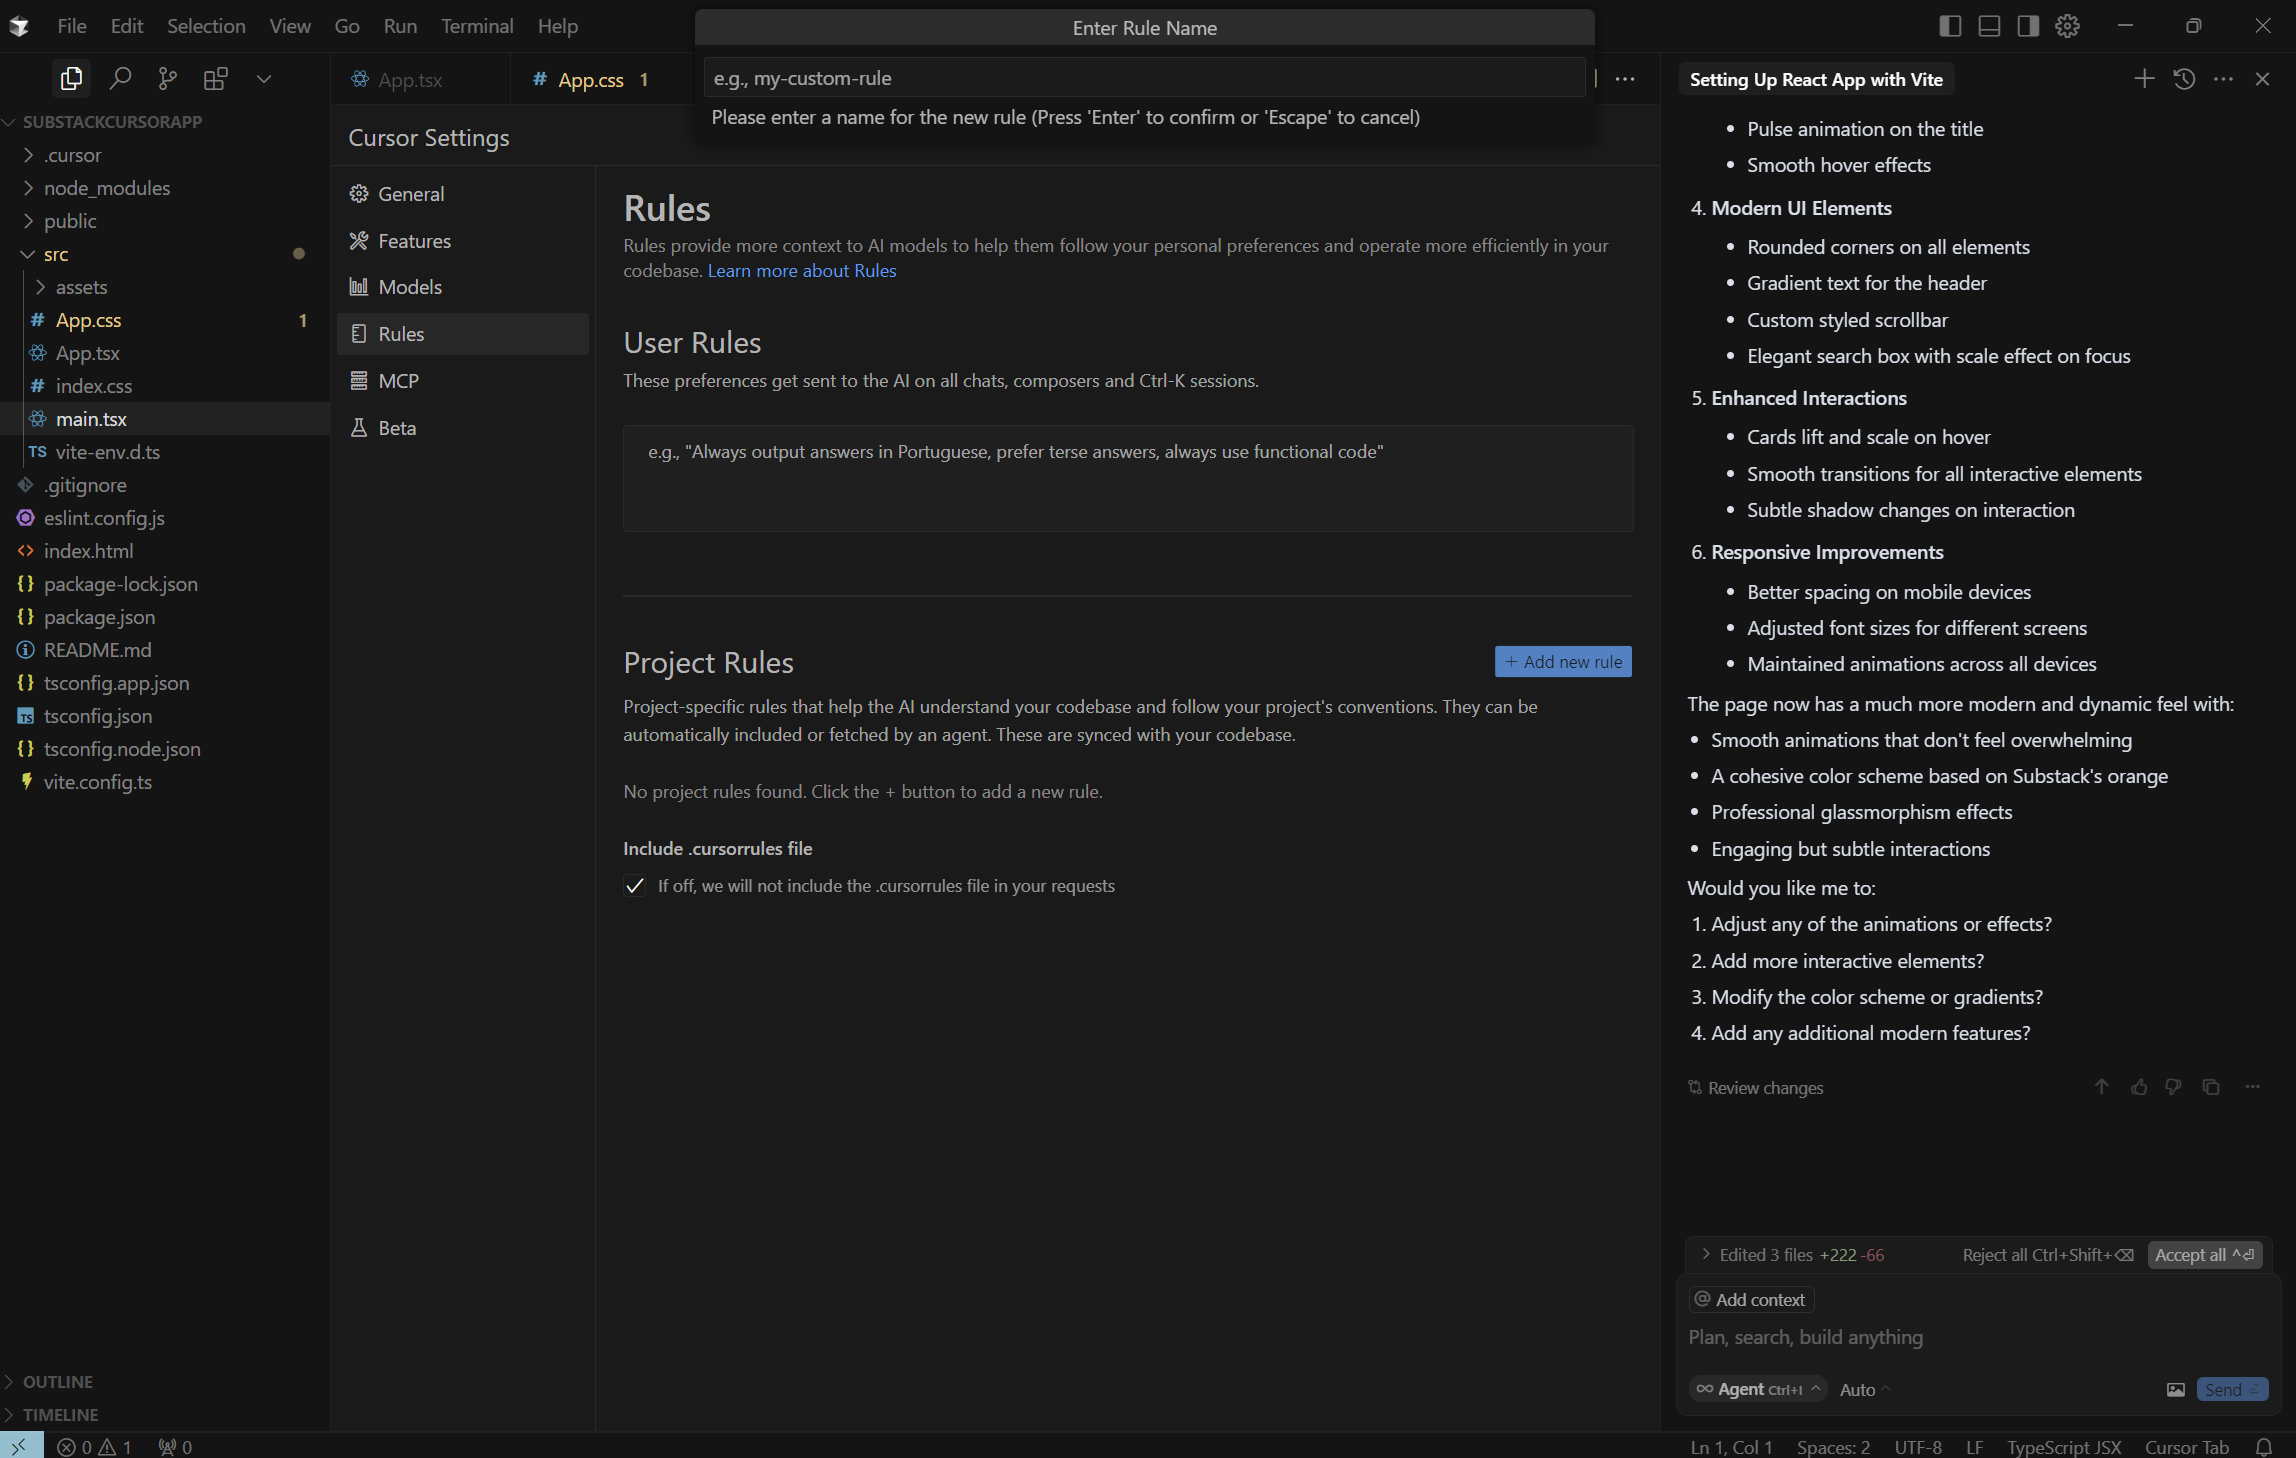
Before se wrap up here, I’m going to try one more prompt for fun (you see how this can become addicting right?)
Can you have fun stylizing this page to make it feel really modern and exciting?There is an Advanced Techniques section below, but I will likely keep writing on how to refine prompt engineering with this tool over time. This should be a good starting point for you to get your hands dirty.
A few key points to remember:
Before accepting files/changes, if you’re able to, test your changes by refreshing your web app to see how it looks.
Do not hesitate to reject changes and modify your prompt
If there are any errors in the console (cmd, terminal, powershell, etc.), don’t worry! Copy and paste those errors into Cursor and it can troubleshoot and fix most of these errors quickly!
When you think of a set of requirements, deconstruct the requirements into pieces of instructions so that the AI attempts to build them piece-meal. If you feed too many instructions at once, there’s a good chance Cursor will step on its own toes and succeed on a few requirements while failing on others. Go step-by-step.
4. How to Deploy Your React App to Production Using Vercel
Once you’ve built something you’re proud of, the next step is putting it online so that other people other than yourself can access it. Vercel is a popular platform that makes it incredibly easy to deploy modern frontend apps like React—perfect for getting your project out in the world with minimal fuss. Moreover, it’s a great tool for Cursor to use since it plays very nicely with it.
Here’s how to deploy your React app to production using Vercel, directly from within Cursor.
Step 1: Install the Vercel CLI
Open the built-in terminal in Cursor and run:
OR, ask Cursor about wanting to install and run the Vercel CLI (it can handle it from there). The following are fairly manual instructions (in the gray code boxes), BUT you could also ask Cursor to execute all of these commands if you’re uncomfortable with it. Sometimes I get lazy and just ask Cursor to do it for me.
npm install -g vercelThis installs the Vercel CLI globally so you can use it from anywhere in your project.
Step 2: Log In to Vercel
In the terminal, type:
vercel loginYou’ll be prompted to enter your email and follow a verification link. This connects your terminal to your Vercel account.
Step 3: Deploy Your Project
In the root of your React project folder, run:
vercelThe CLI will ask a few simple questions (e.g., project name, which folder to deploy from). For most React apps created with Vite, the defaults will work:
Output directory:
distFramework:
Vite
After confirming, Vercel will build and deploy your app, giving you a public production URL.
Step 4: (Optional) Configure Your Project
Once deployed, you can visit https://vercel.com/dashboard to:
Set environment variables
Add a custom domain
Trigger redeploys
Monitor builds and traffic
That’s it! You’ve now shipped your first React app using Cursor and Vercel. You're not just coding—you’re launching.
5. Advanced Techniques
Even after you've deployed your first app, there's more to learn and unlock with Cursor. This section gives you the tools to level up your development game with advanced tips and recommendations.
Prompting Like a Pro
Effective prompting is one of the most valuable skills in Cursor. Here’s how to get the most out of your conversations with the AI:
1. Be clear and action-oriented. Use strong verbs to guide the assistant:
"Create a login form using Firebase Auth."
"Refactor this component to use Tailwind."
2. Provide context. Reference files, folders, or specific components:
"In
src/components/NavBar.jsx, add a dark mode toggle."
3. Break down large requests. Instead of asking for a full backend in one go, split the task:
"Create a Node.js Express server."
"Add a POST /register route."
"Connect to MongoDB Atlas."
4. Use code comments to guide changes. Leave comments in your code like:
// Convert this to a reusable Tailwind button componentThen use Cursor to act on that line.
5. Include your preferences. Let the AI know your conventions:
"Use async/await, not .then()."
"Avoid inline styles; use Tailwind."
6. Ask for explanations. Cursor is great for teaching:
"Explain this function."
"Why is this API request failing?"
"What does this error mean?"
7. Request cleanups and rewrites. Use prompts like:
"Simplify this logic."
"Make this more readable."
8. Iterate naturally. Follow up just like you would with a pair programmer:
"Now add validation."
"Write tests for this function."
9. Keep a prompt playbook. Save your best prompts for reuse—either in a prompts.md file or inside a Cursor Rule Set.
The more intentional your prompting, the more Cursor becomes a collaborative extension of your own thought process. If you feel like some of these more precise prompts are technical, that’s because they are. Again, you can do this even if you’re not an engineer. However, you likely do need to do some research using YouTube tutorials or ChatGPT to learn what options exist. Once you have a good sense for certain tech options, then be as specific as possible with Cursor - it will listen to your instructions closely. When you give an Agent AI room for interpretation, it’s going to interpret!
Backend and Databases
Most real-world apps need a backend to handle authentication, data storage, or business logic. If you’re ready to go beyond the frontend, here’s a simple recommendation:
Use MongoDB Atlas: It's a free, cloud-hosted NoSQL database that scales with your app. It’s easy to connect to from a Node.js/Express backend or through API routes in Next.js or Vercel.
You can prompt Cursor with:
Set up a simple Express.js backend connected to MongoDB Atlas.Cursor will scaffold everything you need, and you’ll be able to build full-stack apps with API endpoints, dynamic content, and persistent storage.
Why use a database? If you’re not using a database, you’re essentially asking your app to have to remember all of it’s data in session memory OR hardcode data within the files. This isn’t a good idea for a variety of reasons. Therefore, once you’re ready to mature your app and you feel like you need data retention for examples such as these:
User credentials system
User created content
Saving data records of any kind (for example, in our demo, for our app to scale, we’ll want a database to house all of our YouTube videos with its metadata so that its not hardcoded in our files)
Then, I highly recommend you make the leap towards adding a backend/database component to your application. Cursor will make this easy.
Pro-tips:
Ask Cursor to build a backend folder repository
When you decided to deploy to Vercel or to a version control system like Github, you’ll likely want the backend to be its own deployable artifact as well
Spell this out to Cursor ahead of time, then create instructions (like a Markdown file) that it can reference to every time so that it doesn’t forget or hallucinate about the file and system structure of your app).
Creating Cursor Rule Sets
Cursor's rule sets are a powerful way to customize AI behavior and guidance across your project. They act like smart templates or policies that help the AI assistant stay consistent with your preferences, coding conventions, or even your architectural patterns.
Here’s a breakdown of how to use Cursor rule sets effectively:
What Are Rule Sets in Cursor?
Rule sets in Cursor allow you to define custom instructions or preferences that the AI will automatically follow when assisting you with code suggestions, documentation, or refactoring tasks.
You can use them to:
Enforce naming conventions or linting styles
Follow architectural patterns (e.g., MVC, atomic design)
Avoid using certain libraries or approaches
Prefer specific frameworks, APIs, or components
Give context about how your app is structured
How to Set Up a Rule Set in Cursor
Open Cursor
Make sure your project is open and fully indexed.
Open the Rule Sets Panel
Click on the “Rule Sets” tab on the left-hand sidebar (⚙️ icon).
If you don’t see it, search “Rule Sets” in the Command Palette (
Cmd+P/Ctrl+P).
Create a New Rule Set
Click “➕ Add Rule Set”.
Name your rule set (e.g.,
Frontend Best Practices,Next.js Project Rules).
Write Your Rules
Use natural language to write your rules. Cursor understands instructions like:
Use TailwindCSS for all styling.
Avoid inline styles. Always prefer async/await over .then().
Don’t use `useEffect` to fetch data—use server components instead.
Group related components in folders.
Assign Rule Set to a Folder or Project
You can apply rule sets to specific folders, files, or the entire workspace.
This allows different parts of your project to have different coding standards.
Best Practices for Using Rule Sets
Be specific: Vague rules like “write clean code” won’t help much. Be clear about what you expect.
Group by domain: Consider separate rule sets for frontend vs. backend, or styling vs. data fetching.
Update often: As your project evolves, so should your rule sets.
Use it with team onboarding: New developers can learn faster by seeing which patterns to follow.
Example Rule Set for a React + Tailwind Project
- Use TailwindCSS utility classes only.
- Use functional components with hooks, no class components.
- Fetch data using React Query.
- Avoid `useEffect` for non-render side effects.
- All components must be in PascalCase.
- Place shared components in `/components/common`.
- Use `clsx` for conditional classNames.
Troubleshooting Errors
Even with AI help, bugs and issues happen. Here’s how to debug effectively:
Read the error message carefully. Cursor can help explain it if you paste it into chat. If you see something wrong on the web app, open up the dev tools F12 and click on Console to see if you see any error logs
Then, take a screenshot of the errors and paste it into Cursor and be as descriptive of the end result error you’re notice coupled with the console error. This goes a long way in Cursor being able to piece together what is wrong.
Occasionally, Cursor will try to fix an error in the same way over and over again. It’s easy to get frustrated at Cursor when this happens, but it’s the operator’s fault (you!). You need to catch what changes it’s trying to do - so when it recommends a fix it’s already done - catch it, stop it, and let it know that it’s already attempted that fix and try to give it more context for the issue.
When an issue is discovered with an error message, especially in console logs, ask Cursor to walk through the troubleshooting process step-by-step. This forces it to parse the troubleshooting process and define it for you each step of the way. The worst thing an AI can do is try to solve an error with sweeping changes that are too hard to define for the user.
If Cursor is claiming to have made changes that fixes an issue, but you still see nothing changing, ask it to add logging or display messages of some kind as proof to you and Cursor that the code is working through each iterative step in the process. This way, it’ll teach you both where the code is going, where it breaks, etc.
Subscriptions and Licensing
So how much am I actually paying for the app I built and am currently deploying on production?
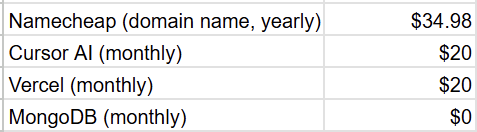
Namecheap: $35 yearly fee - for the domain name rights for website. Your mileage will vary pending the name you’re looking for. If you use Vercel’s basic naming structure, your site will deploy with a name like vercel.yourname.com
Cursor AI: $20 monthly - Cursor offers a free tier with limited daily AI usage. For unlimited access and pro features like codebase search and long-form generations, you can upgrade to a paid plan for $20 a month.
There’s an additional payment-tier option that charges you for MAX speed requests above the 500 limit you have. Each request is a handful of cents per request. I don’t see the value in this. Even after I maxed out my 500 monthly limit, the slow request model gets the job done.
Vercel: $20 monthly - Allows you to host multiple projects, route to your purchased domain name, allows for web analytics to analyze traffic, etc. Vercel has a generous free tier that supports hobby projects and small teams. Paid plans unlock features like serverless functions, analytics, and team collaboration tools. Learn more at https://vercel.com/pricing.
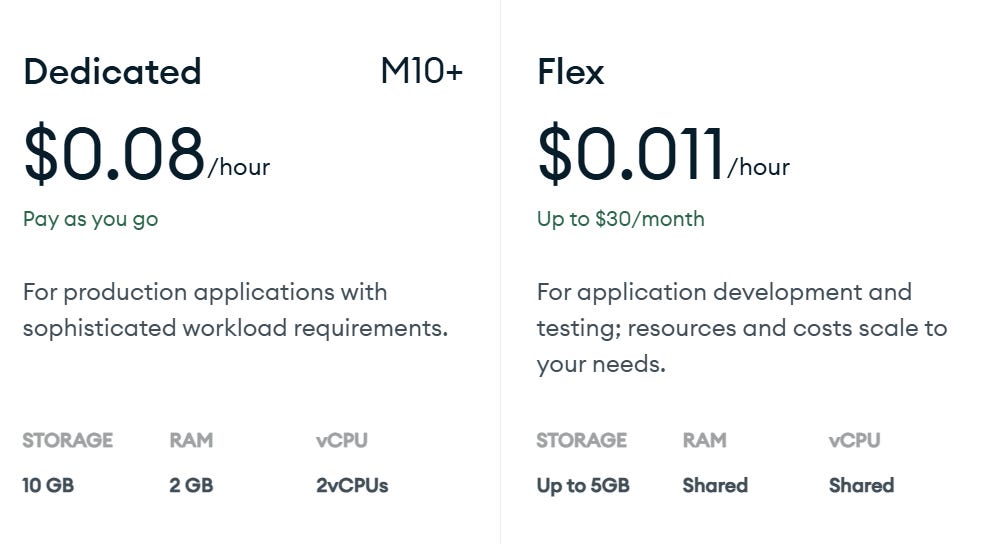
MongoDB Atlas - $0 monthly - I’m currently on the free plan but this is because the amount of data I am storing, plus the transactions against it, allows me to stay in this free tier (up to 512MB storage). Otherwise, they have a few good options if you’re data heavy:

Conclusion: From Beginner to Builder with Cursor
Cursor isn’t just a powerful AI-enhanced code editor—it’s a gateway for non-engineers, product thinkers, and creatives to take their first steps into software development without getting overwhelmed. Though to be fair, you’ll likely still be overwhelmed at times and that’s okay. What you need to remember is that you have the tools to get out of any corner you might get stuck in.
What makes Cursor stand out is its ability to combine professional-grade development tools with intuitive AI support. You’re not boxed into a no-code platform—you’re learning real tools, writing real code, and gaining the confidence to build something meaningful, scalable, and truly yours.
Whether you’re launching a portfolio site, building a small business tool, or experimenting with a new product idea, Cursor gives you the power to go from “just an idea” to “live on the internet” faster than ever before. Keep tinkering, keep prompting, and remember: the best way to learn is to build.